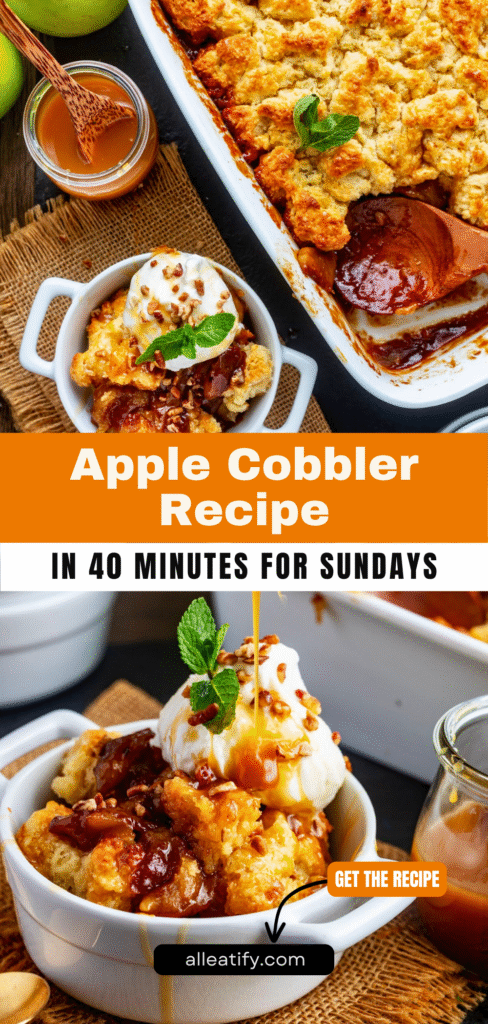
The Best Apple Cobbler Recipe for Fall Nights (2025)
There’s something truly magical about the smell of apples, butter, cinnamon, and vanilla baking in the oven. It’s comforting, nostalgic, and just downright irresistible.
And when you don’t want the fuss of making pie dough but still crave that warm, fruity dessert vibe, apple cobbler is the answer.
This easy apple cobbler recipe brings all the flavors of a homemade apple pie but with half the effort. It’s perfect for family gatherings, Sunday dinners, or even a spontaneous weekday bake.
If you’re ready to make a dessert that tastes like home and hugs in a bowl, let’s get started.
🍏 Why You’ll Love This Apple Cobbler
There’s just something about a warm, homemade apple cobbler that feels like pure comfort in a dish. Whether it’s a cozy fall evening or a family gathering on a Sunday afternoon, this dessert is always a hit and here’s why:
✨ 1. All the Flavor, Half the Effort
Making pie from scratch can be a labor of love. There’s dough to roll, chilling times, and blind baking; it’s a project. But this apple cobbler skips all that hassle.
You still get that same nostalgic apple-cinnamon flavor, but without fiddling with pie crusts. It’s fast, forgiving, and downright delicious.
✨ 2. Customizable Apples for Your Taste
Not all apples are created equal when it comes to baking. This recipe lets you choose your favorite apples depending on what texture and taste you want:
- Honeycrisp offers a sweet-tart balance and holds its shape well.
- Granny Smith is great if you prefer a tart bite.
- Other firm varieties, such as Jonagold or McIntosh, also work beautifully.
The key is to avoid mushy apples (like Fuji or Red Delicious), which break down too much and turn into applesauce.
✨ 3. That Biscuit Topping? Dreamy.
This isn’t just any topping, it’s like a golden, buttery biscuit blanket baked right over sweet, bubbling apples. The bottom soaks in those juicy flavors, the middle stays fluffy, and the top gets golden and crisp. It’s texture heaven in every bite.
✨ 4. Simple Ingredients, Big Payoff
You don’t need fancy ingredients or special equipment. A few kitchen basics, such as flour, sugar, butter, and spices, come together to create something extraordinary. It’s incredible how humble pantry staples can transform into a show-stopping dessert.
✨ 5. It’s Practically Foolproof
Even if you’re new to baking, this cobbler is easy to get right. There’s no need to roll dough or worry about presentation. Just toss, dollop, and bake; the rustic look is part of the charm.
🛒 Ingredients for Apple Cobbler
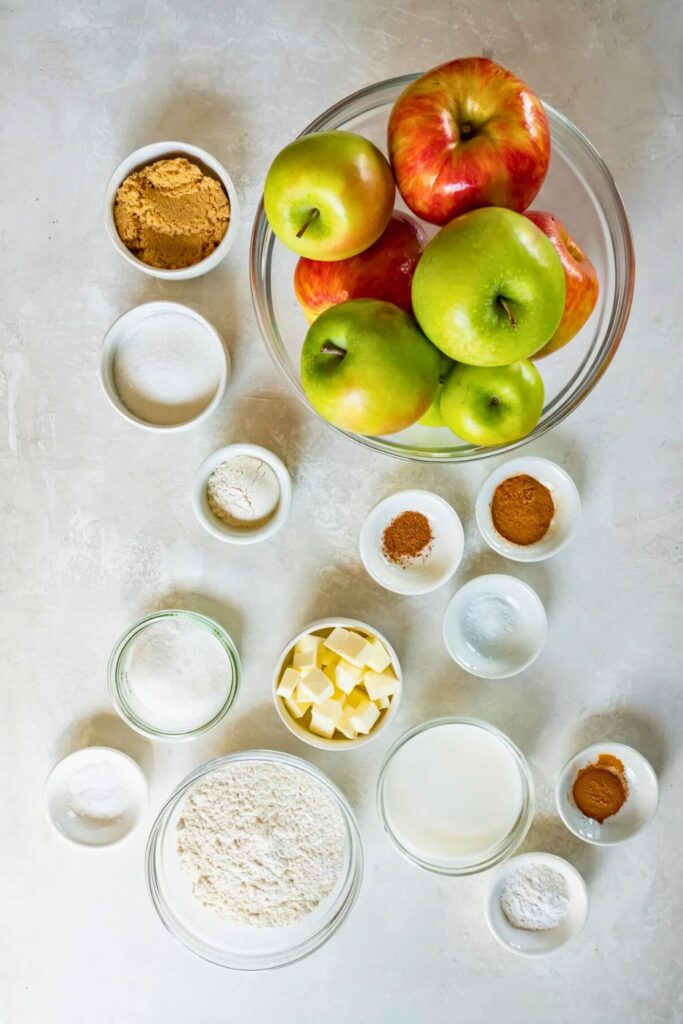
This cobbler is made up of two delicious layers: the apple filling and the biscuit topping. Let’s break down exactly what you’ll need.
🍎 For the Apple Filling:
| Ingredient | Amount | Purpose |
|---|---|---|
| Apples | 4 pounds (about 7–8 medium) | The juicy, sweet-tart base |
| Lemon Juice | 2 tablespoons | Adds brightness and prevents browning |
| Light Brown Sugar | ⅓ cup (73g) | Caramel-like sweetness |
| Cornstarch | 1 tablespoon | Thickens the apple juices |
| Ground Cinnamon | ½ teaspoon | Warm spice for that classic apple aroma |
| Ground Nutmeg | ¼ teaspoon (optional) | Adds a subtle nutty warmth |
| Vanilla Extract | 1 teaspoon | Boosts the flavor profile |
| Unsalted Butter | ¼ cup (56g), cold, diced | Dotted on top to enrich the filling |
✅ Tip: If your brown sugar has lumps, crumble it with your fingers before mixing it in. And always taste your apples first, if they’re extra tart, feel free to add a pinch more sugar.
🥣 For the Biscuit Topping:
| Ingredient | Amount | Purpose |
|---|---|---|
| All-Purpose Flour | 2 cups (240g) | Base for the biscuit dough |
| Granulated Sugar | ½ cup (100g) | Light sweetness for the topping |
| Baking Powder | 1 tablespoon | Makes the biscuit topping fluffy |
| Salt | 1 teaspoon | Balances out the sweet and adds contrast |
| Whole Milk | ¾ cup (180ml) | Moistens the dough |
| Melted Butter | ¼ cup (56g) | Adds richness and a tender crumb |
Optional:
- Cinnamon sugar, for sprinkling on top before baking.
🥧 How to Make Apple Cobbler: Step-by-Step
Making a classic apple cobbler might sound like a weekend project, but trust me, it’s way easier (and faster) than pie.
This no-fuss dessert is packed with comforting flavors, warm spices, tender apples, and a golden biscuit topping that’s just rustic enough to call it homemade.
Whether you’re a beginner or a seasoned baker, follow these 10 simple steps to pull off a dessert your family will request again and again.
🔥 Step 1: Preheat Your Oven
Before anything else, set your oven to 350°F (175°C). You want it hot and ready to go once everything’s assembled. The goal here is simple: a consistent, even bake.
Cobblers aren’t high-maintenance, but they do like a steady temperature to bubble and brown just right.
💡 Tip: Preheat early! Your oven might display a temperature of 350°F, but internal temperatures can vary. Allow it to stabilize for 10–15 minutes.
🍏 Step 2: Prep the Apples
This is where the magic starts.
Grab 4 pounds of apples, about 7 to 8 medium-sized, and get peeling. Yes, it takes a few minutes, but it’s worth it for that soft-yet-firm texture cobbler dreams are made of.
🍎 Apple Options:
- Honeycrisp: Slightly sweet and holds its texture.
- Granny Smith: Tart and firm, great for balancing sweetness.
- McIntosh, Jonagold, Braeburn: Softens well but doesn’t get mushy.
🚫 Skip Fuji, Gala, and Red Delicious. They break down too much and can turn your filling into applesauce under the topping.
Here’s how to prep:
- Peel the apples using a vegetable peeler or paring knife.
- Core them and slice into thin wedges under ¼ inch thick. The thinner the slices, the more evenly they’ll bake.
- As you slice, transfer them to a large mixing bowl.
🛠 Knife Skills Matter: Use a sharp knife, always. Dull knives slow you down and make cutting more dangerous. Practicing your slicing technique helps you prepare like a pro.
🍋 Step 3: Toss Apples with Lemon Juice
Next, let’s give those apples a bright, citrusy kick.
Add 2 tablespoons of lemon juice to your sliced apples. That’s about the juice of half a large lemon.
Why this matters:
- It keeps your apples from browning.
- It adds balance to the sweetness.
- It enhances the overall flavor and freshness.
Toss the apples gently with a spatula or clean hands until every slice gets coated in that zingy goodness.
🍬 Step 4: Add the Sweet and Spicy Mix
Now let’s build flavor deep, sweet, and spiced just right.
Sprinkle the following over your lemon-tossed apples:
| Ingredient | Amount | Role |
| Light Brown Sugar | ⅓ cup (73g) | Adds caramel flavor and sweetness |
| Cornstarch | 1 tbsp | Thickens the filling—no soupy mess |
| Cinnamon | ½ tsp | Warmth and spice |
| Nutmeg (optional) | ¼ tsp | Nutty depth (skip if you’re not a fan) |
| Vanilla Extract | 1 tsp | Rounds out the sweetness |
Use your spatula to mix thoroughly but gently. You want every slice of apple kissed with flavor.
👩🍳 Pro Tip: If your brown sugar is lumpy, crumble it with your fingers before adding it in.
🧈 Step 5: Load Up the Baking Dish
Time to move the party to the oven-safe zone.
Grab a 9×13-inch baking dish and pour the apple mixture in. Spread it into an even layer with your hands or spatula.
Here comes the secret flavor bomb: cold butter.
- Dice ¼ cup (56g) of unsalted butter into small chunks.
- Dot the butter all over the apples, and distribute it evenly.
Why use cold butter? Because it melts slowly and seeps into the apples, adding richness and flavor to the filling without melting all over your hands.
🧈 Butter = Better. A small amount adds a velvety texture to your apple layer, making the dish feel indulgent.
Set this aside while you mix the topping.
🥣 Step 6: Make the Biscuit Topping
This cobbler topping is what makes this dessert feel like a warm blanket on a chilly day. It’s buttery, lightly sweet, and perfectly golden after baking.
In a clean, large bowl, whisk together:
| Ingredient | Amount |
| All-Purpose Flour | 2 cups (240g) |
| Granulated Sugar | ½ cup (100g) |
| Baking Powder | 1 tbsp |
| Salt | 1 tsp |
Give everything a quick whisk until combined.
💡 Did you know? This biscuit-style topping has its roots in the 1800s, when baking powder revolutionized American desserts by allowing for fluffy toppings without the need to beat egg whites.
🥛 Step 7: Add Wet Ingredients to the Topping
Now for the wet stuff to bring your dough together:
- ¾ cup (180ml) whole milk
- ¼ cup (56g) melted unsalted butter
Pour the milk and butter directly into the flour mixture.
Use a spatula to stir everything together until a sticky dough forms gently. You’re not looking for a smooth batter. This has a more rustic biscuit texture.
Don’t overmix! You want that topping to stay light, fluffy, and tender.
🍥 Step 8: Drop the Topping on the Apples
This part is as fun as it is forgiving.
Grab two spoons and dollop the biscuit dough across the top of the apple mixture. You’re not spreading it out; you want imperfect, rustic drops.
Why? Because those biscuit mounds will rise and spread slightly, creating that iconic cobbler look with golden peaks and juicy valleys.
Optional: sprinkle with cinnamon sugar for a little extra crunch and sparkle.
🍪 Want perfect portions? Use a medium cookie scoop or ice cream scoop for evenly sized biscuit tops.
🔥 Step 9: Bake Your Cobbler to Golden Perfection
Slide your assembled cobbler into the oven (preheated to 350°F), and bake for 45–50 minutes.
How to tell it’s done:
- The biscuit topping is golden brown on top.
- The apple filling is bubbling up around the edges.
- It smells like your grandma’s house during the holidays.
Once the cobbler is out of the oven, let it rest for 10 minutes. This allows the juices to thicken up and makes serving easier (and safer).
🕒 Too eager? Resist the urge to dig in right away; scorching apple lava is no joke.
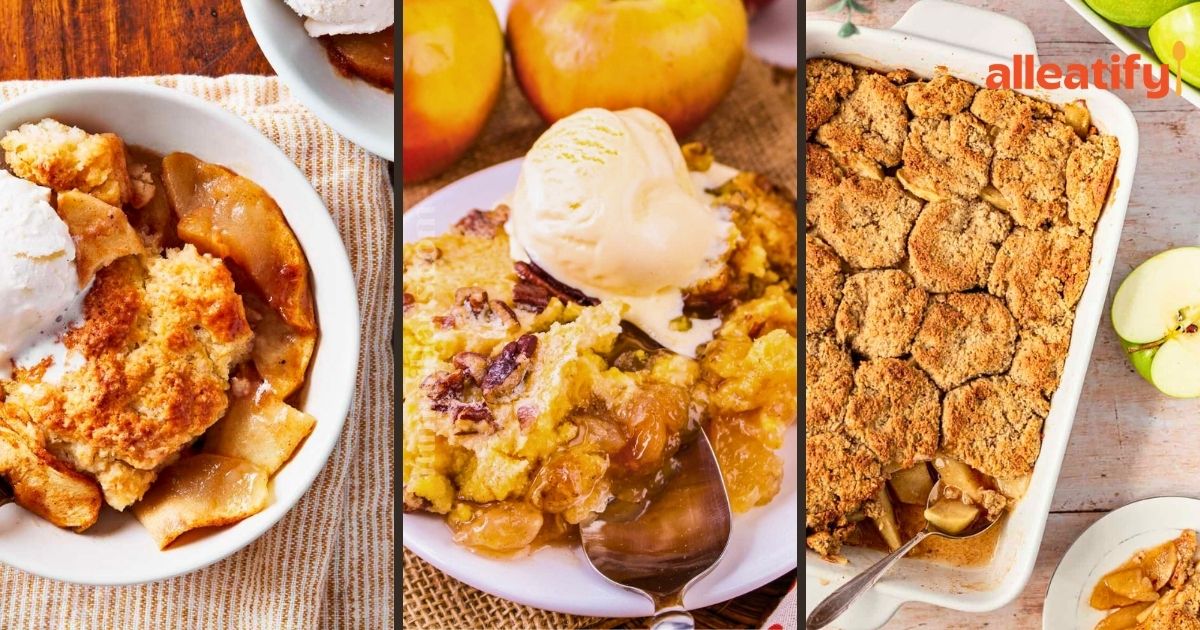
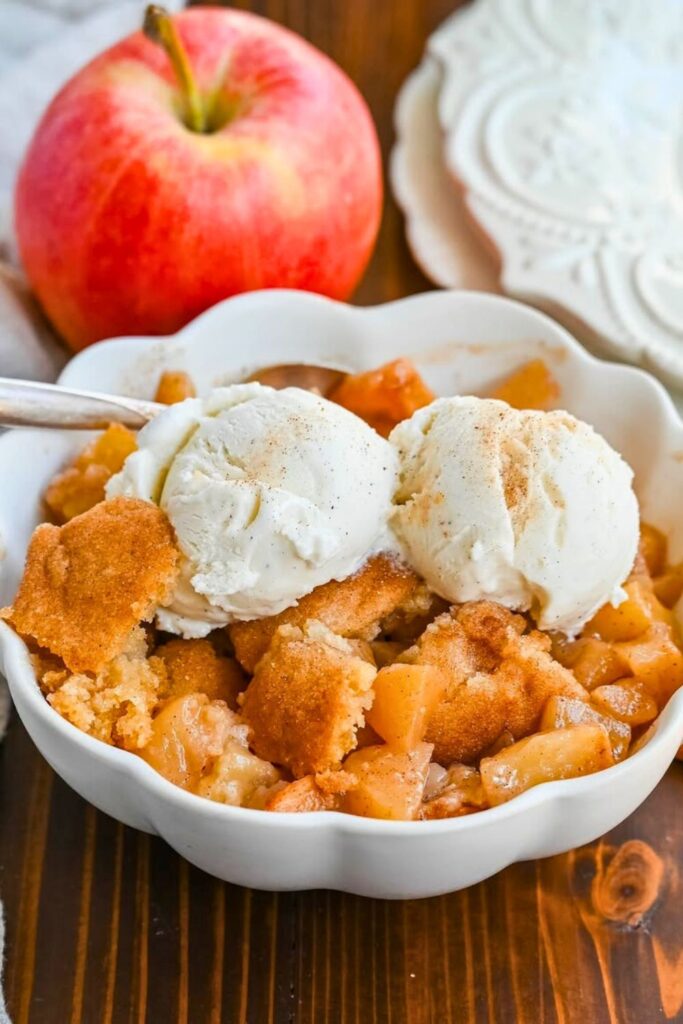
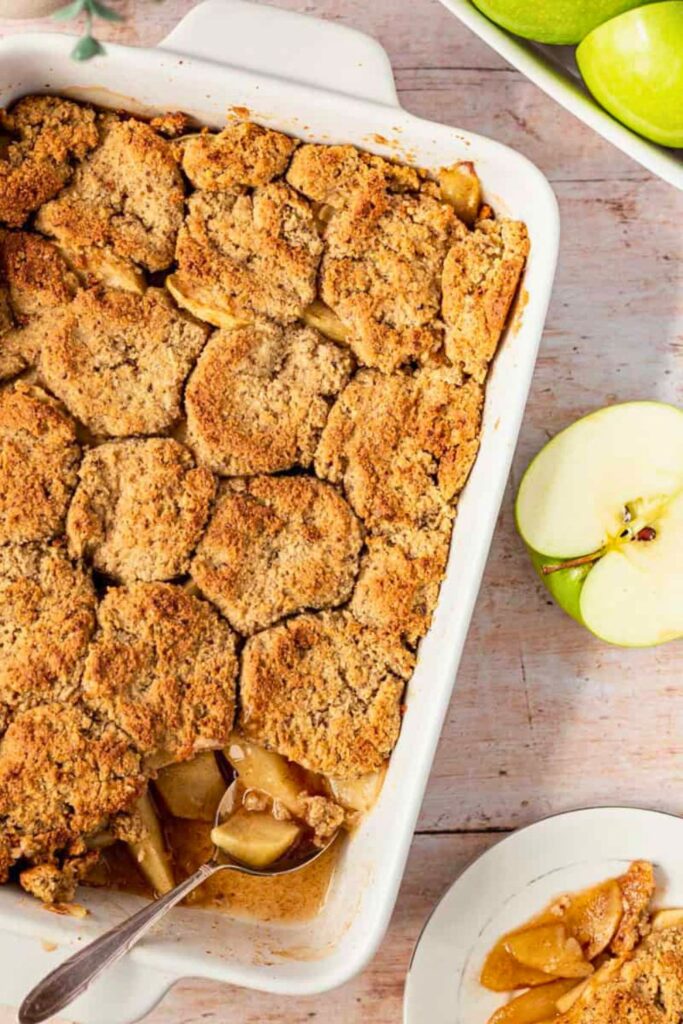
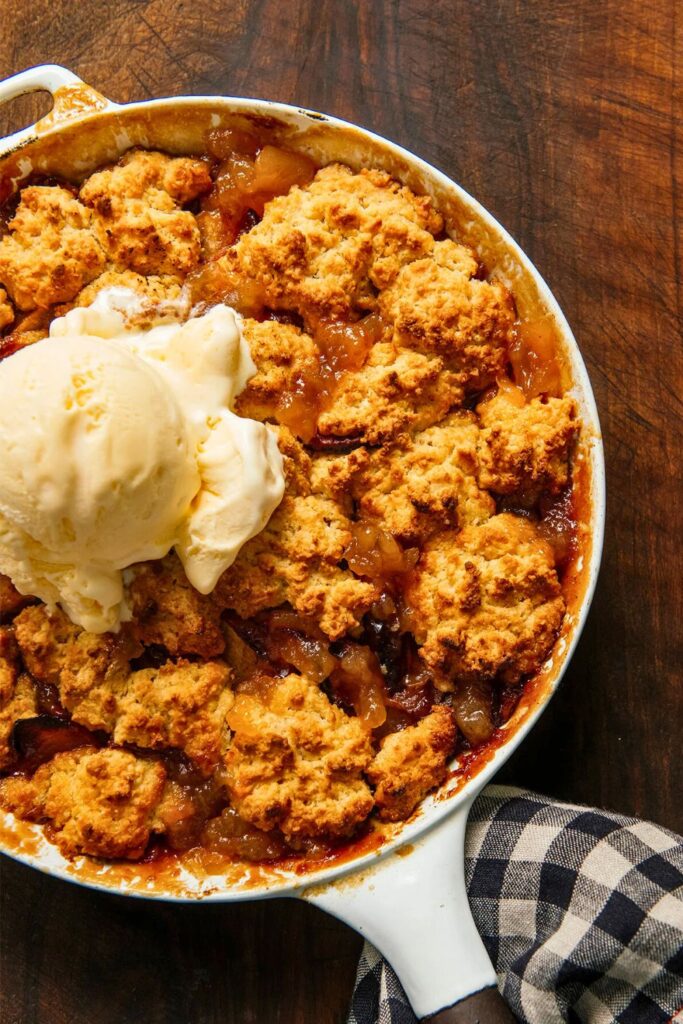
🍨 Step 10: Serve It Up Right
This cobbler is best served warm. Grab your biggest spoon and dish it out into bowls or plates.
The absolute best way to enjoy this? Topped with cold vanilla ice cream. That contrast of hot, spiced apples and cold, creamy ice cream is what dessert dreams are made of.
No ice cream? A dollop of whipped cream or a spoonful of plain Greek yogurt also works wonders.
🛠 Bonus: Make-Ahead & Storage Tips
- Make Ahead: You can assemble the apple layer in advance and refrigerate it for up to a day. Add the biscuit topping fresh before baking.
- Leftovers: Store in the fridge for up to 4 days. Reheat in the oven at 325°F until warmed through.
Freezer-Friendly: Freeze fully baked cobbler. Thaw overnight and reheat in the oven.
✅ 5 Pro Tips for the Best Apple Cobbler
Even though apple cobbler is one of the easiest desserts you can bake, a few expert tips can take it from good to absolutely unforgettable.
These tips focus on elevating flavor, texture, and ease, directly based on the subtitle content and adapted for real kitchen life.
🔪 1. Use a Sharp Knife (and Practice Your Skills)
The most time-consuming part of this recipe is slicing the apples. But you can cut that time (and your risk of injury) by mastering a simple kitchen essential: using a sharp knife.
A dull blade doesn’t just slow you down, it makes you press harder and increases the chance of slipping. With a sharp knife, you’ll glide through apples like butter. And with good knife skills? You’ll prep those apples in minutes.
🛠 Pro Tip: Hone your knife weekly and aim for even, thin slices less than ¼ inch thick for even baking.
🍏 2. Choose the Right Apples
Your apple choice will make or break this dessert.
Not all apples behave the same way in the oven. Some hold their shape, others collapse. Some are extremely sweet, while others are tart. This recipe gives you the flexibility to use what you love, but it pays to pick the best type.
Best Apples for Cobbler:
- Honeycrisp – sweet, crisp, and holds shape perfectly
- Granny Smith – tart and firm, great for contrast
- Jonagold or McIntosh – flavorful and soft, but not mushy
Avoid Fuji, Gala, or Red Delicious. These become mealy and fall apart while baking, turning your cobbler into more of an apple pudding.
🍋 3. Brighten with Lemon Juice
Even sweet apples need a little lift.
Adding lemon juice not only prevents browning but balances sweetness, especially if your apples are overly ripe. It also adds a subtle zing that keeps your dessert from tasting flat.
🍋 Rule of Thumb: Use about 2 tablespoons of fresh lemon juice for every 4 lbs of apples.
🧈 4. Dot with Cold Butter
Before adding the biscuit topping, scatter cold butter over your apple layer. This helps the filling achieve a silky, rich mouthfeel that makes the cobbler taste luxurious.
Cold butter melts slowly, working its way through the apples as they soften. It enhances the flavor without overpowering the natural apple taste.
🍽 Bonus Tip: Using cold butter is easier to handle and won’t melt all over your fingers during preparation.
🥣 5. Don’t Overmix the Biscuit Dough
When making the topping, it’s tempting to mix until it’s silky smooth, but resist the urge. Overmixing creates tough biscuits.
You want a rustic, slightly shaggy dough. It should hold together when dropped by spoonfuls but still look rough and imperfect. That’s what gives cobbler its signature texture: crispy peaks, fluffy centers, and buttery bottoms.
🍥 Remember: Cobbler topping isn’t cake batter. Embrace the lumps!
🔄 Apple Cobbler Variations
Want to change things up? Apple cobbler is incredibly adaptable. You can tweak the fruit, spice, or even the topping to match your mood, season, or pantry situation.
Here’s a helpful table with ideas to spark your next baking session:
| Variation | How to Do It |
|---|---|
| 🍐 Apple-Pear Cobbler | Replace half the apples with sliced ripe pears (Bosc or Anjou work best). |
| 🍓 Apple-Berry Cobbler | Add 1–2 cups of fresh or frozen berries (like blueberries or raspberries). |
| 🍯 Maple-Spiced Cobbler | Replace brown sugar with maple syrup; add a pinch of cloves or cardamom. |
| 🥃 Boozy Cobbler | Add 2 tbsp of bourbon or spiced rum to the apple filling for an adult twist. |
| 🌾 Oatmeal Biscuit Topping | Add ½ cup rolled oats to the topping for extra texture and a rustic vibe. |
| 🥥 Coconut Apple Cobbler | Stir shredded coconut into the topping and sprinkle extra on top before baking. |
| 🍋 Lemon-Glazed Cobbler | Drizzle a simple lemon glaze over the baked cobbler for a sweet citrus finish. |
| 🍫 Apple-Chocolate Chip Cobbler | Fold in ½ cup of mini chocolate chips to the topping dough before scooping. |
| 🥜 Nutty Cobbler | Add ½ cup of chopped pecans or walnuts to the apple filling or the biscuit top. |
| 🧁 Apple Cobbler with Cake Mix | Use a yellow cake mix instead of homemade biscuit topping for a shortcut version. |
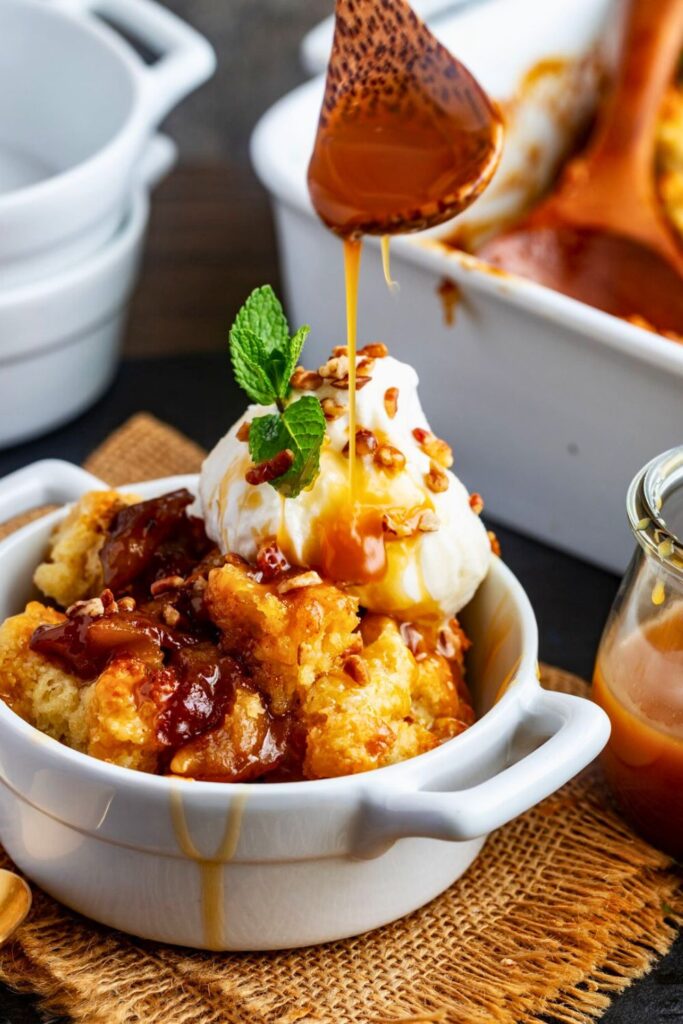
🍽 Final Thoughts: The Comfort of Cobbler in Every Bite
Apple cobbler is more than just dessert; it’s a warm, cozy experience. It’s the kind of dish that fills the whole house with the scent of home, invites everyone back to the table, and satisfies that deep craving for something sweet, spiced, and baked with love.
This recipe is easy enough for beginners, forgiving enough for busy days, and delicious enough to become a family favorite.
With a tender biscuit topping and a bubbling, spiced apple filling, it’s the ultimate no-fuss comfort dessert. And let’s be honest, a scoop of vanilla ice cream on top turns it into pure magic.
Whether you’re baking for guests, surprising someone special, or just craving a weeknight treat, this apple cobbler has your back. Simple, nostalgic, and endlessly adaptable. It’s the kind of recipe that becomes tradition.
🔁 Loved This? You’ll Also Enjoy:
If warm apple desserts are your thing (and we know they are), here are a few more cozy, fruit-filled favorites to try next:
🥄 Best 25-Min Apple Crisp Recipe for Sunday
Quick, crispy, and topped with a buttery oat crumble, perfect for lazy weekends.
🍎 Easy & Cozy Apple Crumble Recipe for Busy Moms
All the fall flavor you crave with minimal effort. Great for school nights or last-minute gatherings.
🇫🇷 Easy French Apple Cake Recipe in Under 20-Min
A lightly sweet, custardy apple cake that feels fancy but takes almost no time. Très délicieux!