Easy Apple Butter Recipe for Cozy Fall Mornings in 2026

Fall is here, and if you’ve ever wanted your home to smell like a warm hug, apple butter is precisely how you make it happen. This thick, smooth, spiced apple spread is what autumn dreams are made of.
Whether you’re slathering it on toast, swirling it into oatmeal, or using it as a secret weapon in fall desserts like apple tarts. This homemade apple butter recipe is the cozy kitchen project your season needs.
In today’s post, I’ll walk you through a step-by-step, foolproof process for making apple butter from scratch. If you’re ready to fill your home with the aroma of cinnamon, cloves, and simmering apples, let’s dive right in.
🍎 What Is Apple Butter and Why You’ll Love It

If you’ve never tried apple butter before, you’re in for a cozy treat that captures the essence of fall in a jar. Despite its name, apple butter doesn’t contain any actual butter. It’s not a dairy spread, and it’s not the kind of butter you’d slather on corn or pancakes.
So what is it?
Think of apple butter as a deeply concentrated, slow-cooked, spiced-up version of applesauce. It starts with apples that are fresh, juicy, tart, or sweet, cooked down gently with spices like cinnamon, cloves, nutmeg, and a hint of sugar.
Then the mixture gets blended into a silky-smooth puree and simmered a second time until it becomes rich, thick, and velvety.
The result? A luscious, dark amber spread that’s:
- Silky smooth like a fruit jam
- Aromatic with cozy spices and tart apples
- Naturally sweetened with no artificial flavors.
- Versatile, great for breakfast, toast, baked goods, or even straight from the spoon
Why You’ll Fall in Love with Apple Butter
- Unmatched Fall Flavor: One whiff of apple butter simmering on the stove, and you’ll be hooked. It smells like cinnamon-sugar hugs and warm orchard air.
- Texture Like a Dream: It’s thicker than applesauce but smoother than jam. One spread and you’ll understand the hype.
- Minimal Ingredients, Maximum Comfort: It’s made with pantry staples, no preservatives or mystery ingredients.
- Customizable: Sweeten it to your taste, spice it to your liking, or use a mix of apple varieties.
- Perfect Homemade Gift: Pour into a cute mason jar, tie it with a ribbon, and boom, fall hostess gift = sorted.
Whether you’re spreading it on warm toast, baking it into pastries, or swirling it into oatmeal, apple butter is one of those small joys that make the season sweeter.
📝 Ingredients You’ll Need (Simple Pantry Staples)

You only need eight ingredients to create this magical apple butter. Most of these are pantry basics, and the only fresh component is the apples themselves.
Here’s a helpful table to keep you organized:
| Ingredient | Amount | Notes |
|---|---|---|
| Granny Smith Apples | 5 extra-large (about 3 lbs) | Tart and crisp, ideal for flavor and texture; can use other varieties too |
| Granulated Sugar | 1 cup | Adds sweetness and helps with caramelization |
| Apple Cider Vinegar | ¾ cup | Balances sweetness, enhances tartness, and brings out apple flavor |
| Water | ½ cup | Helps create steam and softens apples during initial cooking |
| Ground Cinnamon | 2 teaspoons | The backbone of fall flavor—warm and comforting |
| Ground Allspice | ½ teaspoon | Adds depth and complexity |
| Ground Cloves | ¼ teaspoon | Just a touch goes a long way—spicy and aromatic |
| Freshly Grated Nutmeg | 1 teaspoon | Optional but recommended—adds a bold, fragrant kick; use pre-ground if needed |
💡 Pro Tip: Use freshly grated nutmeg if you can. It really does elevate the flavor with its bold, almost sweetly spicy aroma. Just a little goes a long way!
These ingredients come together in the most effortless way, but the flavors they create are anything but simple. From the moment the apples begin to simmer, your kitchen will smell like a fall candle come to life.
🍏 How to Make Apple Butter at Home

Making homemade apple butter is not only easy; it’s also delicious. It’s one of the most satisfying kitchen projects you can take on during the fall.
The process is straightforward, the ingredients are simple, and the result is a jar of something magical that’s sweet, spiced, and comforting.
Below, I’ll walk you through the step-by-step method from prep to jar, including pro tips and sensory cues that’ll help you nail it every time.
🔪 Step 1: Prep Your Apples
Let’s start with the star of the show, the apples.
For this recipe, the creator uses five extra-large Granny Smith apples, which weigh about three pounds total. Granny Smiths are crisp, tart, and sturdy, perfect for cooking down into a flavorful butter.
However, feel free to mix and match with other apples, such as Fuji, Honeycrisp, or Gala, if you want a little natural sweetness to balance the tartness.
🍏 Personal tip: Use what you love! Tart apples give your butter that signature zing, but mixing in a sweeter variety can create a more rounded flavor.
🍽 To Peel or Not to Peel?
That’s entirely up to you. The recipe works beautifully either way. If you want a super smooth apple butter texture, peeling is your best bet. If you prefer a bit more fiber and don’t mind blending a little longer, leave the peels on.
Here’s how to prep the apples:
- Wash the apples thoroughly.
- Cut around the core. No need for a fancy apple corer, just slice the flesh off the core and discard the seeds.
- Chop the apples into medium-sized chunks.
There’s no need to dice them too small. The apples will soften during cooking and be pureed later.
Once your apples are chopped and ready, it’s time to bring in the flavor.
🍲 Step 2: Toss Everything into the Pot
With your apples chopped and your kitchen already starting to smell a bit like an orchard, now it’s time to build flavor.
Grab a large, heavy-bottomed pan (cast iron or a Dutch oven is ideal) and toss in the chopped apples. Now, it’s spice time. You’ll add:
- 1 cup granulated sugar
- ¾ cup apple cider vinegar
- ½ cup water
- 2 teaspoons ground cinnamon
- ½ teaspoon allspice
- ¼ teaspoon ground cloves
- 1 teaspoon freshly grated nutmeg
🍂 Why apple cider vinegar? It adds a beautiful tartness that enhances the apple flavor and helps balance the sugar. It also acts as a natural preservative.
🌪 Toss to Coat
Use a large spoon and gently mix everything, ensuring each apple chunk is coated in the beautiful sugar and spice blend. At this point, the smell is already giving “cozy fall weekend” vibes.
The spices and vinegar will begin to awaken the apples, and the sugar will start to dissolve, making everything glossy and aromatic.
🔥 Step 3: Simmer Until Soft (Stage One)
Now that your apples are coated and ready, it’s time to get them soft and stew-like. Cover your pot with a lid and turn the heat to medium-low. Let everything come to a simmer.
⏳ Timing
Let the apples simmer gently for 18 to 20 minutes, stirring occasionally to ensure even cooking.
👀 What to look for: You’ll know they’re ready when the apples are falling apart with barely any effort. A gentle poke with a spoon should cause the pieces to collapse. That’s your sign that the apples are cooked enough for blending.
✅ Pro tip: Keep the lid on while simmering to trap in moisture. This helps the apples cook faster and more evenly.
At this stage, your house will start to smell incredible, like warm cider and cinnamon. It’s a natural air freshener for fall!
Once the apples are soft and luscious, it’s time for the next step.
🌀 Step 4: Puree the Apples
Here’s where the transformation begins. Your pot of soft, stewed apples will now become a smooth, creamy apple base.
There are three methods you can use to puree the apples:
- Blender: Best for ultra-smooth texture. Transfer the apples in batches and pulse until smooth.
- Food Processor: Another great option if you have a large one.
- Immersion Blender: The most convenient tool, blend directly in the pot (if your pot is deep enough).
The apples were transferred into a standard blender and pulsed for a few minutes until a fine, silky puree formed.
🧴 Smoothness tip: If you left the peels on the apples earlier, blend for a bit longer to ensure the skins are fully incorporated and your puree is velvety.
Once you’ve achieved that creamy, glowing puree, pour everything back into the same pot. You’ll notice that the color will be lighter at this point, but it’ll change during the next stage.
Take a deep breath in. That aroma? It’s the scent of fall about to reach its full potential.
🍯 Step 5: Cook Down into Apple Butter (Stage Two)
Now comes the most crucial and rewarding stage of the process: turning that smooth apple puree into actual apple butter.
This is where the transformation truly takes place. The goal here is to reduce the apple puree and concentrate the flavors until you’re left with a deep, dark, spreadable consistency.
🔥 Low and Slow Wins the Race
Turn the heat to low and let the puree simmer gently for 30 to 40 minutes, stirring often.
- The mixture will gradually thicken.
- The color will deepen from pale tan to golden brown to a rich, amber hue.
- The smell? Out of this world. Like warm apple pie filling, mulled cider, and fall leaves all in one.
🔁 Stir regularly, especially toward the end. The thicker it gets, the more likely it is to stick or burn on the bottom. Use a rubber spatula or wooden spoon to scrape along the edges and base of the pot.
⏳ How Do You Know It’s Done?
When the apple butter is:
- Deeply golden brown
- Holding its shape when spooned
- Thick enough to leave a trail when dragged across the bottom of the pan with a spoon
It’s done.
Congratulations, you’ve made homemade apple butter!
🥄 Step 6: Jar It Up and Store
With your apple butter thick and glossy, it’s time to store it properly.
🫙 Sanitize Your Jars
Use clean glass jars with tight-fitting lids. Here’s how to sanitize them quickly:
- Pour boiling water into each jar.
- Swirl for 30 seconds.
- Dump out the water and let it dry completely.
This simple step helps your apple butter last longer in the fridge and prevents bacteria from growing.
🍶 Transfer Carefully
Use a rubber spatula to scoop the apple butter into each jar. Work slowly and clean up any spills that occur. This stuff is gold, don’t waste a drop!
After filling, wipe the rims of the jars with a paper towel to remove any apple butter that might prevent the lid from sealing tightly.
Then, screw on the lids and let the jars cool completely at room temperature.
🧊 Storing Apple Butter
Once cooled, your jars of apple butter can be stored:
- In the refrigerator for up to 3 weeks
- In the freezer for up to 3 months (leave a bit of headspace in the jar for expansion)
If you want to make it shelf-stable for more extended storage, you’ll need to use a boiling water bath canning method, a great option if you’re gifting or making large batches.
🍽️ How to Use Apple Butter: Delicious Ideas for Every Meal

One of the best parts of making a big batch of apple butter? You can use it in so many ways! This thick, spiced apple spread isn’t just for toast (although it’s heavenly on a warm slice of sourdough). It’s an incredibly versatile ingredient that works in both sweet and savory dishes.
Here are some reader-favorite ways to enjoy it:
1. Spread it on warm toast or croissants
This is the classic. Just a spoonful of homemade apple butter on a warm, buttered slice of toast is a chef’s kiss. The creamy texture and cozy spices melt right into the bread, making each bite feel like a fall morning.
2. Swirl it into oatmeal or Greek yogurt
Tired of bland breakfasts? Stir in a spoonful of apple butter to instantly transform your bowl. Add some chopped nuts, chia seeds, or granola for extra crunch.
3. Use it as a pancake or waffle topping
Skip the syrup and try apple butter instead. It adds a natural sweetness and feels way more seasonal. Bonus: It’s thicker than syrup, so it doesn’t soak your pancakes into mush.
4. Add it to a cheese board
Yes, you heard that right. Apple butter pairs beautifully with sharp cheeses, such as aged cheddar, Gouda, or even Brie. It adds that sweet-tart balance that elevates every bite.
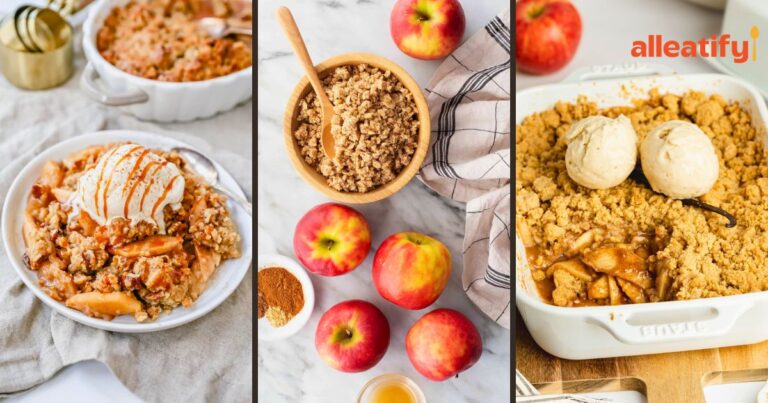
5. Bake it into fall desserts
You can use apple butter as a filling in pies, galettes, tarts, and even turnovers. One delicious example? An apple tart that uses a layer of this rich spread as the base is mouthwatering.
🎯 Apple Butter Tips for Success

Making apple butter is simple, but a few innovative strategies can help take your results from good to jaw-droppingly excellent. Here’s what to keep in mind before and during your cooking session:
✅ Use the Right Apples
Granny Smith apples were used in the original recipe for their tartness and firm texture. This helps balance the sugar and adds bright, tangy notes to the butter.
🧠 Tip: Mix in a few sweeter apples like Fuji or Honeycrisp if you want a naturally sweeter flavor without increasing the sugar.
✅ Don’t Skip the Vinegar
The apple cider vinegar isn’t just for tang. It helps preserve the apple butter longer in the fridge and balances the sweetness of the sugar and apples. The result is more flavorful and complex, rather than just sweet.
✅ Keep the Heat Low
Slow cooking is everything here. Resist the urge to crank up the heat to speed things up. Low and slow cooking helps the flavors meld, deepens the color, and prevents burning.
🔥 If the apple butter is bubbling too aggressively or darkening too fast, lower your heat immediately.
✅ Stir Often in the Second Stage
As your apple puree thickens into apple butter, it becomes more likely to stick to the bottom of the pan. Stir regularly, especially toward the end, to prevent scorching. A rubber spatula or wooden spoon works best to scrape the pot clean as you stir.
✅ Check for Doneness by Texture
Forget timers, your eyes and a spoon are your best tools. You’ll know it’s done when the mixture:
- It is deep amber
- Holds its shape when spooned onto a plate
- Leaves a clear trail when you drag a spoon through the bottom of the pan
🧡 Final Thoughts: Apple Butter Is Fall in a Jar
There’s something almost magical about turning a few apples, some cozy spices, and a bit of time into a jar of silky-smooth apple butter. It’s simple, nostalgic, and deeply satisfying, the kind of kitchen ritual that brings comfort and joy with every spoonful.
Whether you spread it on toast, swirl it into desserts, or gift it to someone special, this homemade apple butter will become a fall tradition you’ll look forward to every year.
It fills your home with warmth, your fridge with flavor, and your heart with that slow, cozy rhythm we all crave in the cooler months.
Now that your jars are filled and your kitchen smells amazing, why stop here? Keep those apple vibes going with these easy and delicious fall recipes:
🍏 More Cozy Apple Recipes You’ll Love
🥐 Easy Apple Turnovers Recipe in Just 30 Minutes
Flaky, golden puff pastry stuffed with sweet apples and a touch of cinnamon, ready in half an hour!
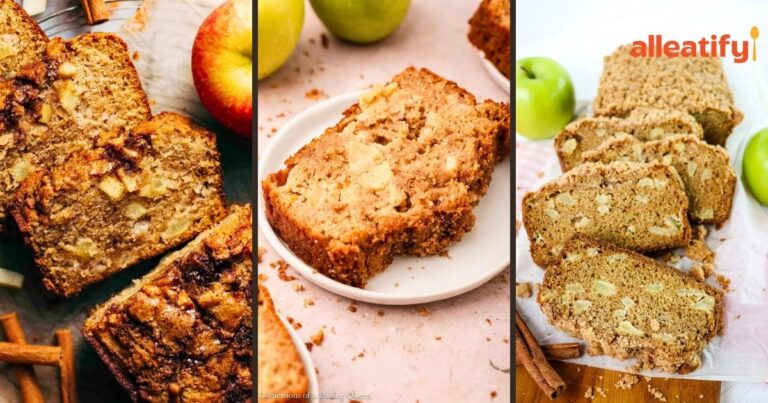
🍞 15-Min Prep Apple Bread Recipe for Fall Vibes
Soft, moist, and full of fall flavor, this quick apple bread makes the perfect cozy morning treat.
🥧 The Best Apple Pie Recipe You’ll Ever Bake
A classic, from-scratch apple pie with real apples, warm spices, and a perfectly flaky crust. Just like Grandma used to make, only easier.