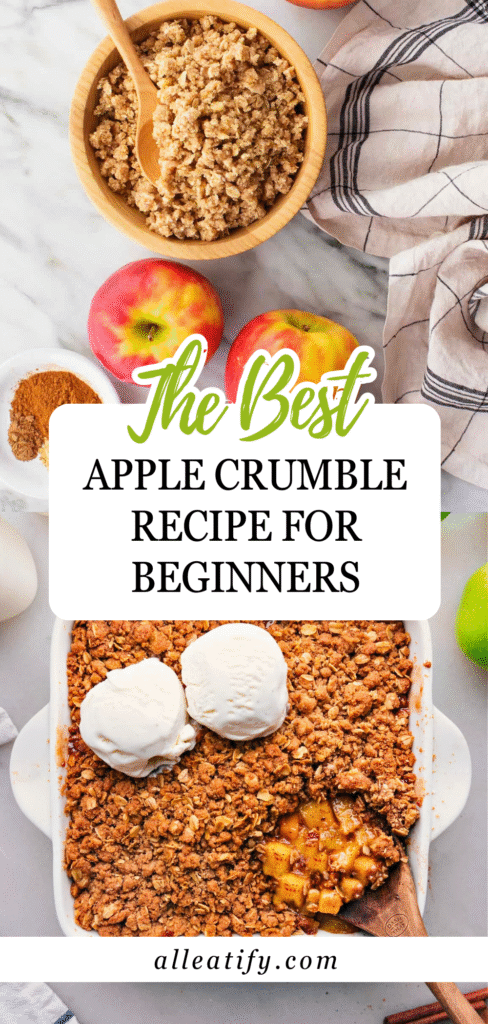
Easy & Cozy Apple Crumble Recipe for Busy Moms (2026)
There’s something magical about the smell of apples, cinnamon, and buttery topping wafting through the kitchen.
If you grew up anywhere near an apple orchard or even just love fall desserts, chances are you’ve had apple crumble at least once in your life. But not all apple crumbles are created equal.
Today, I’m going to walk you through an authentic, time-tested, ridiculously delicious apple crumble recipe inspired by memories from Upstate New York, where apple trees grow like dandelions and dessert comes with opinions.
We’re talking thick layers of tender apples, a crispy almond-brown sugar topping, and just enough sweetness to keep the apples front and center.
Let’s get cozy, grab your favorite apples, and get baking!
🍎 Why This Apple Crumble Recipe Stands Out
This apple crumble isn’t just another fall dessert; it’s the real deal. It’s rooted in tradition, perfected through practice, and built around a few core beliefs that genuinely distinguish it.
Here’s what makes this recipe shine:
1. Fruit-Forward Flavor
Most store-bought or generic recipes overwhelm the apples with sugar and thick, cakey toppings. Not this one. Here, the apple is the star, not the sugar. With just a touch of cinnamon and a hint of sugar, this crumble celebrates the natural sweetness and tang of perfectly chosen apples.
2. A True Apple Lover’s Ratio
We’re not talking about a thin layer of fruit buried under a mountain of topping. Nope, this recipe uses a whopping four pounds of apples in an 8×8-inch pan. That means each bite is bursting with warm, tender apple chunks and just enough buttery topping to keep things interesting.
3. A Smarter Baking Method
Unlike most recipes, you bake the apples first before adding the crumble topping. Why? It reduces their volume and concentrates their flavor, allowing you to pile them high without worrying about overflow. Plus, it ensures the apples are perfectly cooked and the topping doesn’t burn or sink.
4. Texture Perfection
The topping? Oh, it’s a chef’s kiss. Lightly sweet, nutty from the almonds, and crunchy, thanks to a brilliant combination of flour, brown sugar, and melted butter, with just a splash of water and vanilla for added crispiness. It’s not greasy or overly dense, but just right.
5. Set, Not Soupy
Ever scooped into a crumble only to find a watery, runny mess at the bottom? This recipe avoids that by letting the finished dessert cool for 45 minutes before serving. As it rests, the natural pectin in the apples forms a soft gel, giving the filling that perfect, scoopable texture.
🍏 The Best Apples for Apple Crumble
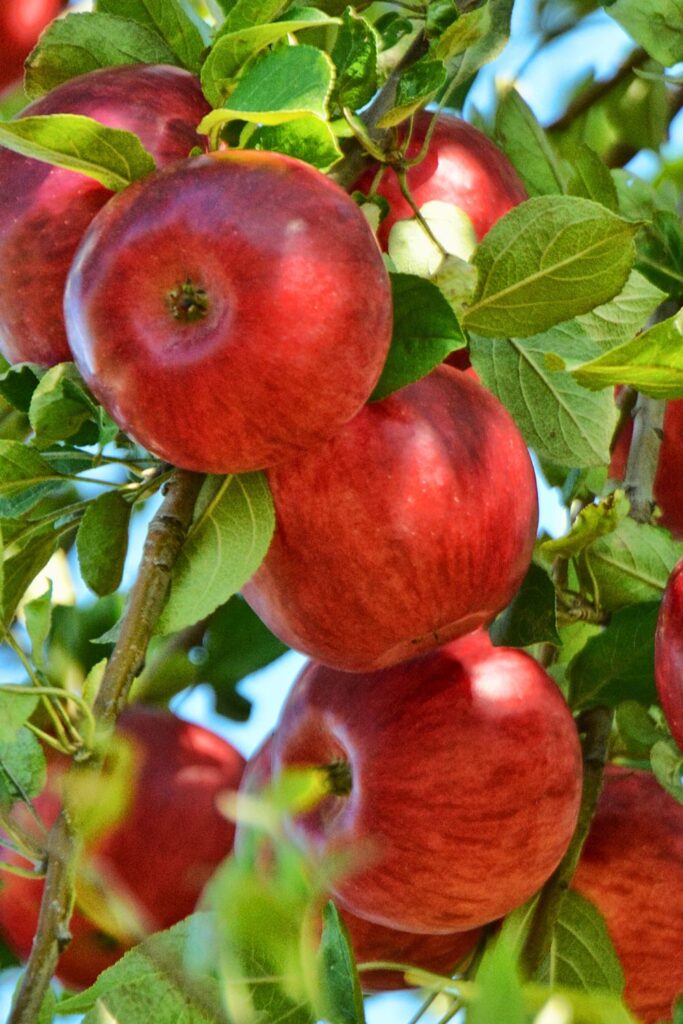
Let’s get this straight: the kind of apple you use matters. Not all apples perform the same in the oven. Some hold up beautifully, others turn to mush. This recipe is designed to utilize the right kind of apple, ensuring your crumble has both flavor and texture.
⭐ Best Apples for This Recipe:
1. Golden Delicious
This is the hero of the recipe. Golden Delicious apples are:
- Available nearly everywhere.
- Naturally sweet with a gentle tartness.
- Known for holding their shape during baking.
They don’t turn to applesauce in the oven; they soften while keeping their structure, making them perfect for a fork-tender crumble.
2. Honeycrisp (If You Can Find Them)
Sweet, juicy, and incredibly crisp, these apples add extra pop.. They’re:
- Often seasonal or regional.
- Slightly more expensive.
- Worth it if they’re available in your area.
3. Gravenstein
Another fantastic option. These are:
- Tart and complex in flavor.
- Great for baking.
- Often found at local orchards or farmers’ markets.
❌ Apples to Avoid:
Granny Smith
Although popular for baking, they’re not ideal here. Why?
- They break down too much in high heat.
- The result is a mushy, watery filling, not what we want in a good crumble.
Think of this crumble like a fruit cobbler’s elegant cousin; it deserves an apple with integrity!
🛒 Ingredients You Need for Apple Crumble
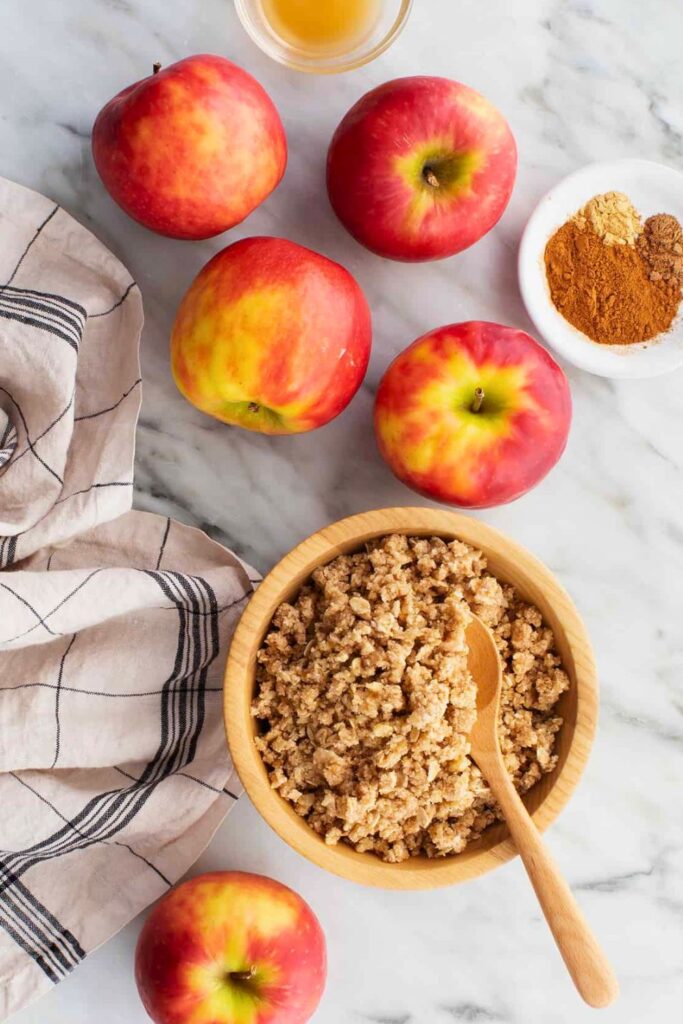
Here’s a quick, clear list of everything you’ll need, both for the apple filling and the crumble topping. These are pantry staples with a few thoughtful additions that make all the difference.
🍏 Apple Filling:
| Ingredient | Amount | Purpose |
| Golden Delicious Apples | 4 pounds | Sweet, tart base with structure |
| Lemon Juice (fresh) | 2 tablespoons | Adds brightness and balances sweetness |
| Sugar | 2 tablespoons | Enhances natural apple flavor |
| Table Salt | ½ teaspoon | Deepens flavor |
| Ground Cinnamon | ¾ teaspoon | Adds warmth and cozy aroma |
Tip: Use fresh lemon juice, not the bottled stuff. That splash of acidity brings out the apple flavor.
🍪 Crumble Topping:
| Ingredient | Amount | Purpose |
| All-Purpose Flour | 1 cup (5 oz) | Forms the crispy, crunchy base |
| Brown Sugar (light) | ½ cup, packed | Adds sweetness and richness |
| Sliced Almonds | ½ cup, finely chopped | Brings crunch and nutty depth |
| Vanilla Extract | 2 teaspoons | Adds flavor complexity |
| Table Salt | ½ teaspoon | Balances sweetness |
| Water | 2 teaspoons | Helps create an extra crisp texture |
| Unsalted Butter | 6 tablespoons, melted | Binds and adds richness |
Optional but recommended: Use a brown sugar saver to keep your sugar soft. No one likes chiseling it out of the container!
🥧 Step-by-Step: How to Make the Ultimate Apple Crumble
This isn’t your average apple crumble. We’re building flavor, texture, and structure every step of the way. Follow this step-by-step guide, and you’ll create a dessert that’s as nostalgic as it is foolproof.
🔪 Step 1: Peel and Prep the Apples
Let’s start with the foundation: the apples.
🍏 You’ll need:
- 4 pounds of apples (Golden Delicious preferred)
This might seem like a lot of apples for a small pan, but trust the process. We’re not skimping on the fruit. The crumble derives its essence from these apples.
🛠️ How to prep:
- Peel the apples – A good old-fashioned vegetable peeler does the trick. For fun? Try removing the peel in one long piece—it’s oddly satisfying.
- Core the apples – Skip the apple corer. They can be awkward and often leave parts of the core behind. Just slice around the core using a paring knife.
- Cut into chunks – Aim for pieces about ¾-inch thick. Not too small (or they’ll disintegrate), and not too large (or they won’t cook evenly).
Pro Tip: When slicing the apples, consistency matters. Uniform chunks = even baking and better texture.
🍋 Step 2: Flavor the Apple Filling
We’re keeping it simple and elegant here. This isn’t a syrupy, overly sweet apple mush. This is light, bright, and all about the apples.
🧂 Here’s what you’ll add:
- 2 tablespoons lemon juice – for brightness and balance
- 2 tablespoons sugar – just a whisper of sweetness
- ½ teaspoon salt – to round out the flavors
- ¾ teaspoon cinnamon – for that classic warm depth
🥄 How to mix:
- Place the chopped apples in a large bowl.
- Add the lemon juice first and toss to coat.
- Sprinkle in the sugar, salt, and cinnamon.
- Stir until all the pieces are evenly coated.
Smell check: At this stage, your kitchen will already smell like fall. That’s the cinnamon doing its magic.
This step pre-seasons the apples and sets the tone for every bite. Don’t be tempted to add more sugar. The natural sweetness of apples will shine through during baking.
🧂 Step 3: Pre-Bake the Apples
This step sets this recipe apart. Most crumbles are baked all at once, but this can result in undercooked apples or a soggy topping. Here, we bake the fruit first to soften and shrink it, so it layers perfectly under the topping.
🔥 How to do it:
- Grab an 8×8-inch metal baking pan. Why metal? It heats evenly and encourages browning.
- Pile in the apples. Yes, it will look way too full. That’s what we want.
- Cover tightly with foil.
- Set the pan on a rimmed baking sheet. This catches any bubbling juices and prevents oven messes.
🕒 Bake at 400°F (200°C) for 30 minutes.
After 30 minutes, the apples will have collapsed slightly and released some of their juice. Their volume will reduce just enough to make room for the topping.
Why this matters: This method ensures that the fruit cooks thoroughly and the topping doesn’t drown or steam, just golden, crisp perfection.
🥣 Step 4: Make the Perfect Crumble Topping
While the apples are baking, turn your attention to the topping. This isn’t just flour and sugar, it’s a finely tuned formula for crunch, flavor, and beauty.
🍪 Ingredients:
| Ingredient | Amount | Purpose |
| All-purpose flour | 1 cup | Crisp, golden base |
| Light brown sugar | ½ cup, packed | Sweetness and caramel notes |
| Sliced almonds | ½ cup, finely chopped | Nutty crunch |
| Vanilla extract | 2 tsp | Flavor depth |
| Table salt | ½ tsp | Balances flavor |
| Water | 2 tsp | Helps crisp the topping |
| Melted unsalted butter | 6 tbsp | Richness and structure |
🛠️ How to make it:
- Weigh or scoop your flour into a medium bowl. Pro tip: For precision, a cup of flour weighs approximately 5 ounces.
- Add brown sugar.
- Use light brown for its mild molasses flavor.
- Pack it tightly into the cup for accuracy.
- Finely chop the almonds.
- You can use a food processor or a knife.
- Add to the bowl.
- Stir in vanilla, salt, and water. Yes, water! Just 2 teaspoons give the topping extra crunch.
- Add melted butter. Stir until you get a mixture that resembles cookie dough crumbs, clumpy, not sandy.
Texture tip: You’re aiming for a dough that clumps together when squeezed but breaks apart easily when sprinkled.
Set aside and let the apples finish baking.
🔄 Step 5: Add the Topping and Finish Baking
Now comes the fun part: assembling the full crumble.
🥄 Here’s what to do:
- Remove the apples from the oven.
- Gently press down on them to compact and make a level surface.
- Evenly sprinkle the topping across the apples.
- Break up any large clumps (bigger than a marble).
- Ensure the topping reaches the corners.
🔥 Back into the oven:
- Place the pan uncovered on the upper oven rack.
- Bake at 400°F for 30 minutes.
Why the upper rack? It allows the topping to brown beautifully while the bubbling juices do their thing below.
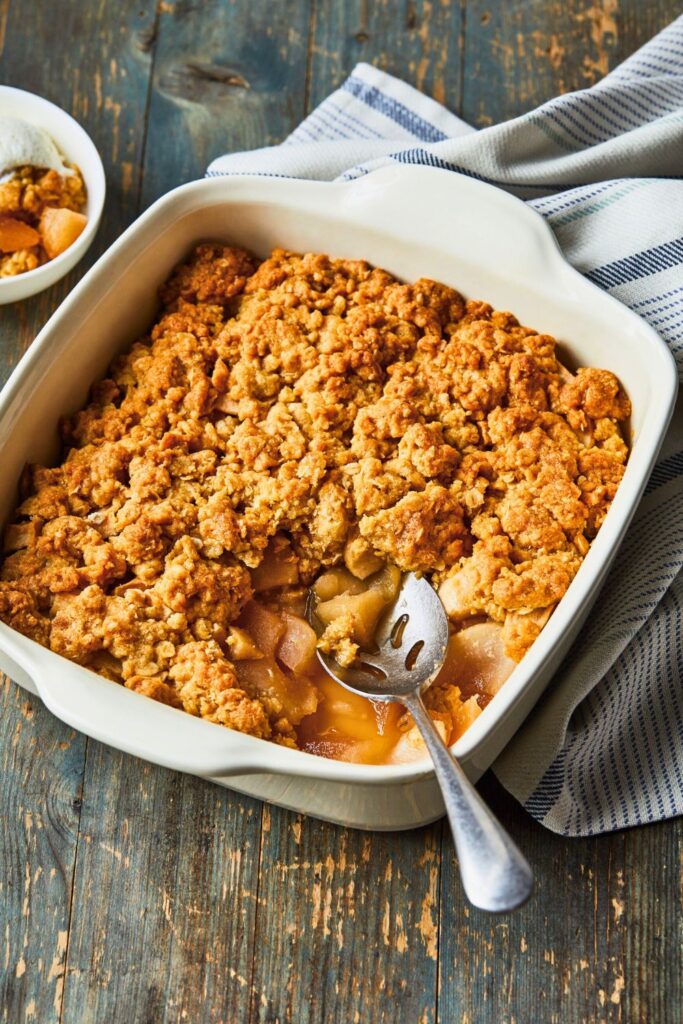
The topping should come out golden, crisp, and the edges of the crumble should be bubbling with apple juice.
Place the crumble on a cooling rack, but don’t touch it yet!
🧊 Step 6: Let It Cool (Yes, You Have To!)
This step is non-negotiable. It’s where the magic happens.
🕒 Cool for at least 45 minutes.
Yes, it’s hard. Yes, your kitchen smells like heaven. But wait.
Here’s why cooling matters:
🧪 The Science Behind It:
- Apples release water during baking.
- That water dissolves pectin (a natural thickener).
- While hot, the pectin solution is loose and runny.
- As it cools, the pectin forms a delicate mesh that traps the moisture.
- This creates a thick, scoopable filling instead of a watery mess.
If you dig in too early, you’ll ruin all that work. Be patient, and you’ll be rewarded with a firm, flavorful crumble that holds together beautifully.
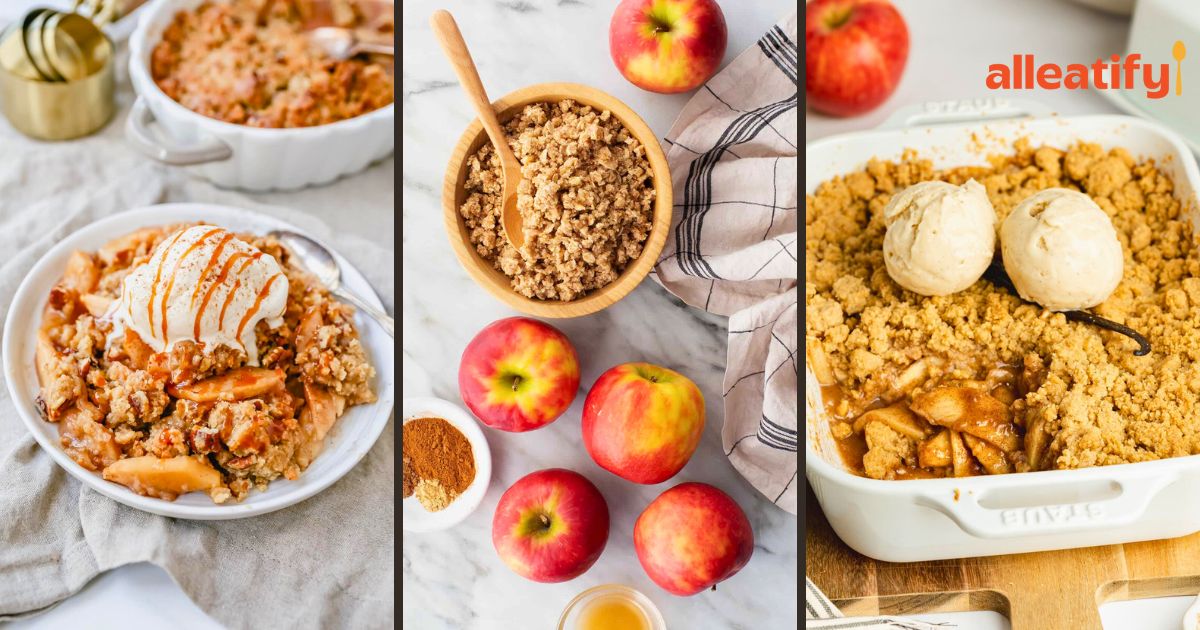
Once it’s cooled, dig in with a big spoon, top with ice cream, and enjoy every spoonful of apple-rich goodness.
🍨 How to Serve Apple Crumble
Once your apple crumble has cooled for at least 45 minutes (yes, you waited like a pro!), it’s time for the best part: digging in.
This dessert is rustic, homey, and comforting. So it doesn’t need fancy plating, but a few simple serving tips can elevate the experience.
🥄 Here’s How to Serve It Like a Pro:
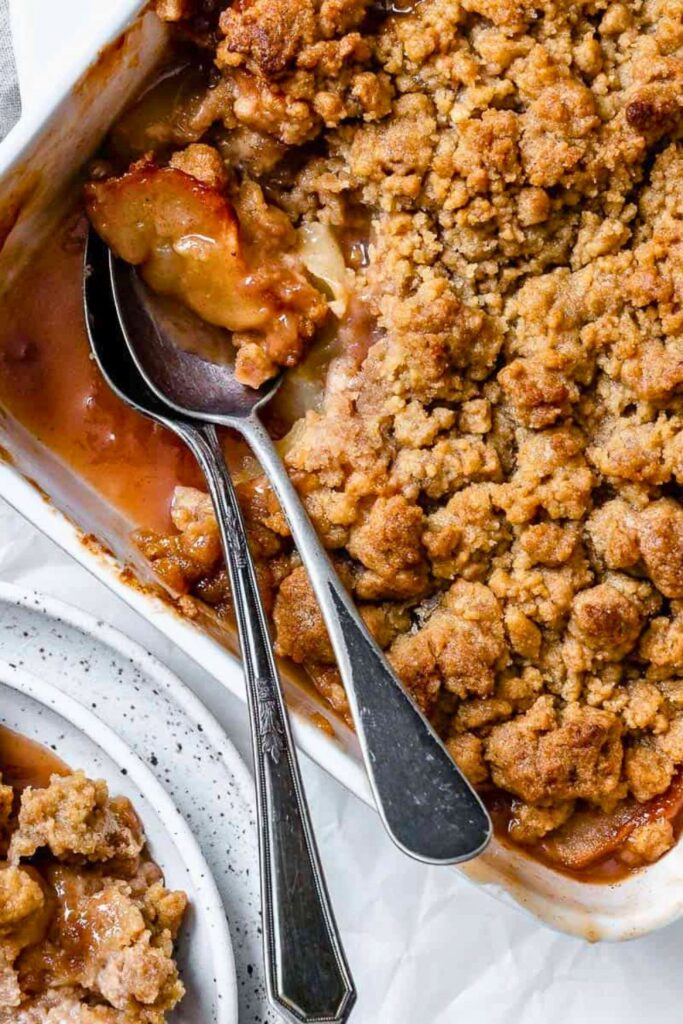
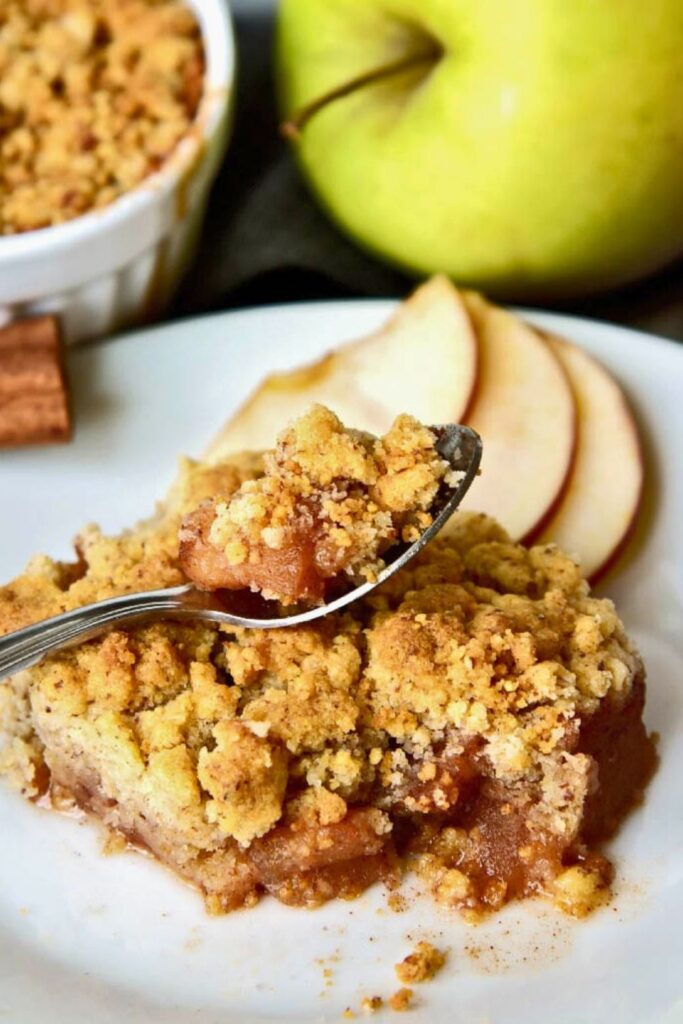
1. Scoop It, Don’t Slice It
Apple crumble isn’t meant to be sliced like pie. Instead, use a large spoon to scoop generous portions directly from the pan. The topping should crunch slightly as you break through, revealing layers of soft, cinnamon-spiced apples underneath.
2. Go Big or Go Home
In Upstate New York, this is what we’d call a “real portion”. Don’t be shy, this is comfort food! Load up your bowl with a heaping helping of that crumble-to-apple perfection.
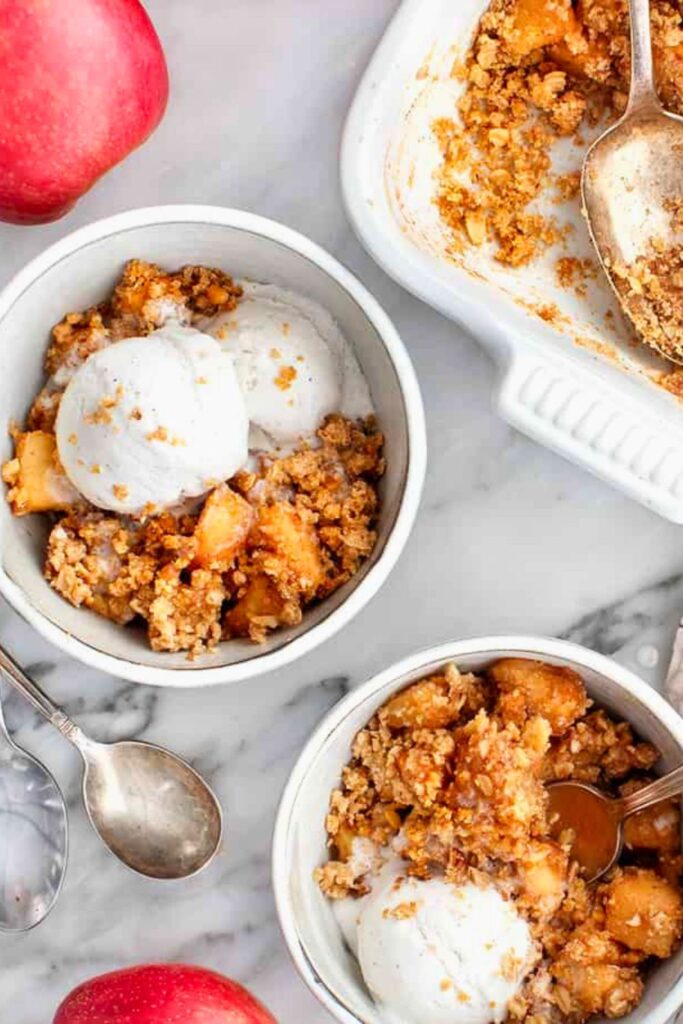
3. Pair with Something Cool & Creamy
The warm crumble paired with a cold topping is unbeatable. Try:
- A scoop of vanilla ice cream (classic and always right)
- A dollop of whipped cream
- A drizzle of salted caramel sauce
- Or even a spoonful of plain Greek yogurt for a tangy twist
4. Serve Warm, but Not Hot
If you’ve made the crumble ahead, gently reheat individual portions in the microwave or rewarm the whole dish in a low oven. Just don’t serve it piping hot; let those textures shine through.
Tip: Reheating leftovers? A few minutes in a 325°F oven helps the topping stay crisp better than microwaving it.
🔥 Tips for Apple Crumble Success
Want to ensure your crumble turns out perfectly every time? These quick tips will help you avoid common mistakes and level up your baking game.
1. Use the Right Apples
Stick to firm apples, such as Golden Delicious, Honeycrisp, or Gravenstein. Avoid soft or overly tart apples, such as Granny Smith, which can become mushy and lose their balance.
2. Don’t Skip the Pre-Bake
Pre-baking the apples softens them, concentrates their flavor, and reduces their volume, allowing you to achieve that satisfying fruit-to-topping ratio. It also prevents a raw, crunchy apple bite, not what you want in a cozy crumble.
3. Add Water to the Topping
It might sound strange, but just 2 teaspoons of water helps the topping achieve an ultra-crispy texture. It creates a slight steam effect during baking, improving the crunch without greasiness.
4. Watch the Bake Time Closely
Keep an eye on the crumble in the final 10 minutes. You want the topping to be golden brown and the juices to be bubbling up around the edges; those are your visual cues for doneness.
5. Let It Cool—Seriously
That 45-minute wait isn’t optional. As the crumble cools, the natural pectin in the apples sets the filling into a perfectly thick texture. Dig in too soon, and it’ll be soupy.
Remember: The crumble gets better with time. Give it a rest, then enjoy that perfect balance of crunchy top and juicy filling.
🍏 Variants of Apple Crumble
One of the great things about a classic like apple crumble is how easily it can be adapted. Whether you’re craving something nutty, tart, gluten-free, or bursting with spice, there’s a version for everyone.
Here’s a quick table of delicious apple crumble variations you can try:
| Variant Name | Key Ingredient Change | Flavor Profile | Notes |
| Classic Apple Crumble | Golden Delicious, Brown Sugar, Cinnamon | Sweet, cinnamon-spiced, buttery | The original and best |
| Apple-Pear Crumble | Half apples, half ripe pears | Softer texture, light floral sweetness | Great with a hint of ginger |
| Spiced Apple Crumble | Add nutmeg, clove, and allspice | Warm and bold fall flavor | Pairs well with chai ice cream |
| Gluten-Free Crumble | Use almond flour or GF 1:1 flour mix | Nutty, slightly softer topping | Use GF oats if adding for crunch |
| Oaty Apple Crisp | Add ½ cup rolled oats to the topping | Heartier and more rustic texture | Technically a “crisp,” but delicious |
| Salted Caramel Apple | Add caramel sauce and sea salt | Sweet with a pop of salt | Serve with vanilla or caramel swirl |
| Nutty Apple Crumble | Swap almonds for pecans or walnuts | Rich, toasty, buttery crunch | Chop nuts finely for an even topping |
| Apple-Berry Crumble | Mix in fresh or frozen berries (blueberries, raspberries) | Tart-sweet combo, juicier base | Add a little cornstarch to thicken |
| Maple Apple Crumble | Replace sugar with maple syrup | Deep, rich sweetness with earthy tones | Use real maple for the best results |
| Apple-Raisin Crumble | Add golden or dark raisins to the filling | Chewy, sweet bursts inside the fruit | Soak raisins in warm juice for plumpness |
Feel free to mix and match, your apple crumble can evolve with the seasons, your pantry, or your taste buds!
🍂 Final Thoughts: The Apple Crumble That Checks All the Boxes
There’s something deeply satisfying about apple crumble. It’s rustic yet refined, humble yet heavenly. And this version? It’s a love letter to fall and a nod to the flavors of Upstate New York, where apple season is practically a celebration.
By using the right apples, pre-baking the fruit, and being patient during the cooling stage, you get a perfectly balanced dessert. Each bite delivers a mountain of soft, flavorful apples crowned with a crunchy, buttery topping that doesn’t overpower. It’s the kind of dish that makes you pause mid-bite and smile.
Whether you’re making this for a holiday gathering, a quiet Sunday dinner, or just to celebrate the end of apple season, this crumble will never let you down. So grab a spoon, maybe a scoop of vanilla ice cream, and dig in.
🍞 More Cozy Recipes You’ll Love
If you loved this Apple Crumble, here are a few more tried-and-true recipes perfect for chilly weekends, family gatherings, or anytime you need a warm hug in food form:
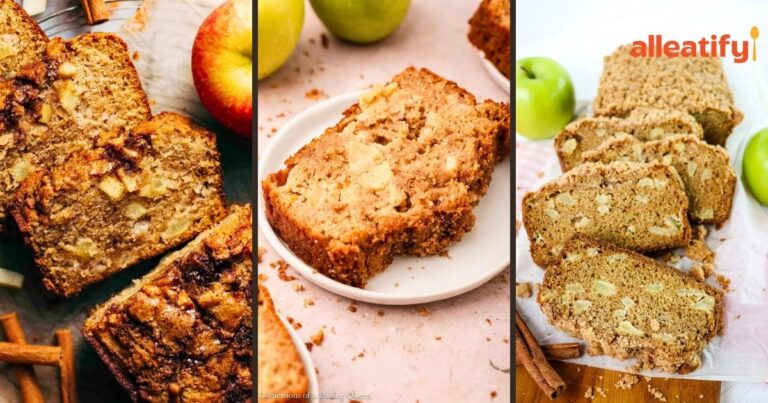
🍌 No-Fail Banana Zucchini Bread in Under 25 Min
Moist, lightly sweet, and packed with flavor, this quick bread is your go-to when bananas are spotted and zucchini is overflowing. Bonus: It’s super easy and bakes fast!
🍫 Moist & Fudgy Chocolate Zucchini Bread Recipe
Rich, chocolatey, and sneakily veggie-packed, this loaf is a favorite among kids and adults alike. No one will guess it’s made with zucchini.
🍏 Best 25-Min Apple Crisp Recipe for Sunday
Craving something quicker than a full apple crumble? This crisp delivers all the warm, spiced apple goodness with a simple oat topping and is ready in under 30 minutes!