The Best Apple Galette Recipe You’ll Ever Try (2026)
If you love apple pie but dread the effort it takes to make one from scratch, you’re not alone. Between the fussy dough, intricate latticework, and the need for perfection, it often feels like more stress than it’s worth.
But what if I told you there’s a rustic, buttery, flaky alternative that’s easier, faster, and arguably more delicious? Meet your new favorite fall dessert: the apple galette.
This guide will walk you through everything you need to know from making the perfect flaky crust to arranging those cinnamon-sugar apples like a pro. Let’s roll up our sleeves and dive into this delicious masterpiece.
🍎 What Is an Apple Galette?
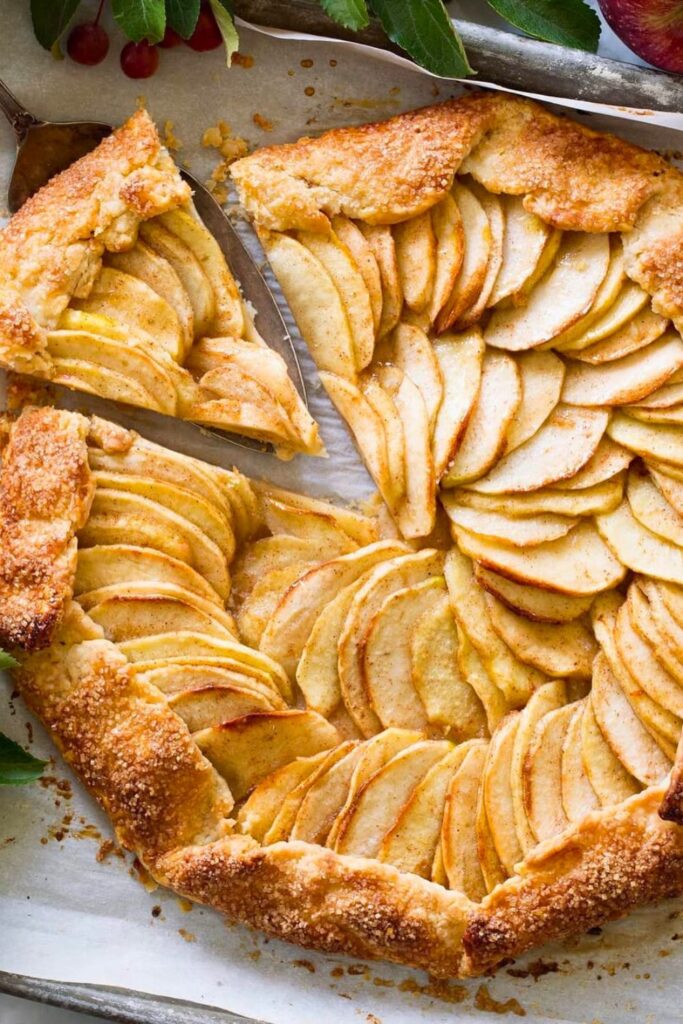
An apple galette is a rustic, free-form pastry that delivers all the flavor and comfort of a traditional apple pie without any of the fuss. Think of it as pie’s laid-back French cousin, no pie dish, no crimping edges, and no blind baking required.
Unlike apple pie, which often demands careful dough work and precise layering, an apple galette embraces imperfection. You simply roll out the dough into a rough circle, pile the spiced apple slices in the center, fold the edges over, and bake. The result? A beautifully crisp crust with golden brown edges and a gooey, cinnamon-apple center.
This galette is all about simplicity and flavor:
- It uses Honeycrisp apples for the perfect balance of tart and sweet.
- The crust is made from cold butter and flour, pulsed together just until it forms crumbly, buttery gravel perfect for that irresistible flakiness.
- The filling is lightly spiced with cinnamon, nutmeg, sugar, and a splash of lemon juice, then thickened with cornstarch for that iconic apple pie “goo.”
So, if you’ve ever felt like making homemade pie was a chore, this galette is your new best friend. It’s forgiving, easy to shape, and delivers that buttery crust-to-filling ratio that traditional pies can’t match.
🧾 Ingredients You’ll Need
Below is a detailed ingredient breakdown for both the crust and the filling, plus final assembly. All quantities are measured in grams for precision, which is especially helpful when baking.
| Category | Ingredient | Amount | Notes |
|---|---|---|---|
| For the Crust | All-purpose flour | 200 grams | The base of your flaky dough |
| Granulated sugar | 20 grams | Adds slight sweetness to the crust | |
| Salt | 3 grams | Enhances flavor and balances sweetness | |
| Unsalted butter (cold) | 150 grams | High-fat butter like Kerrygold preferred for richness and flakiness | |
| Ice-cold water | 65 grams | Helps bring the dough together without melting the butter | |
| For the Filling | Honeycrisp apples (peeled & sliced) | 300 grams | 2 medium-large apples, sliced 1/8–1/4 inch thick |
| Granulated sugar | 50 grams | Sweetens the filling without overpowering the apple flavor | |
| Cornstarch | 15 grams | Thickens the apple juices into a glossy, gooey texture | |
| Salt | 2 grams | Helps balance the sweetness | |
| Ground cinnamon | 2–3 grams | Warm spice that complements the apples | |
| Nutmeg (freshly grated, optional) | ~1 gram | Optional, but adds depth to the cinnamon | |
| Lemon juice | 5 grams | Brightens the flavor and prevents apples from browning | |
| Assembly | Egg + splash of water | 1 egg | Whisked together for egg wash |
| Demerara or raw sugar | As needed | Sprinkled on the crust for extra crunch and sparkle | |
| Butter (thin pats) | 3–4 pieces | Added on top of apples before baking for richness | |
| Flaky sea salt (like Maldon) | A few pinches | Sprinkled over apples for sweet-savory balance |
🥣 Step-by-Step Instructions: Let’s Make Apple Galette
Making an apple galette is easier than it looks, and trust me, it looks beautiful. From the buttery crust to the cinnamon-laced apples, every layer of this rustic dessert is satisfying to prepare and even better to eat. Let’s dive into each step and walk through the process together.
1. Make the Buttery, Flaky Dough
This galette dough is the unsung hero of the recipe. It’s tender, crisp, and oh-so-flaky thanks to cold butter and just the right amount of mixing.
Start with the dry ingredients: In the bowl of a food processor, combine:
- 200 grams of all-purpose flour
- 20 grams of granulated sugar
- 3 grams of salt
Pulse a few times to blend them. This is your flour base.
Add the butter: Next, cube 150 grams of very cold butter and add it to the processor. If you’re using high-fat butter like Kerrygold, freeze it for 10 minutes first. This ensures it’s firm enough to hold its shape while mixing and doesn’t melt too quickly.
Pulse 25–35 times until the butter is broken down into small pieces about the size of a grain of rice. This texture is crucial. You don’t want to over-pulse into a smooth dough. You want little pockets of butter to remain intact. That’s what creates steam when baking, which puffs up the layers and gives your crust its signature flakiness.
Add the water: Now measure 65 grams of ice-cold water. Begin pulsing the food processor while slowly streaming in the water. This should take no more than 12–15 pulses.
Stop as soon as the dough starts clumping, but still looks a bit sandy. The trick is not to thoroughly combine into a smooth mass. It should be shaggy and a bit crumbly. You can test it by pinching a small amount, it should hold together without being wet.
2. Wrap and Chill the Dough
Transfer the loose, crumbly dough to a large sheet of plastic wrap. Squeeze and press it together gently into a rough ball, then flatten it into a disk about 6 inches wide. Wrap it tightly and refrigerate it for at least 1 hour.
Why chill? This rest period:
- Re-solidifies the butter (key for flakiness)
- Allows the flour to absorb the water (better texture)
- Makes the dough easier to roll
When you unwrap it later, you’ll see tiny flecks of butter scattered throughout the dough. That’s a great sign, you nailed it.
3. Choose the Right Apples
Now let’s talk apples.
For this galette, Honeycrisp apples are your best friend. They’re tart, sweet, super juicy, and they hold their shape during baking. No one wants mushy apples in a galette.
You’ll need about 2 medium-to-large apples, or roughly 300 grams sliced.
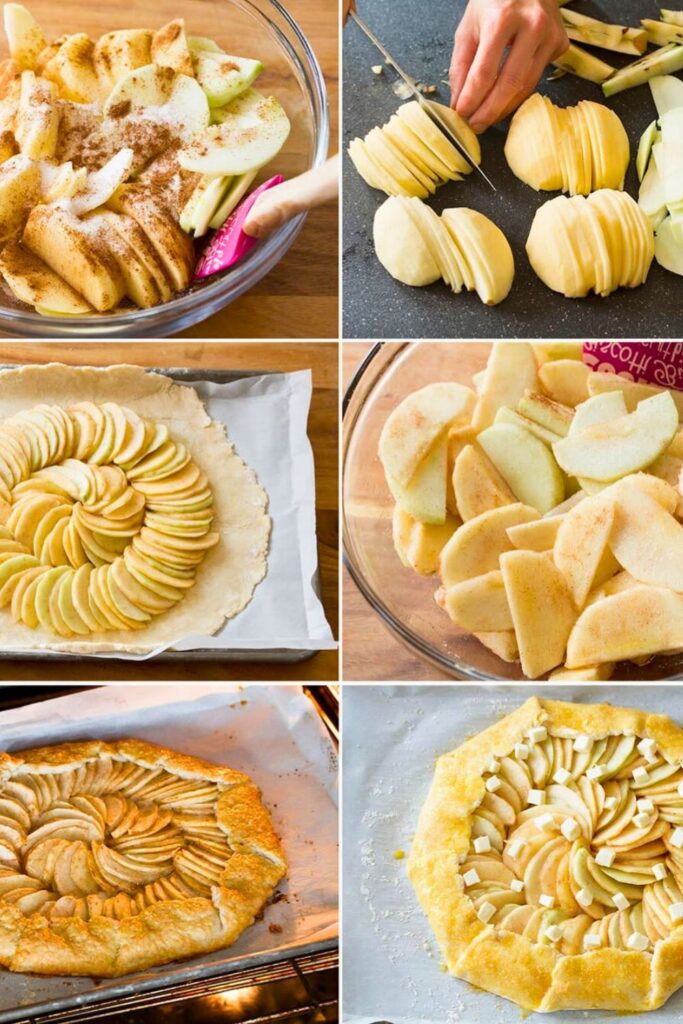
Peel the apples, remove the core, and slice the flesh into pieces between 1/8 and 1/4 inch thick. That size gives the perfect balance between tender and firm after baking. Too thin and they turn to mush. Too thick and they won’t soften enough.
Pro tip: Cut the sides off the apple first, then slice each quarter. It keeps the pieces more uniform.
4. Mix the Filling
Place the apple slices in a large bowl and add the following:
- 50 grams of granulated sugar
- 15 grams of cornstarch (for thickening the juices)
- 2–3 grams ground cinnamon
- About 1 gram freshly grated nutmeg (optional but lovely)
- 2 grams of salt
- 5 grams lemon juice (just a splash)
Toss everything together gently. Don’t press or smash the apple; handle them with care. The goal is to coat, not crush. Overmixing can lead to watery apples and a soggy crust.
Set the bowl aside and let the apples sit for 5–10 minutes while you roll out the dough. This resting time helps the sugar draw out some juices and gives the flavors a chance to mingle.
5. Roll It Smoothly
Grab your chilled dough from the fridge. Let it sit at room temperature for a few minutes, just long enough to make it pliable but still cold. If it’s too firm, it’ll crack; too soft, and it’ll stick.
Dust both sides of the dough generously with flour. Also, flour your rolling pin and work surface.
Start rolling by pressing gently from the center outward, using even pressure. Then rotate the dough 90 degrees and repeat. This keeps the shape round and prevents sticking. Use a bench scraper to lift and turn the dough as needed.
If cracks form, don’t stress. Use your fingers to press the edges back together.
Aim for a 12-inch circle, about 1/8 inch thick. Once you reach that size, transfer the dough to a 12-inch sheet of parchment paper.
Then give it one final gentle roll to 13–14 inches wide. Use very light pressure at this point to preserve the flaky layers you’ve worked so hard to build.
6. Arrange the Apples
Here’s where the beauty comes in.
Start by placing the apple slices in a ring around the outer edge of the dough, about 2–3 inches from the edge. You can stack the slices in a fan-like pattern for a decorative look, or keep it rustic and casual by piling them in the center.
To go the extra mile:
- Arrange one ring of apple slices overlapping each other around the edge.
- Then add another inner ring in the same direction.
- Place 3 apple slices in the center to prop up the spiral.
- Finish with a small rose-like bundle of slices in the middle.
This part is oddly soothing; it’s like putting together a puzzle. And remember: if you’re in a hurry or don’t feel like being fancy, just mound the apples in the middle. It’ll taste just as good.
7. Fold and Seal the Crust
Now fold the edges of the dough over the apples, pleating every few inches as you go. Gently press each fold to seal.
There should be no gaps between the apples and the crust. That outer ring of apples should be fully tucked in. Why? It creates a sealed edge that traps those gooey, caramelized juices during baking, resulting in the most glorious bite.
When you’re done, adjust the folds slightly to make the shape nice and round. This step is surprisingly satisfying.
8. Add the Golden Glow
Before baking, it’s time to give this galette some glow-up magic.
First, brush the crust with egg wash (1 egg whisked with a splash of water). This gives the crust its rich golden color and shine.
Next, sprinkle Demerara or raw sugar generously over the crust. This adds crunch, sparkle, and depth of flavor. As it bakes, the sugar caramelizes and turns the crust beautifully golden brown.
Then, spoon in 3–4 tablespoons of the leftover apple juice from the bowl. That sugary-cinnamon liquid contains cornstarch and will turn into a luscious gel when baked.
To finish:
- Add a few thin pats of butter over the apples
- Sprinkle on a couple of pinches of flaky sea salt.
Sweet, buttery, and salty? Yes, please. This balance makes the galette unforgettable.
9. Bake It to Perfection
Carefully transfer the galette (on the parchment) to a baking sheet. Slide it into a preheated 375°F (190°C) oven.
Bake for 40–50 minutes, rotating the sheet pan halfway through to ensure even browning.
You’ll know it’s done when:
- The crust is deep, golden brown
- The apples are soft and slightly caramelized.
- The filling is bubbling gently.
As it bakes, the butter in the crust melts and creates steam pockets that puff and flake. You can see it happening; it’s like a magic trick.Once out of the oven, let it rest for 10–15 minutes before slicing. This helps the filling set slightly and prevents it from spilling everywhere.
🍨 How to Serve Apple Galette
Serving an apple galette is arguably the most rewarding part, after all, this is where rustic elegance meets indulgent satisfaction.
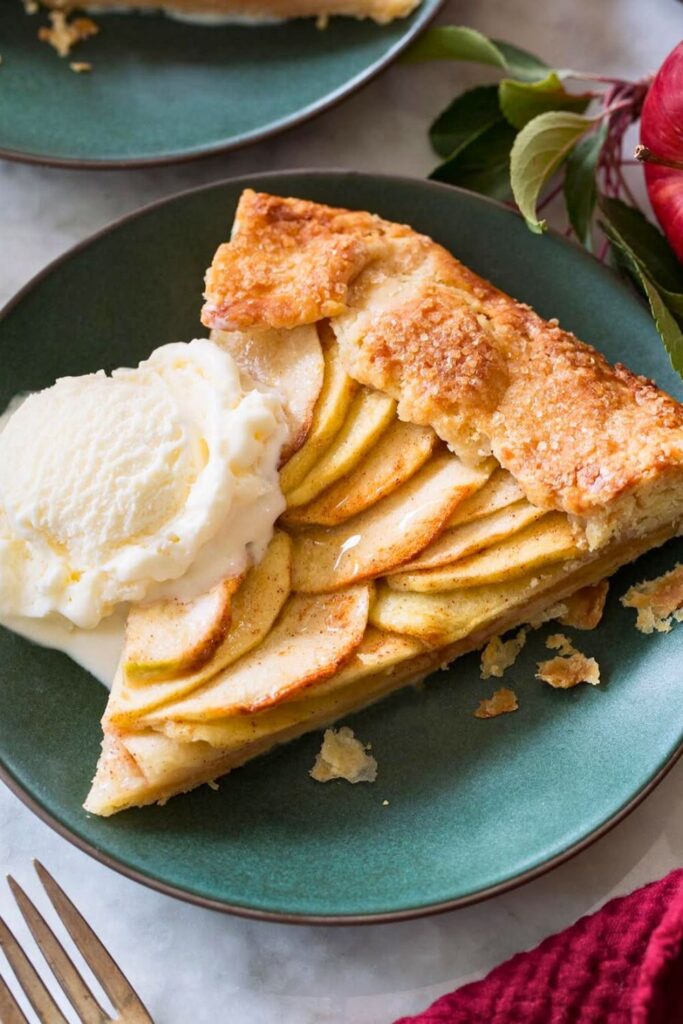
Serve it warm, not hot. Straight out of the oven, the filling will be molten and the crust super delicate. Let the galette cool for about 10–15 minutes. This brief resting time helps the juices settle, allowing the slices to hold their shape when cut. Plus, a slightly cooled galette is the perfect temperature for pairing with creamy toppings.
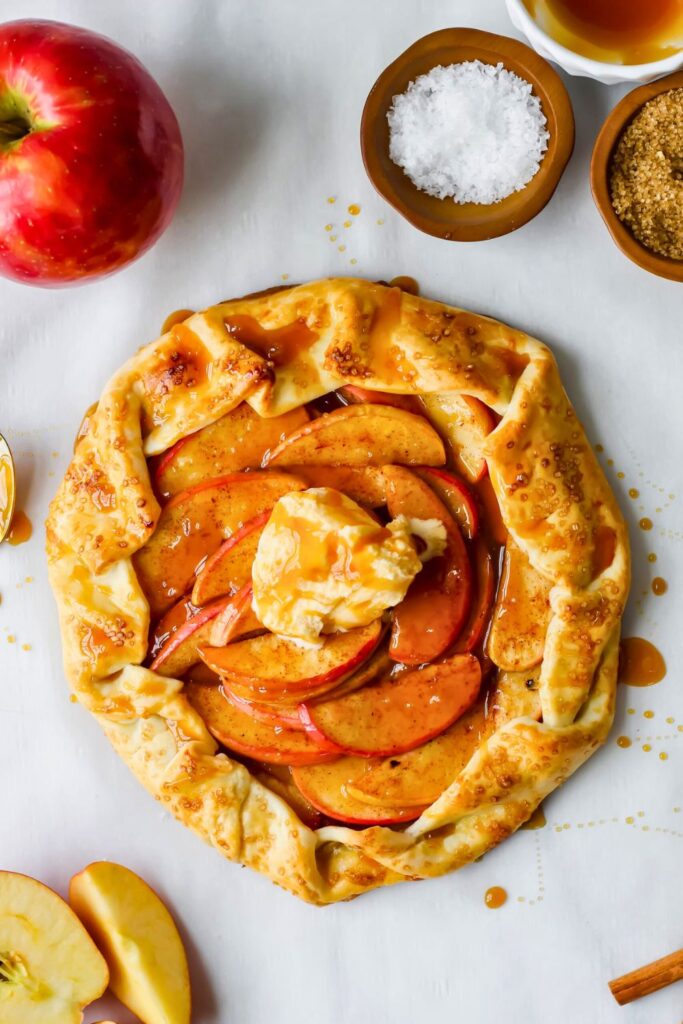
Top it with vanilla ice cream. There’s truly nothing better than the combination of warm apples and cold, melting vanilla ice cream. As it melts into the buttery crevices of the flaky crust and the gooey cinnamon apple center, it creates an irresistible sauce-like texture. That first bite? Absolute heaven.
If you’re looking for alternatives to ice cream, try:
- Fresh whipped cream
- A dollop of crème fraîche
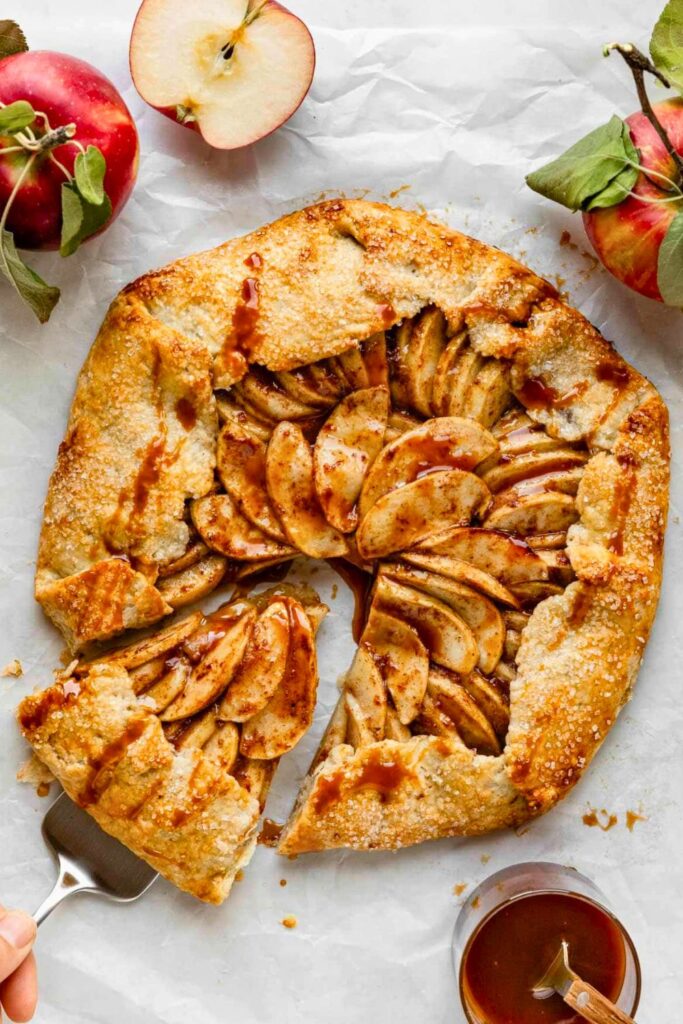
- A drizzle of salted caramel sauce
- A dusting of powdered sugar and cinnamon
Serving style tip: Cut the galette into wedges like a pizza or scoop a rustic piece into a shallow bowl. Either way, it’s casual, cozy, and charming. Don’t worry about perfect slices—the beauty of a galette is in its imperfection.
And here’s the secret bonus: because of its higher crust-to-filling ratio, every bite is balanced. No soggy pie bottom. No overly sweet goop. Just buttery, flaky pastry hugging soft, perfectly spiced apples.
✅ 5 Tips for the Best Apple Galette
Making a galette may be easier than a pie, but a few clever tricks can take your dessert from good to unforgettable. Here are five must-know tips to guarantee success:
1. Keep Everything Cold
Cold ingredients = flaky crust. Your butter should be firm and cold, ideally from the fridge or freezer. Your water should be ice-cold. Even your flour and mixing bowl can be chilled for best results on a hot day.
Why? Cold butter stays intact longer as you mix, and when it finally melts in the oven, it releases steam. That steam creates air pockets in the dough, aka the glorious flakiness you’re aiming for.
Bonus tip: After assembling the galette, pop it in the fridge for 10–15 minutes before baking to firm it up again.
2. Don’t Overmix the Dough
Once you’ve added the water to the flour-butter mixture, pulse just enough to bring the dough together. It should still look a bit sandy or gravelly.
If the dough forms a smooth ball too early, you’ve likely overmixed it. Overmixing melts the butter and activates too much gluten in the flour, making the crust tough and chewy instead of light and tender.
You want to see visible flecks of butter in your rolled-out dough; that’s a good thing!
3. Slice Apples Uniformly
Aim for apple slices that are 1/8 to 1/4 inch thick. This ensures even cooking, no crunchy bits and no apple mush.
Thicker slices = undercooked
Thinner slices = soggy and fall apart.
Take your time when slicing and try to keep them as even as possible. Uniformity helps the galette bake more consistently and also makes for a prettier presentation if you decide to spiral the apples.
4. Layer Thoughtfully (Or Don’t!)
The galette shines whether you arrange the apples artfully or go the rustic route. But if you want a wow-worthy look, try layering the slices in a circular shingled pattern, working from the outside in.
This adds visual appeal and helps distribute the filling evenly. Just remember: appearance doesn’t affect flavor. If you’re short on time, simply pile the apples in the center and fold the edges. It’ll taste just as incredible.
5. Finish with Texture and Balance
Before baking, brush the crust with egg wash and sprinkle with raw or Demerara sugar. This creates a golden, crispy texture that crackles with every bite.
Then, drizzle in a few tablespoons of the apple-cinnamon juice from your filling bowl. The cornstarch in the juice will thicken during baking, creating a gooey gel around the apples.
Top with a few flakes of sea salt (like Maldon) and a couple of pats of butter. That salty-sweet balance and extra richness give the galette an edge over any traditional pie.
🍂 Final Thoughts
If you’ve ever felt intimidated by homemade apple pie, the apple galette is here to change your mind. It’s rustic, forgiving, and packed with cozy fall flavor.
With its golden, buttery crust and cinnamon-swirled apples, this galette brings everything you love about autumn desserts without the stress of a traditional pie.
It’s easy enough for a weekday treat, yet elegant enough to serve at a holiday gathering. Plus, you don’t need any fancy tools or baking skills, just a little patience and a love for buttery crusts and juicy apples.
Whether you enjoy it with a scoop of vanilla ice cream or a dusting of powdered sugar, one thing’s for sure: this apple galette is about to become your new go-to dessert.
🍰 Love This Apple Galette? You’ll Also Enjoy:
If you’re in a fall baking mood, here are a few more cozy apple dessert recipes you’ll love. They’re easy, delicious, and perfect for the season:
👉 Easy Apple Cheesecake Recipe for Beginners
Creamy, sweet, and topped with spiced apples. This no-fail cheesecake is beginner-friendly and perfect for autumn get-togethers.
👉 Easy 20-Min Prep Apple Pie Bars Recipe for Fall
All the flavor of classic apple pie in a quick, grab-and-go bar. No rolling pin needed, just layer, bake, and slice!
👉 Best 20-Min Apple Dump Cake Recipe for Holiday
Only 5 ingredients and packed with cozy caramel apple flavor. Just dump, bake, and enjoy a warm dessert with minimal cleanup.