Easy Apple Turnovers Recipe in Just 30 Minutes (2026)

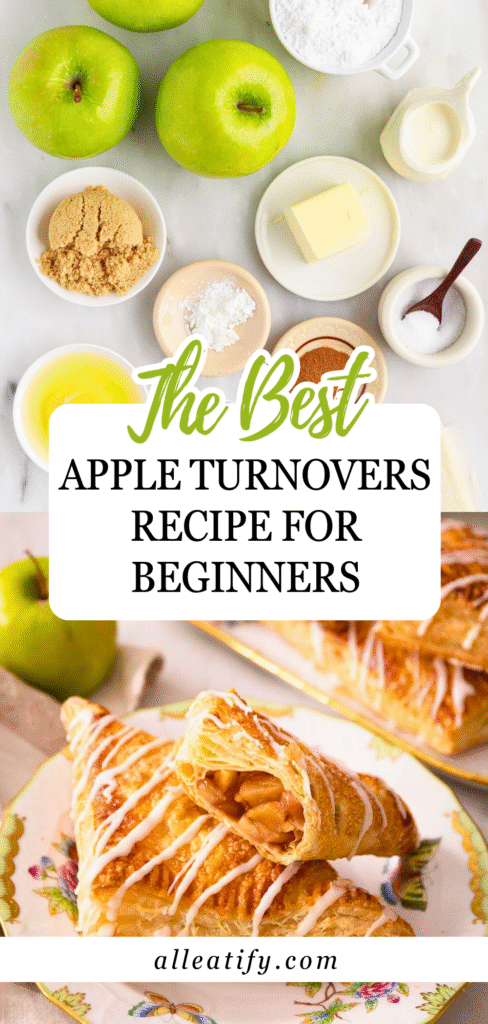
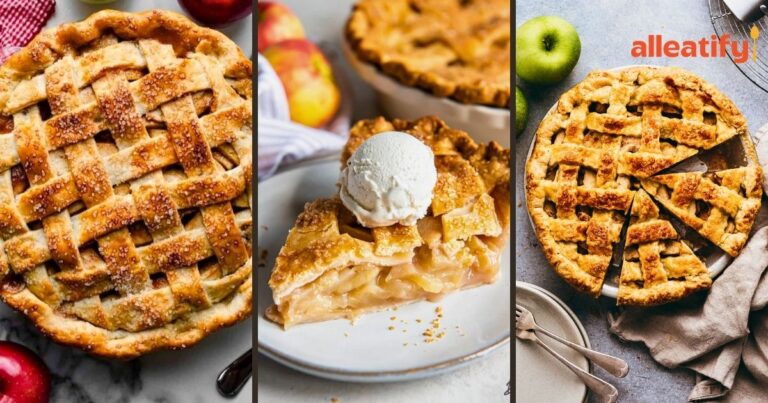
There’s something magical about a warm, flaky apple turnover. It’s like holding a tiny apple pie in your hands, crisp golden layers on the outside, cozy cinnamon-sugar apple filling on the inside.
And the best part? They’re surprisingly easy to make at home, even if you’ve never baked with puff pastry before!
Whether you’re planning a cozy weekend bake or want a simple dessert to impress your guests, this apple turnovers recipe is here to deliver all the flavor without the fuss.
Let’s walk you through every step so you can whip up this fall favorite with confidence and ease.
🍎 Why You’ll Fall in Love with These Apple Turnovers

Imagine biting into a golden, flaky pastry that’s warm, buttery, and filled with tender cinnamon-spiced apples. That’s the magic of homemade apple turnovers and why they’re such a fan favorite.
These treats are the best of both worlds: comforting like a slice of apple pie, but way easier and faster to make.
With this recipe, you can skip the hassle of rolling out pie crust or worrying about blind baking. Thanks to store-bought puff pastry, most of the hard work is already done. And the best part? You can enjoy a bakery-style dessert right from your oven in under 30 minutes.
Here’s what makes this apple turnovers recipe so special:
- No fuss, all flavor: No need for a mixer, no pie crust stress, just slice, sauté, fold, and bake.
- Perfect texture: The apples are diced small and sautéed, so they soften perfectly in the oven, no undercooked chunks here.
- Flaky and golden: Puff pastry bakes up tall, crisp, and buttery. It’s practically foolproof.
- Customizable: Love spice? Add nutmeg or cardamom. Want it extra sweet? Drizzle on more icing.
- Kid-friendly: Kids can help fill, fold, and drizzle. Plus, they’re the perfect handheld size.
If you’ve ever craved the taste of apple pie but didn’t want the time commitment, these turnovers are your answer. They’re ready fast, look fancy, and taste like fall in every bite.
📝 Ingredients You’ll Need
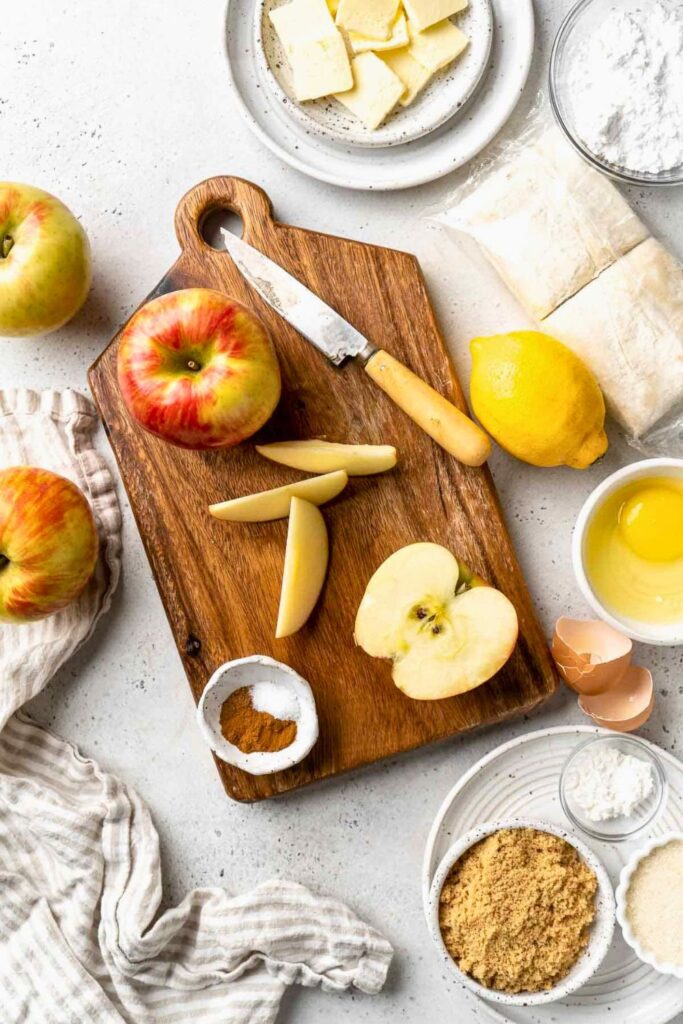
These apple turnovers come together with simple ingredients. Here’s your shopping list:
🧂 For the Apple Filling
| Ingredient | Amount | Notes |
|---|---|---|
| Apples | 4 medium (≈2 cups diced) | Honeycrisp, Granny Smith, Cortland, or your favorite variety |
| Butter | 1 tablespoon | For sautéing the apples |
| Lemon Juice | 1 tablespoon (juice of ½ lemon) | Brightens the flavor and balances the sweetness |
| Cinnamon | ½ teaspoon | Adds warmth and classic apple pie flavor |
| Brown Sugar | ¼ cup (packed) | Sweetens and deepens the flavor with molasses richness |
| Salt | 1 pinch | Enhances the apple flavor |
| Cornstarch (opt) | Up to 1 teaspoon | Helps thicken the filling if very juicy |
| Optional Spices | ¼ tsp each | Nutmeg, cardamom, allspice for extra autumn spice |
🥐 For the Turnovers
| Ingredient | Amount | Notes |
|---|---|---|
| Puff Pastry Sheets | 2 sheets (thawed) | Store-bought or homemade; thaw in the fridge |
| Egg | 1 large | For egg wash to seal and shine |
| Cream/Milk/Water | 1 tablespoon | Mixed with egg for wash |
| Sugar (Optional) | 1–2 tablespoons | For sprinkling on top—use sanding or granulated sugar |
🍋 For the Icing
| Ingredient | Amount | Notes |
|---|---|---|
| Powdered Sugar | ¾ cup | The base for the glaze |
| Lemon Juice or Water | 1–2 tablespoons | Adjust to desired consistency |
| Vanilla Extract (opt) | ½ teaspoon | Adds aroma and depth to the icing |
🥣 Step-by-Step: How to Make Apple Turnovers (With Tips!)

This apple turnovers recipe is beginner-friendly, ultra-flaky, and loaded with warm apple-cinnamon goodness. Whether you’re baking for a crowd or just treating yourself, this step-by-step guide will help you achieve perfectly puffed and golden turnovers every time.
Let’s break it down into 10 clear steps:
🔥 Step 1: Preheat the Oven and Prep the Puff Pastry
Before you do anything else, preheat your oven to 400°F (200°C). This ensures that it’s hot and ready once your turnovers are assembled. Puff pastry needs a high temperature to rise and crisp quickly.
Meanwhile, take out two sheets of puff pastry and let them thaw according to package instructions, usually about 30 to 40 minutes at room temperature or overnight in the fridge. The pastry should be pliable but still cold when you use it.
Pro Tip: Keep the sheets covered with a clean towel or plastic wrap to prevent drying and cracking. Dry puff pastry is hard to work with and won’t seal properly.
🍏 Step 2: Dice the Apples
Next, it’s time to prep the star of the show: the apples!
You’ll need about four medium apples to yield approximately 2 cups of diced fruit. You can use your favorite variety, but Granny Smith, Fuji, Cortland, or Braeburn work wonderfully.
How to dice them:
- Peel the apples (optional, but recommended for a smoother filling).
- Cut around the core into large chunks.
- Dice those chunks into ¼-inch cubes.
Uniform, small pieces are key; they cook evenly and quickly, so you won’t end up with crunchy bits inside your pastry.
Tip: Check your measurement after chopping. You want to hit that 2-cup mark, but a little extra is fine, perfect for snacking while the filling simmers.
🍳 Step 3: Cook the Apple Filling
Grab a large skillet and melt 1 tablespoon of butter over medium heat. Once melted, toss in your diced apples and stir to coat them in the butter.
Let the apples cook for about 2–3 minutes, stirring frequently. They’ll start to soften and release their natural juices.
Now add the flavor:
- Pinch of salt – enhances sweetness and balances the taste.
- 1 tablespoon fresh lemon juice – brightens the flavor and prevents browning.
- ½ teaspoon cinnamon – for that cozy, fall aroma.
- ¼ cup packed brown sugar – melts into a caramel-like glaze.
If you’re feeling fancy, toss in a dash (no more than ¼ tsp) of nutmeg, allspice, or cardamom for extra warmth.
Let this mixture cook for about 5 minutes, or until the apples are fork-tender and coated in a slightly thickened sauce. The juice will reduce, concentrating the flavor.
Too much liquid? Sprinkle in up to 1 teaspoon of cornstarch to help the filling thicken. Stir over low heat until the sauce turns glossy and clings to the apples.
❄️ Step 4: Cool the Filling
This step is crucial! Hot filling can melt your pastry before it hits the oven, leading to leaks, soggy bottoms, and uneven baking.
Transfer the apple mixture to a shallow bowl or spread it out on a plate to cool faster. If you’re in a rush, pop it into the fridge for 10–15 minutes.
Pro Tip: More surface area = faster cooling. Don’t leave the filling in a hot skillet. It’ll continue cooking and possibly get mushy.
🧈 Step 5: Roll Out the Puff Pastry
Once your puff pastry is thawed and your filling is cool, it’s time to roll.
Place a sheet of pastry on a lightly floured surface (or use a pastry mat). Roll it out gently into a 12×12-inch square. Don’t go thinner, you want to keep those buttery layers intact.
Use a pizza cutter or knife to divide the sheet into four equal 6×6-inch squares.
Repeat with the second sheet for a total of 8 turnovers.
Tip: If the pastry edges are uneven or rounded, square them off gently before cutting.
Necessary: Keep any cut pastry pieces you’re not currently working with covered under a towel or plastic wrap. This prevents drying and cracking.
🥚 Step 6: Make the Egg Wash
To help seal the edges and give the turnovers a beautiful golden crust, you’ll need a quick egg wash.
How to make it:
- Crack 1 egg into a small bowl.
- Add 1 tablespoon of cream, milk, or water.
- Whisk until smooth.
Set aside with a pastry brush; you’ll need it during assembly and before baking.
🧺 Step 7: Assemble the Turnovers
Here’s where the magic happens!
Work directly on a parchment-lined baking sheet, this saves you from moving fragile, filled pastry around later.
To assemble:
- Place a square of puff pastry on the baking sheet.
- Add 2–3 tablespoons of cooled apple filling to one half of the square, staying away from the edges.
- Brush egg wash along the edges to act as glue.
- Fold the square diagonally into a triangle. If needed, gently stretch the pastry to meet the edges.
- Press the edges to seal and crimp with a fork.
Tips for perfect turnovers:
- Don’t overfill them. It’s tempting, but too much filling = leaks and bursts.
- Make sure the edges are sealed tightly.
- Crimping isn’t just for looks; it helps lock in the steam and filling.
Repeat until all 8 turnovers are assembled.
✂️ Step 8: Score, Brush, and Sprinkle
Now it’s time for the final touches before baking.
- Brush the tops of each turnover with egg wash.
- Optional but recommended: Sprinkle with sanding sugar or granulated sugar for crunch and sparkle.
- Use a sharp knife to score 2–3 slits on the top of each turnover. This lets steam escape so your pastry doesn’t explode.
Tip: Don’t skip the scoring, it’s essential for even baking and also adds that bakery-style look.
🔥 Step 9: Bake to Golden Perfection
Place the baking sheets in the preheated oven and bake at 400°F for 18–20 minutes, or until the turnovers are puffed up and golden brown.
Check around the 15-minute mark; every oven varies, and you want them golden but not overbaked.
When done, remove them from the oven and let them cool for 5–10 minutes. They’ll firm up slightly and be easier to handle.
Smells fantastic, right? That warm apple-cinnamon scent is like a hug for your senses.
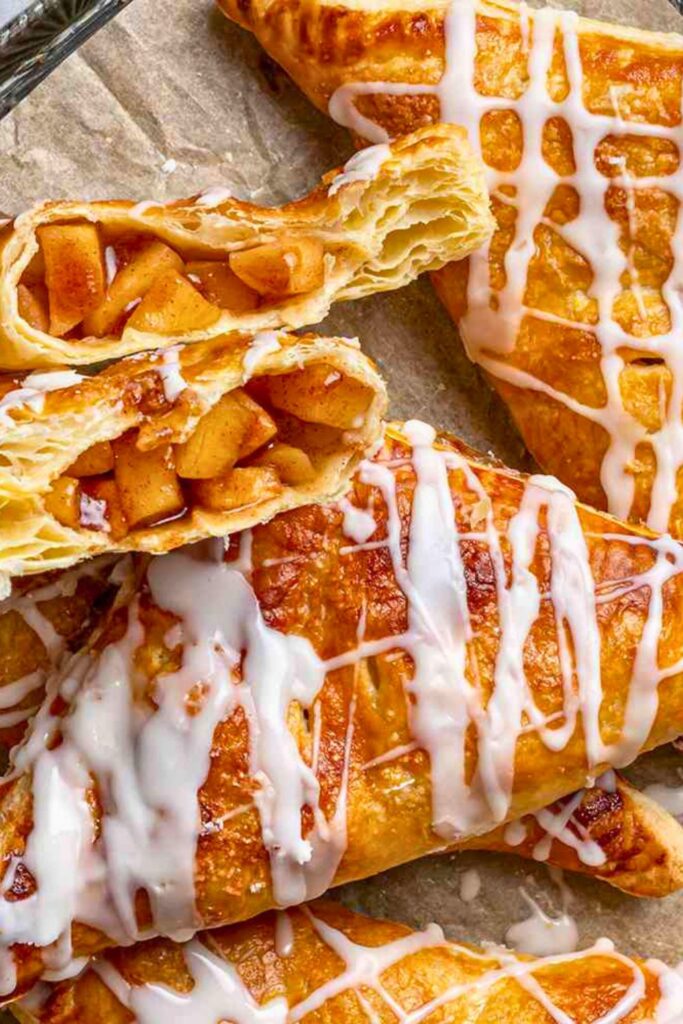
🍋 Step 10: Drizzle with Icing
Last (but never least): that sweet, tangy drizzle.
While the turnovers bake or cool, make your icing:
- Add ¾ cup powdered sugar to a small bowl.
- Stir in 1–2 tablespoons of lemon juice, vanilla extract, or water, depending on your flavor preference.
- Mix until smooth and drizzle-ready.
How to drizzle:
- Use a spoon for a rustic, messy look.
- Use a piping bag or zip-top bag with the corner snipped for more precision.
Go heavy or light, it’s your call! Just make sure to drizzle while the turnovers are slightly warm but not hot.
🧁 5 Must-Know Tips for Making Perfect Apple Turnovers

If you want apple turnovers that are bakery-worthy, crispy, and full of flavor, not soggy, leaky, or dry. These tips will help you get it right every time. These insights come straight from the recipe creator’s personal experience and are packed with practical wisdom.
1. Cool the Filling Before Assembling
Hot filling is the #1 enemy of puff pastry. If your apples are too warm when you spoon them into the pastry, the butter in the dough will melt before baking. This leads to flat, greasy turnovers instead of tall, flaky ones.
Pro Tip: After cooking the apple mixture, spread it out on a plate or baking sheet. More surface area = faster cooling. Pop it into the fridge for 10–15 minutes if you’re short on time.
2. Keep Puff Pastry Cold at All Times
Puff pastry relies on cold butter between thin dough layers. If it warms up too much before baking, the butter melts prematurely, and the layers won’t puff up as they should.
Tips to stay cool:
- Work in small batches and keep unused pastry covered.
- Roll and cut pastry quickly, then return to the fridge if needed.
- Always assemble turnovers directly on the baking sheet to avoid handling too much.
3. Crimp and Seal the Edges Properly
A good turnover shouldn’t leak while baking. To prevent filling from oozing out:
- Brush the edges with egg wash (your “glue”).
- Fold the pastry diagonally and press the edges to seal.
- Use a fork to crimp all sides; it’s decorative and functional.
Avoid thick dough at the edges, trim if necessary, so you’re not biting into a chunk of plain pastry with no filling.
4. Score the Tops to Let Steam Escape
Ever had a turnover puff up so much that it cracked or leaked from the sides? That’s what happens when steam from the filling has nowhere to go.
Use a sharp knife to make 2–3 small slits on the top of each pastry. It’s a small step with a significant impact. Plus, it makes your turnovers look fancy and professional.
5. Don’t Skimp on the Egg Wash and Sugar Topping
That gorgeous golden color and crispy crunch on top? It all comes from a quick egg wash and optional sugar sprinkle before baking.
- Egg wash = shine and color
- Sugar = texture and sparkle
If you love a sweet contrast to the buttery pastry, sanding sugar or coarse raw sugar on top is a must. It balances out the rich, warm filling inside.
🌀 Apple Turnover Variations to Try
Want to put a twist on the classic apple turnover? These easy variations let you customize your turnovers with different ingredients, flavors, and mix-ins. Perfect for seasonal vibes or personal preferences.
| Variation Name | How to Make It |
|---|---|
| Caramel Apple Turnovers | Add a drizzle of caramel sauce to the filling or over the top after baking. |
| Apple-Cranberry | Mix ½ cup dried cranberries or chopped fresh cranberries into the apple filling. |
| Apple-Pear Delight | Use 1 cup apples + 1 cup diced pears for a softer, fragrant twist. |
| Spiced Chai Apple | Add ¼ tsp each of cardamom, ginger, and cloves to the filling for warm chai flavor. |
| Savory Cheddar Apple | Add a small handful of shredded sharp cheddar cheese inside with the apples. |
| Apple Cider Glaze | Replace lemon juice with apple cider in the icing for a tangy, fall-inspired drizzle. |
| Apple-Walnut Crunch | Stir ¼ cup chopped toasted walnuts into the filling for crunch and richness. |
| Maple Apple Turnovers | Add 1 tablespoon maple syrup to the filling + maple icing instead of lemon. |
| Vegan Apple Turnovers | Use vegan butter, egg-free wash (plant milk), and a vegan-friendly puff pastry. |
| Bourbon Apple Turnovers | Add 1 tablespoon bourbon to the filling while cooking for depth and flavor. |
🍽 Final Thoughts
These apple turnovers are everything a homemade dessert should be: simple, satisfying, and packed with flavor.
Whether you’re baking them for a fall party, cozying up on a rainy day, or just craving a sweet treat, this recipe delivers in all the best ways.
And remember: even if your pastries aren’t perfect triangles or your icing drips off the side, the taste will be unbeatable.
🍏 More Cozy Apple Desserts to Try
Craving more warm and comforting apple treats? These easy recipes are perfect for busy moms, fall nights, or when you just need a simple dessert that hits the spot.
- Easy & Cozy Apple Crumble Recipe for Busy Moms
A one-bowl wonder with a buttery topping, perfect with ice cream and no fuss at all. - Easy French Apple Cake Recipe in Under 20-Min
Light, tender, and not too sweet. This rustic French treat is ideal for afternoon coffee. - The Best Apple Cobbler Recipe for Fall Nights
Juicy baked apples under a fluffy biscuit topping, pure comfort in a dish.