The Cutest 30-Min Brownie Cookies Recipe for Girls in 2026
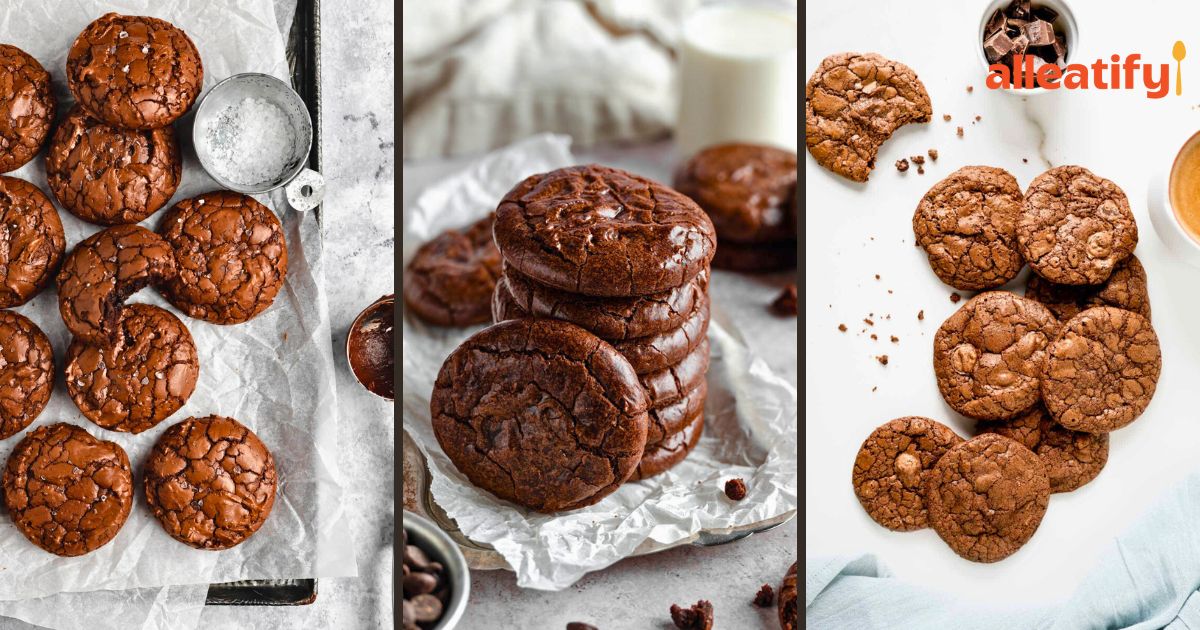
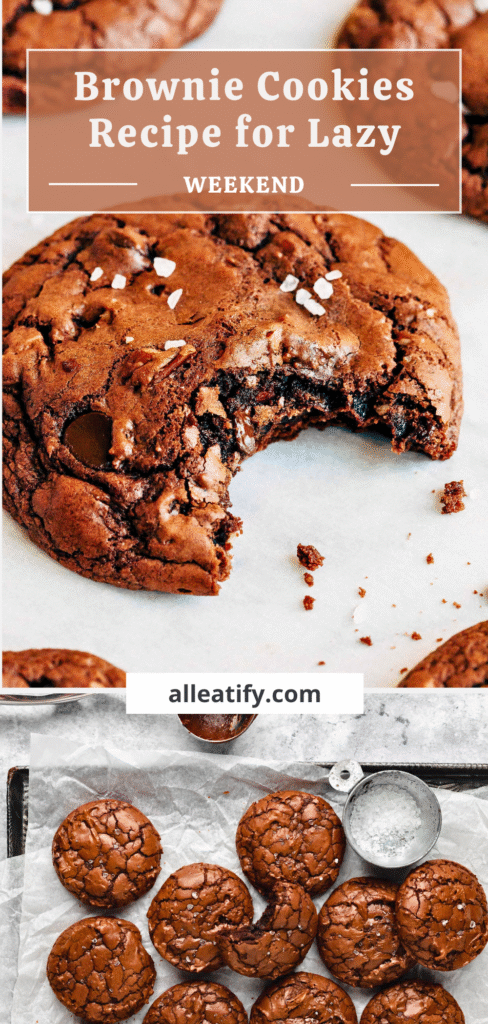
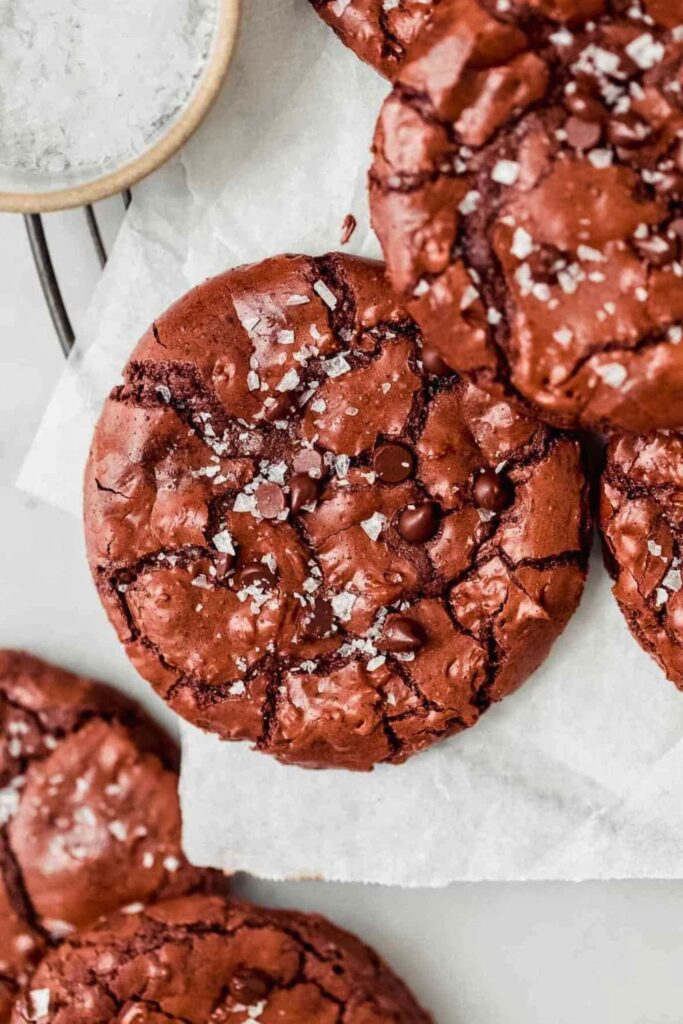
Something magical happens when a brownie meets a cookie. The smell of melting chocolate fills the air. The tops crack as they cool. One bite, and you taste the gooey center with crisp edges, pure chocolate bliss.
These aren’t just cookies. They’re brownies in disguise, rich, fudgy, and perfectly chewy.
If you’ve ever stood in your kitchen, unsure whether to bake brownies or cookies, this recipe ends that struggle. You get the best of both worlds: the shiny crackled top of a brownie and the soft chew of a cookie.
It’s simple, quick, and incredibly satisfying. Perfect for cozy nights, holiday baking, or whenever you crave chocolate comfort.
Let’s make the most decadent brownie cookies you’ll ever taste.
Ingredients You’ll Need
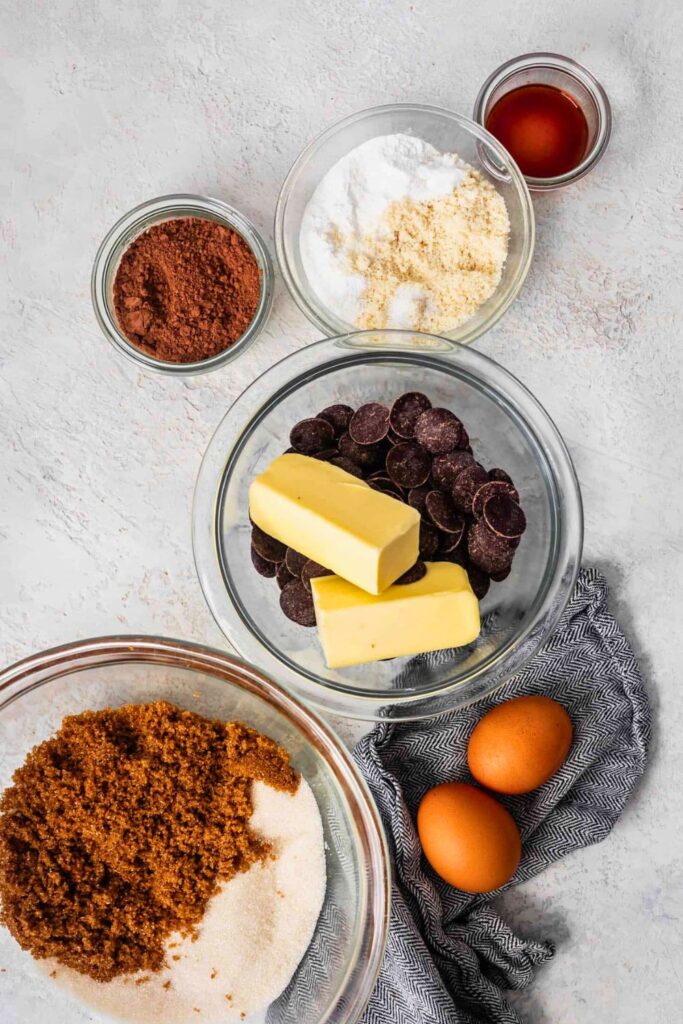
Let’s talk ingredients first. The secret to perfect brownie cookies is balance, each ingredient plays a role in creating that shiny, crackly top and fudgy center.
| Ingredient | Amount | Purpose |
| Bittersweet chocolate (bar or chips) | 4 oz (about 115 g) | Gives a deep chocolate flavor |
| Unsalted butter | ¼ cup (56 g) | Adds richness and helps chocolate melt smoothly |
| Granulated sugar | ½ cup (100 g) | Adds sweetness and structure |
| Brown sugar (light or dark) | ½ cup (110 g) | Adds moisture and caramel undertones |
| Eggs (room temperature) | 2 large | Binds and adds fudginess |
| Vanilla extract | 1 tbsp | Enhances flavor |
| All-purpose flour | ⅔ cup (80 g) | Provides structure while keeping cookies soft |
| Cocoa powder (natural or Dutch-process) | ¼ cup (25 g) | Intensifies the chocolate flavor |
| Sea salt | ½ tsp | Balances the sweetness |
| Baking powder | ½ tsp | Helps cookies puff slightly |
| Semi-sweet chocolate chips | ½ cup (90 g) | Adds texture and more chocolate bursts |
That’s it, simple, pure, and all about the chocolate.
Step-by-Step: How to Make the Best Brownie Cookies
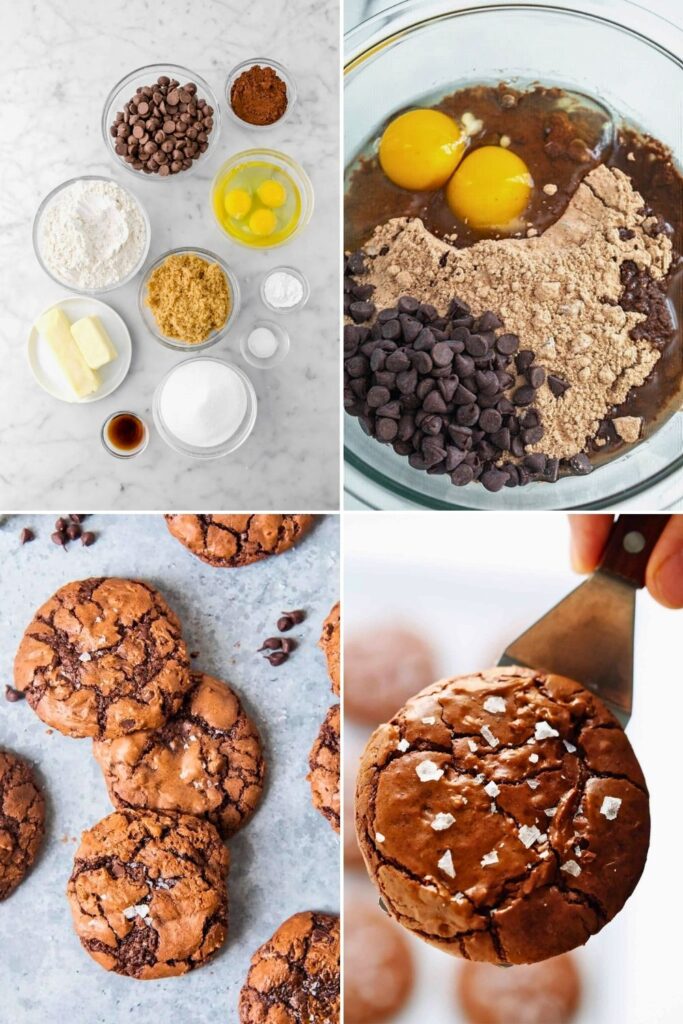
Let’s walk through the process of making rich, chewy, chocolate-packed brownie cookies from scratch. Each step is designed to achieve the perfect balance of a fudgy middle, a glossy, crackly top, and a chocolatey depth. Ready? Let’s dive in.
Step 1: Melt the Chocolate and Butter
This is where the magic begins, right at the heart of the flavor.
Start by grabbing 4 ounces of bittersweet chocolate. You have two great options here:
- A chocolate bar, which you’ll chop into small, even pieces
- Or chocolate chips, which are convenient but take a bit longer to melt
Why bittersweet? Because it delivers that deep, pure chocolate taste without being overly sweet. It’s closer to real cocoa with fewer added sugars or fats, perfect for rich cookies.
Next, add ¼ cup of unsalted butter, chopped into chunks, into the same bowl as your chocolate.
Now, gently melt this chocolate-butter combo. The best method? Microwave in 20-second intervals at 60% power, stirring between each round until the mixture turns glossy and smooth. You don’t want to rush this, as high heat can cause the chocolate to burn quickly.
Once melted, set the bowl aside. Let it cool slightly while you prep the rest. This prevents scrambling the eggs later.
Step 2: Combine Sugars, Eggs, and Vanilla
This is where texture and structure begin to form.
In a large bowl, mix:
- ½ cup (100 g) granulated sugar
- ½ cup (110 g) brown sugar – light or dark, your choice
Each sugar plays a role:
- Granulated sugar helps create a crisp edge and a sturdy structure.
- Brown sugar brings moisture, softness, and rich caramel notes.
Tip: If your brown sugar is clumpy, break it up with your hands before mixing. No one wants rock-hard sugar lumps in their cookies.
To this sugar mix, add:
- 2 large eggs, at room temperature
- 1 tablespoon of vanilla extract
Now comes the key move: beat this mixture well. Use a hand mixer or stand mixer and whisk on medium to medium-high speed for about 2–3 minutes.
Why is this so important?
- First, it dissolves the sugar into the eggs. That’s what gives your cookies that signature shiny, crackly top just like a classic brownie.
- Second, it whips air into the batter, helping the cookies puff up just the right amount in the oven.
If you skip this step or under-mix, the cookies may come out dull or overly dense. So mix with love!
Step 3: Mix in the Melted Chocolate
Now, take your cooled chocolate-butter mixture and slowly pour it into the whipped sugar, egg, and vanilla mix.
Beat or fold gently until everything is beautifully combined. You’ll see the color darken and the batter become thick, shiny, and rich in chocolate. It almost looks like silky brownie frosting at this stage!
Don’t forget to scrape down the sides and bottom of the bowl with a spatula. You want every bit of chocolate goodness evenly incorporated.
This is when you start to smell the chocolate dreams coming to life.
Step 4: Sift and Add Dry Ingredients
Here’s where structure meets flavor.
Place a bowl or sifter on your scale (if you’re using one), zero it out, and add:
- ⅔ cup (80 g) all-purpose flour
- ¼ cup (25 g) cocoa powder – natural or Dutch-process, both work
- ½ teaspoon baking powder
- ½ teaspoon sea salt
Let’s pause on the cocoa powder for a moment.
- Natural cocoa is more acidic and may provide a more pronounced lift.
- Dutch-process cocoa is smoother and darker. Choose your favorite!
Sifting is a smart move here. Cocoa powder tends to clump up, and no one wants a surprise bitter lump in their cookie. Push the dry mix through your sifter or use a whisk to break it up evenly.
Once sifted, gently fold the dry ingredients into the chocolate base using a spatula.
Go slow. Stop mixing as soon as you see the last few streaks of flour. Overmixing can toughen your cookies.
The dough will continue to thicken at this point, which is a good sign.
Step 5: Add Chocolate Chips
Just when you thought things couldn’t get more chocolatey, enter the chocolate chips.
Toss in ½ cup (90 g) of semi-sweet chocolate chips and gently fold them into the dough.
These little gems will melt into gooey pockets as the cookies bake, adding an extra layer of richness to every bite.
By the time you’re done folding, any streaks of flour should disappear completely, and the dough should look thick, glossy, and ready for its nap (yes, a nap is coming up next).
Step 6: Chill the Dough
Before you reach for the cookie scoop, stop and let the dough chill.
Cover the bowl tightly with plastic wrap and place it for at least 30 minutes.
Why does this matter?
- Chilling gives the butter and chocolate time to firm up.
- It prevents the cookies from spreading too much while baking.
- It helps concentrate the flavors and enhances the texture.
If you skip this step, you’ll likely end up with flat, sad puddles instead of chewy, fudgy perfection.
Planning? Chill overnight or freeze the dough in scooped portions for even more flexibility.
Step 7: Scoop and Bake
While your dough chills, preheat your oven to 350°F (175°C).
Line a baking sheet with parchment paper or a silicone baking mat.
Using a medium cookie scoop (about 1½ to 2 tablespoons), scoop the dough and place each cookie mound about 3 inches apart on the baking sheet. These cookies spread slightly, so allow them room to expand.
Bake in the center of the oven for 10 to 12 minutes, depending on your oven and desired texture.
Watch for these visual signs:
- The tops will be shiny and crackled.
- The edges will look set, but the centers may still look slightly underbaked.
Don’t overbake! They’ll continue cooking from residual heat after you take them out.
Let them cool on the baking sheet for 5 minutes, then transfer to a wire rack to cool fully.
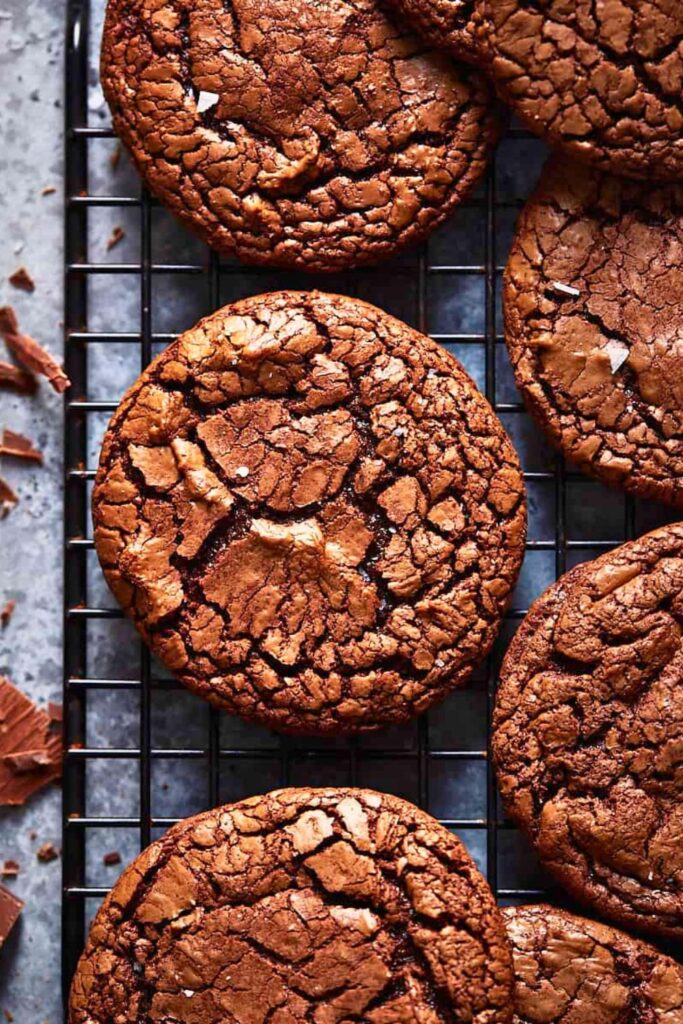
Step 8: Enjoy the Magic
This is the moment you’ve been waiting for.
As the cookies cool, their centers firm up just enough to hold together while staying soft and gooey inside. Bite in and you’ll get:
- A lightly crisp, shiny crust on the outside
- A molten, fudge-like interior
- Melty chocolate chips that explode with flavor
Pair them with a cold glass of milk, a warm espresso, or your favorite holiday drink.
These brownie cookies aren’t just a treat; they’re a little luxury in every bite. Once you try them, they might just become your go-to dessert for holidays, birthdays, or midnight snack runs.
5 Tips for Perfect Brownie Cookies
Even a simple recipe like brownie cookies has a few golden rules. These tips ensure you nail that fudgy center, crackly top, and rich flavor every single time:
1. Use Good-Quality Chocolate
This isn’t the time for bargain-bin chocolate. A high-quality bittersweet chocolate bar melts more smoothly than chips, creating a deeper, more complex flavor. The purer the chocolate, the richer your cookies will be.
2. Whip the Eggs and Sugars Thoroughly
That signature shiny top? It comes from dissolving the sugars in the eggs. Beat them until pale and glossy. This step also adds air, helping your cookies puff just enough.
3. Don’t Skip the Chill
Your dough needs to be refrigerated for at least 30 minutes. Skipping this step leads to thin, overspread cookies. Chilling firms the fats, helps flavor develop, and makes for a gooier center.
4. Weigh Your Dry Ingredients
Too much flour can ruin the texture. Use a kitchen scale whenever possible, especially for measuring flour and cocoa powder. That’s how you keep them chewy, not cakey.
5. Watch the Bake Time
Remove cookies when the edges are set but the centers are still soft. They’ll continue to cook from residual heat. Overbake, and you lose the gooey magic!
Flavor Variations to Try
Here’s a table of creative brownie cookie twists you can try. Each adds a new personality to the classic recipe:
| Variation Name | What to Add |
| Peppermint Bliss | Fold in crushed candy canes and top with a drizzle of white chocolate |
| S’mores Dream | Add mini marshmallows, graham cracker chunks, and chocolate chunks |
| Espresso Boost | Mix in 1 tsp of instant espresso powder to deepen the chocolate flavor |
| Peanut Butter Crater | Press mini peanut butter cups in the center before baking |
| Nutty Delight | Add ½ cup of chopped walnuts, pecans, or hazelnuts for crunch |
| Salted Caramel Swirl | Drizzle in caramel and sprinkle with flaky sea salt before baking |
| Double Chocolate Chunk | Replace chips with chopped dark chocolate chunks for a luxe bite |
| Raspberry Ripple | Swirl in raspberry jam for a fruity contrast |
| Coconut Brownie Cookies | Mix in shredded coconut and a dash of coconut extract |
| Mocha Hazelnut Heaven | Add espresso + hazelnuts + chocolate-hazelnut spread swirl |
Serving Ideas
1. Cookie Ice Cream Sandwiches
Scoop vanilla or salted caramel ice cream between two brownie cookies. Freeze briefly for a firm bite. Perfect summer treat or party hit!
2. Holiday Dessert Board
Serve alongside peppermint bark, sugar cookies, and chocolate truffles. These cookies bring the deep, fudgy element that balances festive trays.
3. Warm & Gooey with Ice Cream
Top a freshly baked cookie with a scoop of vanilla ice cream and a drizzle of hot fudge. It’s like a personal skillet brownie… but better.
4. Gift Jar Treats
Stack cooled cookies in a mason jar, tie them with a ribbon, and gift them to friends, teachers, or neighbors. Add a tag that says “Homemade Chocolate Hugs.”
5. Midnight Snack with Milk
Late-night cravings? Warm a cookie for 10 seconds and dunk it into cold milk. Comfort in every bite.
Healthier Twists (If You Must!)
While these brownie cookies are meant to be indulgent, there are ways to lighten things up just a little:
- Swap half the butter with unsweetened applesauce or mashed avocado. It cuts fat and adds moisture.
- Use dark chocolate (70–85%) to reduce sugar and increase antioxidants.
- Reduce sugar by ¼ cup or use coconut sugar for a lower glycemic index option.
- Try using whole wheat pastry flour in place of all-purpose flour. It keeps cookies soft but adds fiber.
- Add chia or flaxseed (1 tbsp) to boost fiber and omega-3s.
They won’t taste like a salad, but they’ll still be fudgy enough to satisfy.
Conclusion: A Cookie Worth Falling For
There’s something magical about these brownie cookies. They bridge two dessert worlds perfectly, chewy, fudgy, chocolate-packed, and beautifully simple.
You don’t need fancy equipment or pastry-chef skills, just good ingredients, a little patience for the chill, and a love of chocolate.
Every bite feels like a reward, every batch a small celebration. So the next time you can’t decide between a brownie or a cookie… don’t. Bake these instead.
Once you do, you’ll never go back to choosing sides again.
More Chocolate-Lover Favorites You’ll Enjoy
Looking for more soft, chewy, and festive cookie recipes to add to your baking list? Try these next, each one is tested, delicious, and made for cookie lovers like you:
- 🍪 Quick 25-Min Peanut Butter Blossom Cookies Recipe: Soft peanut butter cookies topped with a chocolate kiss for that perfect holiday charm.
- 🎉 Easy & Chewy Monster Cookies Recipe You’ll Love: Packed with oats, chocolate chips, and peanut butter for a chewy, kid-friendly treat.
- ❤️ Quick & Easy Thumbprint Cookies Recipe for Christmas: Buttery, jam-filled cookies that look stunning on any dessert table.