Easy & Chewy Monster Cookies Recipe You’ll Love in 2026
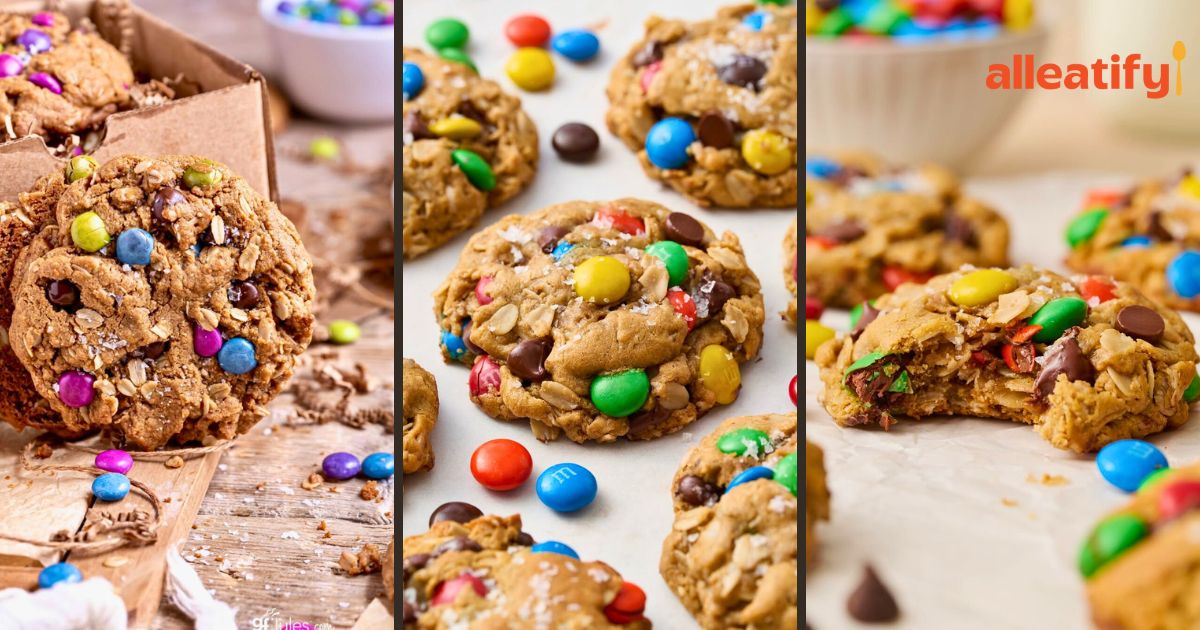
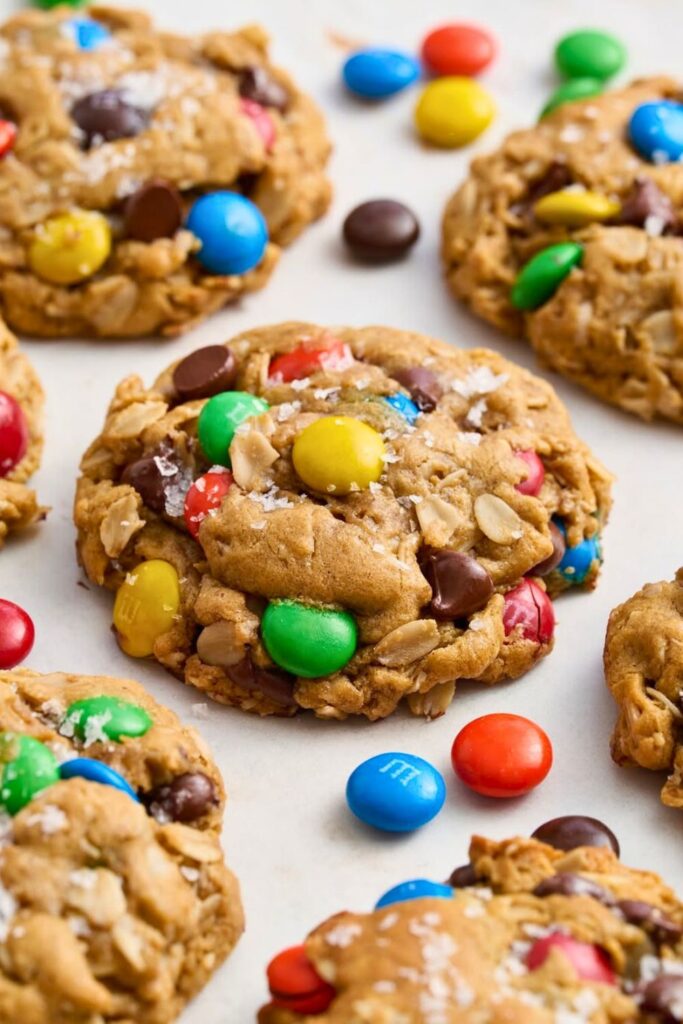
If there’s one cookie that perfectly blends nostalgia, fun, and flavor, it’s the Monster Cookies. A colorful, chewy, peanut butter-packed treat loaded with oats, chocolate chips, and M&Ms.
These cookies are soft on the inside, slightly crisp on the edges, and full of personality. Whether you’re baking for kids, planning a party, or just need something to brighten your weekend, Monster Cookies are your go-to.
So grab your mixing bowl, preheat the oven, and get ready to make the most delicious homemade Monster Cookies in under an hour. Let’s dive in.
What Are Monster Cookies & Why You’ll Love Them
Monster Cookies are the ultimate mash-up of your favorite cookie worlds: peanut butter cookies, oatmeal cookies, and chocolate chip cookies. All baked into one irresistible treat.
They’re called Monster Cookies, not because they’re scary, but because they’re “monstrously good” and often baked in huge, hearty portions.
The story goes that a baker once ran out of flour while making cookies. Instead of giving up, he threw in oats, peanut butter, and whatever mix-ins he had, like chocolate chips and candies. The result? A monstrously large batch of delicious cookies that became an instant classic.
Over time, Monster Cookies evolved into what we love today: chewy, soft-centered cookies with crispy edges, bursting with colorful M&Ms, oats, and peanut butter goodness.
Every bite feels like a flavor explosion: creamy, nutty, chocolatey, and slightly crunchy from the oats and candy shells.
You’ll love these cookies because they’re:
- Easy to make with pantry staples.
- Fun and colorful, perfect for kids or holidays.
- Soft, chewy, and packed with texture from oats and candy pieces.
- Freezer-friendly and customizable, add nuts, swap out candies, or make them gluten-free.
These are the kind of cookies that make your kitchen smell cozy and your heart feel happy.
Ingredients You’ll Need
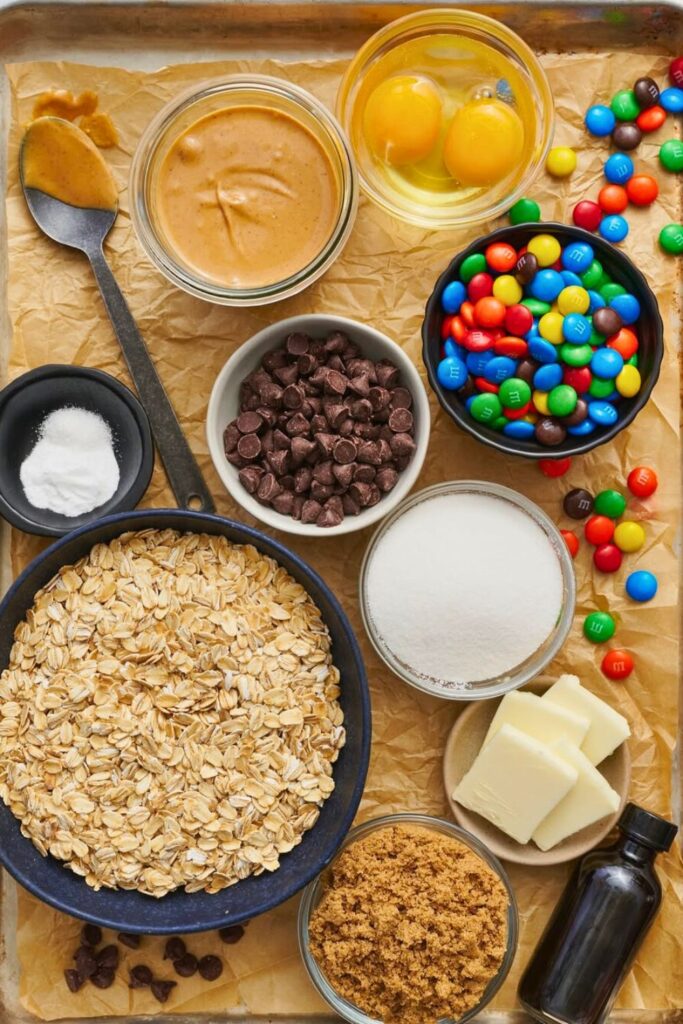
| Category | Ingredient | Amount | Notes & Tips |
| Dry Ingredients | All-purpose flour | 1½ cups (180g) | Helps bind the oats and peanut butter together |
| Salt | ½ teaspoon | Balances sweetness and enhances flavor | |
| Baking soda | ¾ teaspoon | Helps cookies rise and stay soft | |
| Old-fashioned oats | 1 cup (90g) | Gives chewy texture and hearty flavor | |
| Wet Ingredients | Unsalted butter (room temp) | 1 cup (226g) | Should be soft enough to press with a finger, but not melted |
| Creamy peanut butter | 1 cup (250g) | Use regular peanut butter (not oily or natural unless well-stirred) | |
| Light brown sugar | ¾ cup (165g) | Adds moisture and a caramel note | |
| Granulated sugar | ⅔ cup (133g) | Controls spread and balances sweetness | |
| Eggs | 2 large | Add one at a time for smooth mixing | |
| Vanilla extract | 1 teaspoon | Brings a warm, bakery-style aroma | |
| Mix-Ins | Semi-sweet chocolate chips | ½ cup | For gooey chocolate pockets |
| M&Ms or candy-coated chocolates | 1 cup | Adds color, crunch, and fun for kids |
💡 Tip: If using natural peanut butter, stir thoroughly before measuring and add an extra pinch of salt to balance the flavor.
How to Make Monster Cookies (Step-by-Step Guide)
Ready to whip up the softest, chewiest, peanut-butteriest Monster Cookies ever? This step-by-step guide breaks it all down in a simple, no-fuss way from preheating your oven to taking that first glorious bite. Let’s dive into the delicious details.
Step 1: Preheat and Prep
Before you even think about mixing, do one crucial thing: preheat your oven to 350°F (175°C).
You want it hot and ready to go by the time your cookie dough is scooped. This temperature yields golden edges with soft, chewy centers, achieving cookie perfection.
While the oven warms up, line your baking sheets with parchment paper or silicone mats. This step makes cleanup easier and helps prevent sticking or overbrowning.
Step 2: Combine the Dry Ingredients
In a large mixing bowl, add the following:
- 1½ cups all-purpose flour
- ½ teaspoon salt
- ¾ teaspoon baking soda
Give it a good whisk to combine. These ingredients control the structure and spread of your cookies. Salt balances sweetness, baking soda adds lift, and flour provides the base.
Now comes the heart of the monster: 1 cup of old-fashioned oats. Stir them in so they’re evenly distributed. These oats are the chewy surprise that makes Monster Cookies stand out from regular chocolate chip cookies.
Tip: Oats absorb moisture over time, which also helps the cookies stay soft for longer.
Once mixed, set this bowl aside. We’ll come back to it after we handle the wet ingredients.
Step 3: Cream the Butter and Peanut Butter
In the bowl of a stand mixer (or large bowl with a hand mixer), add:
- 1 cup (2 sticks) unsalted butter, at room temperature
- 1 cup creamy peanut butter
Creaming refers to the process of beating the two ingredients together until they are smooth, light, and fluffy. Start on a low speed, then increase to medium speed. This step usually takes 1–2 minutes.
Why room temperature butter? It creates a smooth, creamy mixture without lumps and blends better with sugar later.
You want your butter to be soft enough to press with your finger and leave an indent, but not so smooth that it’s melty. If it’s too cold, the mixture won’t whip correctly.
Once smooth, scrape down the sides and bottom of the bowl to ensure everything’s mixed well before proceeding.
Step 4: Add the Sugars
Next up: the sweet stuff.
- ¾ cup light brown sugar (165g)
- ⅔ cup granulated sugar (133g)
Crumble the brown sugar in with your hands to break up any lumps. Brown sugar is moist and tends to clump. The brown sugar brings molasses-like caramel notes and a chewy texture.
The granulated sugar keeps things structured and prevents the cookies from spreading too much.
Beat the sugar into the peanut butter-butter mix for about 3 minutes on medium speed, or until light and fluffy.
Scrape down the bowl again. You’ll notice the color gets paler and the texture more airy; that’s your cue that it’s ready.
Step 5: Mix in the Eggs and Vanilla
Crack 2 large eggs into a separate bowl (just to avoid any rogue shell pieces) and add them to the mixer one at a time.
Let the first egg mix in fully before adding the second. This helps the dough stay smooth and prevents it from curdling or breaking.
Once both eggs are mixed in, add 1 teaspoon of vanilla extract for that classic warm cookie flavor.
Observation: Thanks to the peanut butter, this dough stays creamy and cohesive even after the eggs are added, unlike some cookie batters that separate or look curdled.
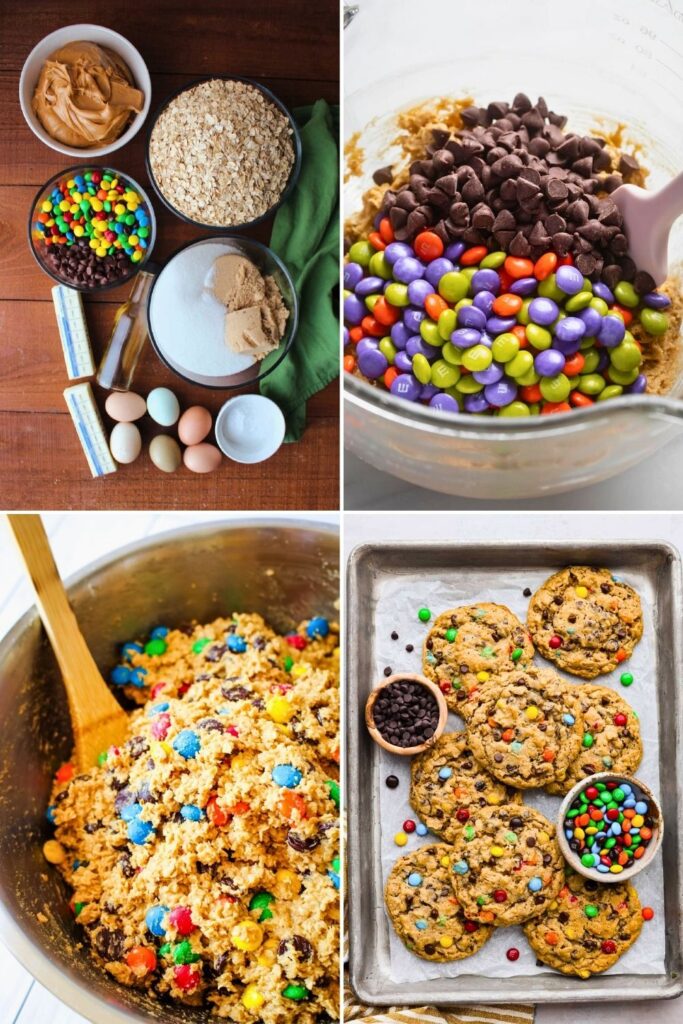
Step 6: Combine Wet and Dry Mixtures
Now reduce your mixer speed to the lowest setting. Slowly add the dry mixture (flour, salt, baking soda, oats) to your wet ingredients.
Do this gradually, don’t dump it all in at once. Mix until the flour is just barely incorporated. The dough will look a little rough, with streaks of flour still visible; that’s precisely what you want.
Why not thoroughly mix it here? Because we still have our mix-ins to add, and they’ll finish the job. Overmixing now would make the cookies tough.
Step 7: Add the Fun Stuff – Mix-Ins!
Here’s where things get exciting. Stir in:
- ½ cup semi-sweet chocolate chips
- 1 cup M&Ms (or other candy-coated chocolate pieces)
The combo of gooey chocolate chips and crunchy candy shells is what makes Monster Cookies magical. Each bite is vibrant, sweet, and packed with texture.
Start the mixer on low speed for 2–3 seconds to evenly distribute the ingredients. Then stop and grab a spatula. Gently finish folding by hand.
Make sure to scrape the bottom; sometimes clumps of peanut butter hide down there.
Bonus Tip: Want to switch it up? Use peanut butter chips, white chocolate chunks, chopped mini peanut butter cups, or even sprinkles.
Step 8: Scoop and Chill
Using a 2-tablespoon cookie scoop, scoop the dough onto your prepared baking sheets. Leave about 2 inches between cookies; they’ll spread slightly in the oven.
Now for a bit of patience: chill the dough in the fridge for at least 20 minutes.
Why chill?
- Helps control the spread
- Deepens the flavor
- Gives you that thick, bakery-style texture
If you’re prepping ahead, you can chill the dough up to 72 hours, or freeze the dough balls for even longer storage.
Step 9: Add Extra Toppings
Before baking, make your cookies look as good as they taste.
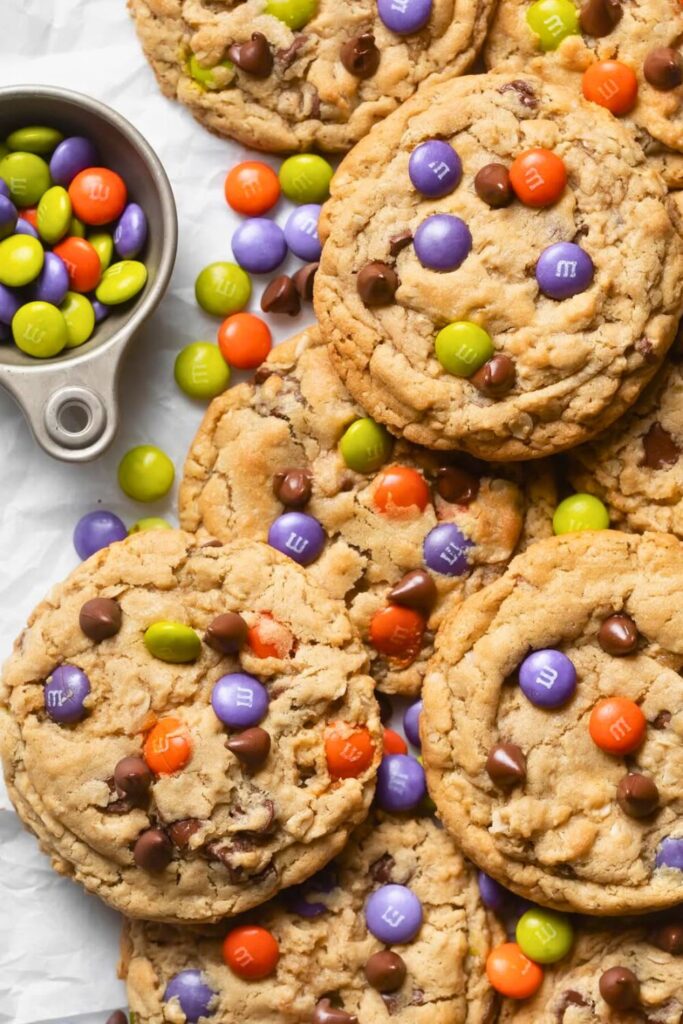
Press a few extra chocolate chips and M&Ms onto the tops of each dough ball. This gives them that Pinterest-worthy finish, colorful, glossy, and irresistible.
Visual Tip: Use mini M&Ms for an even more vibrant burst of color across the top.
Step 10: Bake the Cookies
Once chilled, bake your Monster Cookies at 350°F (175°C) for 10–12 minutes.
Here’s what to watch for:
- Edges: light golden brown
- Centers: still soft, slightly underdone-looking
That’s your sweet spot! They’ll continue to firm up as they cool.
Important: Don’t overbake. You want them soft, not crunchy.
Let the cookies cool on the baking sheet for about 5 minutes before moving them to a wire rack. This helps them stay together without falling apart.
Step 11: Cool and Enjoy
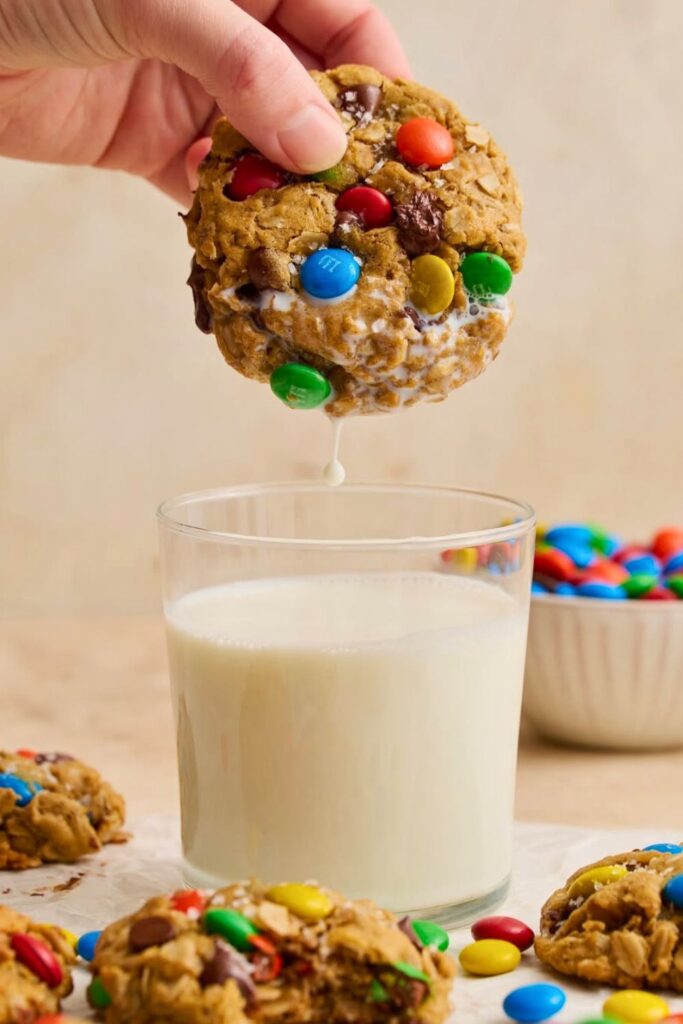
Now comes the best part, the taste test.
Your kitchen smells like warm peanut butter and melty chocolate. The cookies have crispy edges, gooey centers, and those colorful candy shells that crack just right when you bite in.
Take one, take two, hide a few for yourself before they disappear.
Whether you enjoy them with a cold glass of milk, serve them at a holiday party, or sneak one as a midnight snack, these Monster Cookies deliver comfort and joy in every single bite.
Variations to Try
Monster Cookies are endlessly adaptable! Whether you’re looking to match a holiday theme, tweak the flavor, or make them a little healthier, here are some creative versions to try:
| Variation Name | Key Changes | Flavor & Texture Highlights | Perfect For |
| Classic Monster Cookies | Keep the original mix: peanut butter, oats, chocolate chips, and M&Ms | Chewy, nutty, colorful, and perfectly balanced | Everyday baking or lunchbox treats |
| Double Chocolate Monster Cookies | Replace ¼ cup of flour with cocoa powder and add dark chocolate chunks | Deep, rich chocolate flavor with gooey centers | Chocolate lovers |
| Peanut Butter Lovers’ Edition | Add peanut butter chips and drizzle with melted peanut butter | Creamy and indulgent, with an extra nutty finish | Kids or peanut butter fans |
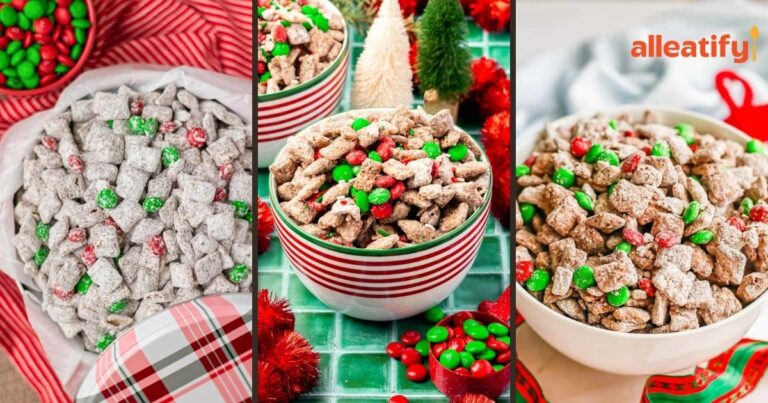
| Holiday Monster Cookies | Use red and green M&Ms, or themed candies for each holiday | Festive, colorful, and cheerful | Christmas, Easter, or Valentine’s Day |
| Healthy Twist | Substitute half the butter with unsweetened applesauce, and use whole-wheat flour | Slightly softer, less sweet, and hearty | Everyday snacking or post-workout treat |
| Salty-Sweet Version | Sprinkle sea salt on top before baking | Perfect flavor contrast; elevates the peanut butter and chocolate | Dessert platters or gifting |
| Nutty Crunch Mix | Add ½ cup chopped pecans, walnuts, or almonds | Extra crunch and depth of flavor | Cookie swap parties or bake sales |
💡 Tip: Any of these variations can be made gluten-free by using certified gluten-free oats and a 1:1 gluten-free flour blend.
5 Expert Baking Tips
Even a simple cookie recipe can turn out extraordinary when you follow a few pro tips. These expert-approved secrets help ensure your Monster Cookies come out chewy, thick, and bakery-perfect every time.
- Measure with precision. Cookies are a delicate balance of fat, sugar, and flour. Always use a kitchen scale or level your measuring cups to ensure consistent results and avoid dense or dry cookies. Even an extra tablespoon of flour can completely change the texture.
- Don’t skip chilling the dough. Chilling solidifies the fat, allowing the oats to absorb moisture. This means less spreading in the oven and a thicker, chewier cookie. Even a short 20-minute chill makes a big difference.
- Start with room-temperature ingredients. Soft butter and eggs mix evenly, trapping air in the dough. This creates a smoother, more uniform texture. Cold butter can cause lumps, and freezing eggs can seize the fat.
- Avoid overmixing once the flour is added. Overmixing develops gluten, which makes cookies tough instead of tender. Stop as soon as the streaks of flour disappear, and the mix-ins will finish the blending naturally.
- Pull cookies out before they look done. They should appear slightly underbaked in the center. Residual heat will finish the job as they cool, locking in that signature soft-chewy bite every baker dreams of.
Follow these five tips, and your Monster Cookies will turn out perfect every single batch.
Serving Ideas
Monster Cookies aren’t just delicious on their own; they’re versatile enough to serve in all kinds of creative ways. Here are a few ideas to make them the star of your dessert lineup:
- Classic and Simple: Serve warm with a cold glass of milk – it’s a timeless combination that never fails.
- Cookie Sandwiches: Spread vanilla or peanut butter frosting between two cookies for an indulgent treat.
- Ice Cream Sundae Topping: Crumble cookies over vanilla or chocolate ice cream. The mix of warm and cold textures is divine.
- Holiday Platters: Stack them with festive candies or tie a few together with ribbon for edible Christmas gifts.
- After-School Snack: Pair one cookie with a handful of fruit or nuts for an energy-boosting mini meal.
- Party Dessert Bar: Offer them alongside brownies, cupcakes, and mini cheesecakes for a colorful dessert spread.
- Crumble Parfait: Layer crushed Monster Cookies with whipped cream and chocolate pudding in a glass for an easy no-bake dessert.
Conclusion: Bake the Joy
Monster Cookies aren’t just dessert; they’re a burst of happiness baked into every bite. They’re the kind of cookies that make your home smell cozy, your heart warm, and your family smile.
Whether you bake them for Christmas, birthdays, or just because it’s Tuesday, one thing’s for sure: these cookies never disappoint. So, preheat the oven, grab your spatula, and get ready to bake the most delicious, chewy, and colorful Monster Cookies of your life.
Because life’s too short not to have a slight color (and peanut butter) in your cookies.
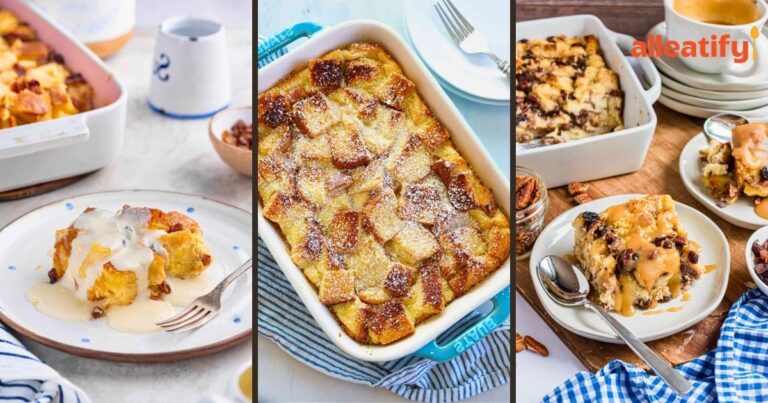
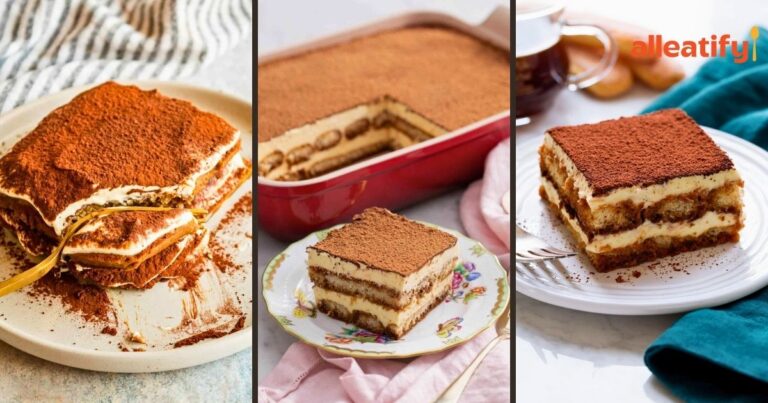
More Sweet Recipes to Try
Looking for more soft, chewy, and chocolate-packed dessert ideas? Here are a few homemade classics you’ll love next:
- 🍪 Homemade Peanut Butter Balls Recipe in 35-Min: creamy, chocolate-coated no-bake bites that melt in your mouth.
- ❤️ 15-Min Prep Red Velvet Cookies Recipe for Holidays: rich, vibrant, and perfect for festive cookie boxes.
- 🌸 Quick 25-Min Peanut Butter Blossom Cookies Recipe: the ultimate peanut-chocolate combo topped with a Hershey’s Kiss.