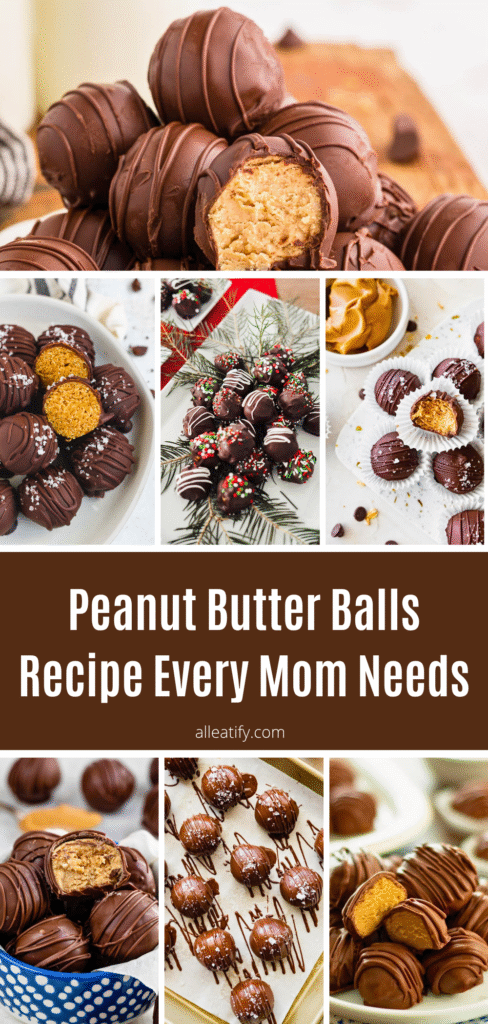
Homemade Peanut Butter Balls Recipe in 35-Min (2026)
There’s something magical about the holiday season. The air feels warmer, even when it’s cold outside, and every kitchen seems to smell like butter, sugar, and nostalgia.
If you’re looking for a dessert that captures that feeling perfectly, these no-bake peanut butter balls are exactly what you need.
They’re sweet, creamy, and just a little bit crunchy, everything you could want in a bite-sized treat. My grandma used to make these every Christmas, and now they’re a family staple.
The best part? They’re ridiculously easy to make. No oven, no fuss, just pure joy in every chocolate-coated bite.
Let’s get rolling (literally).
Why Peanut Butter Balls Are Good for You
While peanut butter balls are definitely a treat, they offer some surprising benefits when enjoyed in moderation.
Made with real ingredients and a balance of fats, protein, and carbohydrates, these bite-sized sweets give you an energy boost and satisfy cravings without going overboard.
Here’s why they’re better than your average candy:
- Rich in Protein: Peanut butter provides a natural source of plant-based protein, helping you feel full longer and supporting muscle health.
- Healthy Fats: The combination of peanut butter and a touch of butter offers heart-healthy monounsaturated fats that keep you energized.
- Quick Energy Boost: Powdered sugar and rice cereal add fast-digesting carbs, perfect for a quick pick-me-up during busy holiday prep.
- Mood-Lifting Ingredients: Peanut butter’s natural magnesium can help reduce stress and improve your mood during festive chaos.
- Portion Control Friendly: Since they’re small and rich, one or two balls can satisfy your sweet tooth without overindulgence.
In short, peanut butter balls strike that ideal balance between indulgence and nourishment. They’re sweet enough to feel special, yet wholesome enough to keep you going through the season’s hustle.
Ingredients You’ll Need
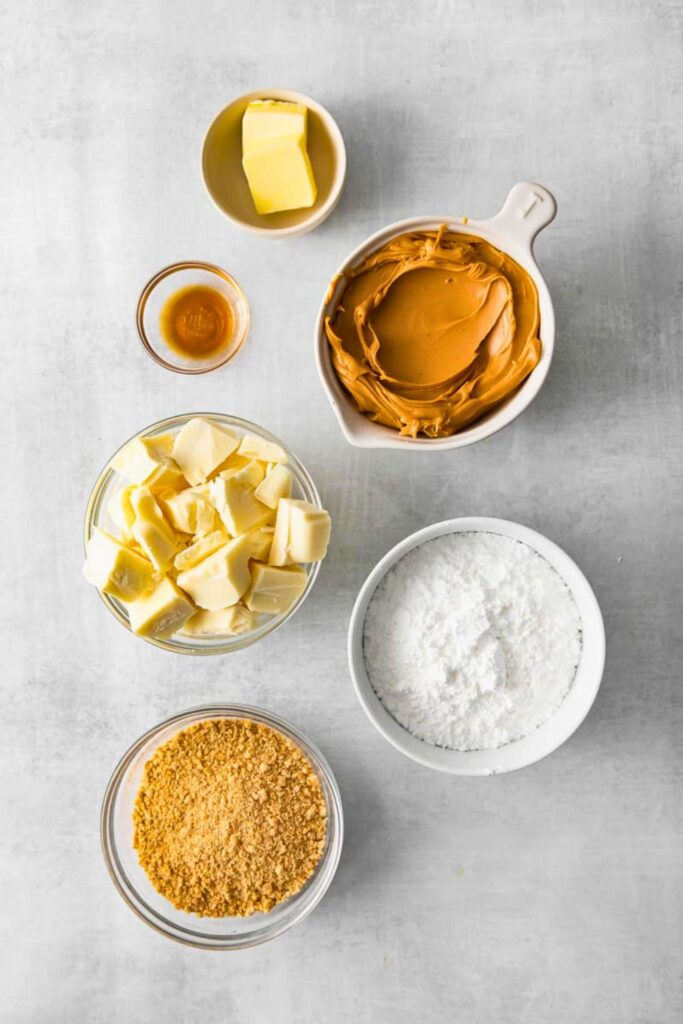
| Ingredient | Amount | Purpose / Notes |
| Creamy peanut butter | 1 cup | The base — rich, nutty flavor and smooth texture. |
| Unsalted butter | ½ cup (melted) | Helps soften the peanut butter and blend easily. |
| Vanilla extract | 1 teaspoon | Enhances flavor and adds warmth. |
| Powdered sugar | 2–3 cups (as needed) | Sweetens and firms the mixture into dough. |
| Rice Krispies cereal | 1½ cups | Adds crunch and airy texture. |
| Chocolate chips | 2 cups | For coating, choose semi-sweet or dark chocolate. |
| Coconut oil | 1 tablespoon | Smooths and thins melted chocolate for dipping. |
| Flaky sea salt (optional) | Pinch per ball | Balances sweetness and gives a gourmet touch. |
This combination of simple, pantry-friendly ingredients creates the perfect mix of creamy, crunchy, and chocolatey, making every bite unforgettable.
How to Make Peanut Butter Balls (Step-by-Step)
Making peanut butter balls is a fun and rewarding experience, one that fills your kitchen with the scent of the holidays and brings joy to your home. Let’s walk through each step in detail so you know exactly what to expect, from start to finish.
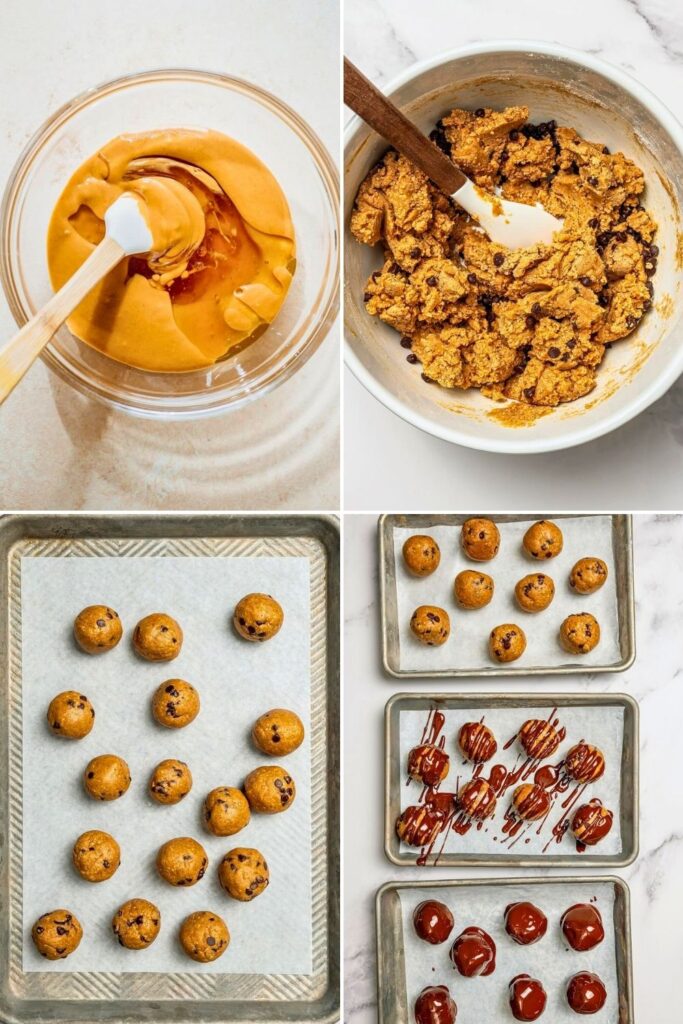
Step 1: Mixing the Peanut Butter Base
Let’s start by creating a creamy, flavorful base that will be the heart of your peanut butter balls.
Grab a large mixing bowl. Scoop in your creamy peanut butter; no need to go fancy here; just the standard all-purpose variety works best.
If you’ve ever tried to scrape peanut butter from a jar, you know it can be a messy job. It sticks to the spoon, the bowl, your fingers, everything. But hang in there; it’s worth it.
Now, pour in your melted butter. Ensure it’s still warm, but not piping hot. The melted butter helps soften the peanut butter, making it easier to stir and blend. It’s like giving your mixture a warm hug; it melts the tension (and the peanut butter) right away.
Finally, add a splash of vanilla extract. It might not seem like a big deal, but trust me, vanilla enhances the flavor and brings everything together.
It cuts through the heaviness of the peanut butter and adds a soft, sweet aroma.
Gently stir this mixture to start combining the ingredients. You don’t need a mixer yet. Use a sturdy spoon or spatula and stir until the mixture begins to look creamy and smooth.
Tip: If you find the peanut butter hard to stir, microwave it for 10 seconds to soften.
Step 2: Sweeten It Up with Powdered Sugar
Here’s where things get interesting.
Start adding powdered sugar slowly. Don’t dump the whole bowl in at once unless you want to see a puff of sugar float into the air and land all over your counters (we’ve all done it). Add about a cup at a time, stirring after each addition.
As you mix, you’ll notice a significant change. The mixture will go from soft and creamy to thick, almost like cookie dough. That’s precisely what you want.
Why powdered sugar? It gives the mixture structure. Without it, you’d have a gooey mess that doesn’t hold its shape. But with it? You get that perfect, firm yet smooth texture that’s essential for shaping into balls.
You can mix by hand, but a hand mixer works wonders at this stage. Just be careful, the sugar will puff up a bit when you start. Mix on low speed until the mixture comes together.
Keep adding sugar until the dough pulls away from the sides of the bowl and holds its shape. It should feel slightly crumbly, not sticky.
Think of this stage as transforming your peanut butter into candy.
Step 3: Add the Crunch with Rice Cereal
Now it’s time to add some texture. This is what sets these peanut butter balls apart from the denser “buckeye” style.
Add in your Rice Krispies cereal. Pour it over the peanut butter dough and begin gently folding it in.
At first, you might think, “This is going to crush all the cereal!” And yes, some of it will break; that’s okay. The goal isn’t to keep every flake perfectly whole. You want the overall texture to be airy and light, not dense or pasty.
Why cereal? It adds a little crunch, a touch of lightness, and a fun contrast to the creamy peanut butter.
Use a spatula, your hands, or the mixer on low speed to combine all the ingredients. Be patient, it takes a bit of work to distribute the cereal evenly.
By the end, you’ll have a firm, crunchy, peanut-buttery dough that’s ready to be shaped.
Step 4: Rolling the Peanut Butter Balls
Here comes the most satisfying part: rolling them into bite-sized balls.
You can use a small cookie scoop, a melon baller, or just a spoon to portion out the dough. Try to make them uniform in size for even coating and a polished presentation. About one inch in diameter is perfect for two bites of creamy goodness.
Now roll each scoop between your palms to shape it into smooth balls. As you go, you might notice the dough starts to feel a little sticky; that’s totally normal. Your hands warm up the dough, and the peanut butter softens a bit.
Pro tip: Dip your hands in a bit of powdered sugar instead of using butter or oil. It keeps things dry and makes the rolling easier without altering the texture.
Place each ball onto a parchment-lined baking sheet as you finish. You’ll want a single layer, with a bit of space between each.
You’re getting close now, they’re already starting to look like little treats!
Step 5: Chill Before Dipping
Before you dip these beauties in chocolate, they need a chill.
Pop the baking sheet into the freezer for 15–20 minutes. This helps firm up the balls so they don’t fall apart or get too soft during the dipping process.
Cold peanut butter balls hold their shape better when coated in warm, melted chocolate. Additionally, the chilling helps the chocolate set faster once dipped, resulting in a beautiful, glossy finish with minimal mess.
You don’t want them frozen solid, just cold enough to be firm and easy to handle.
Step 6: Melt the Chocolate
While the peanut butter balls are chilling, it’s the perfect time to prep your chocolate coating.
Pour chocolate chips into a microwave-safe bowl. Semi-sweet or dark chocolate works beautifully in this recipe. Heat in the microwave in 20 to 30 second bursts, stirring between each burst until completely melted.
Now for the secret weapon: a spoonful of coconut oil. Stir it into the warm, melted chocolate until it dissolves completely.
Why coconut oil?
- It gives the chocolate a beautiful glossy finish.
- It makes it thinner and smoother, which helps with dipping.
- It creates that perfect “snap” when the coating sets.
Once your chocolate is ready, set it aside and get your chilled peanut butter balls from the freezer.
Step 7: Dipping Like a Pro
Time to coat!
Drop one peanut butter ball into the bowl of chocolate. Use two forks or dipping tools to roll it gently until fully coated. Lift it out, letting the excess drip off.
Here’s a trick: Place the dipped ball back onto the chilled baking sheet. A cold tray helps the chocolate set quicker and keeps everything clean and tidy.
Repeat with the rest; it might get a little messy, but don’t stress! That’s the charm of homemade treats.
You can also rotate between dipping tools. Some people love using pronged chocolate tools, others just use forks. Try what works best for you.
And hey, if one doesn’t look perfect, eat it! That’s the baker’s reward.
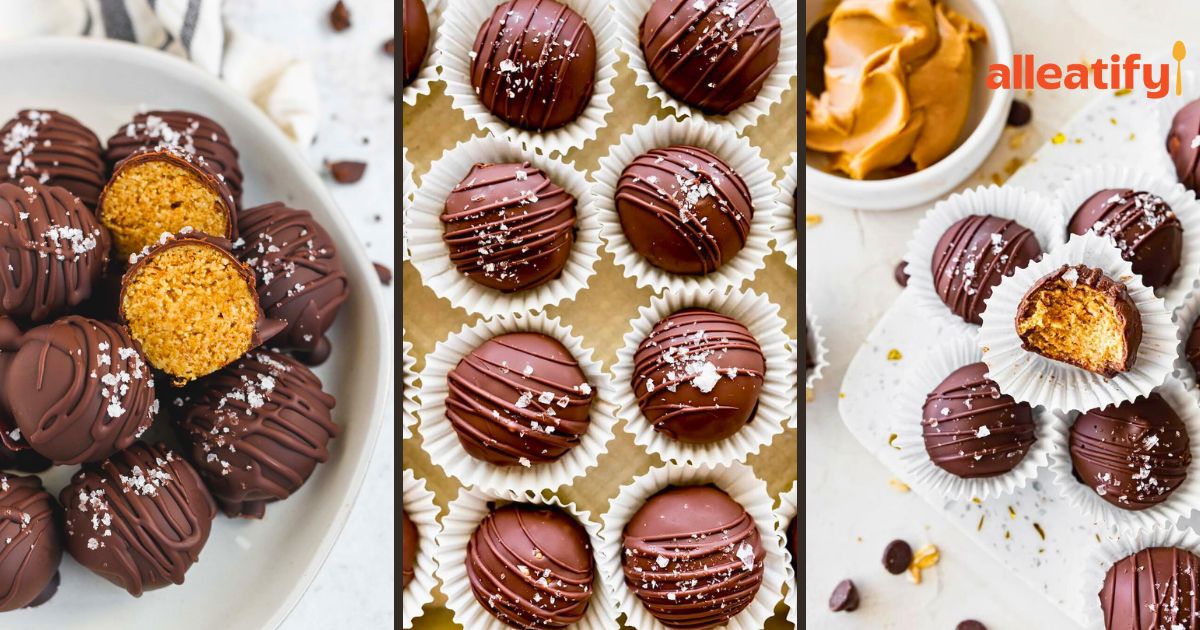
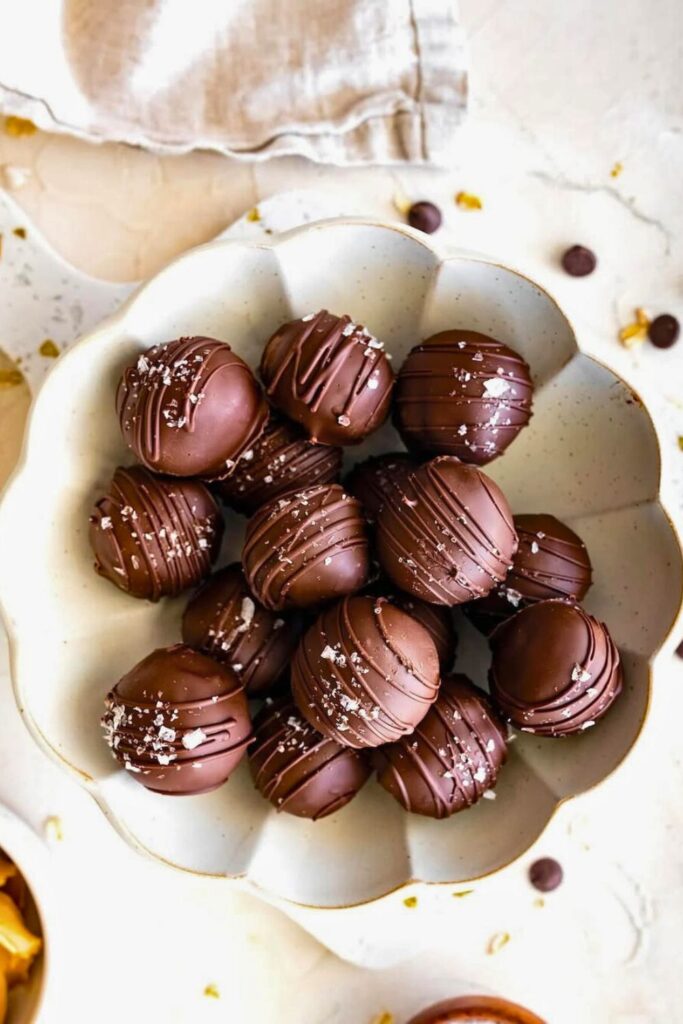
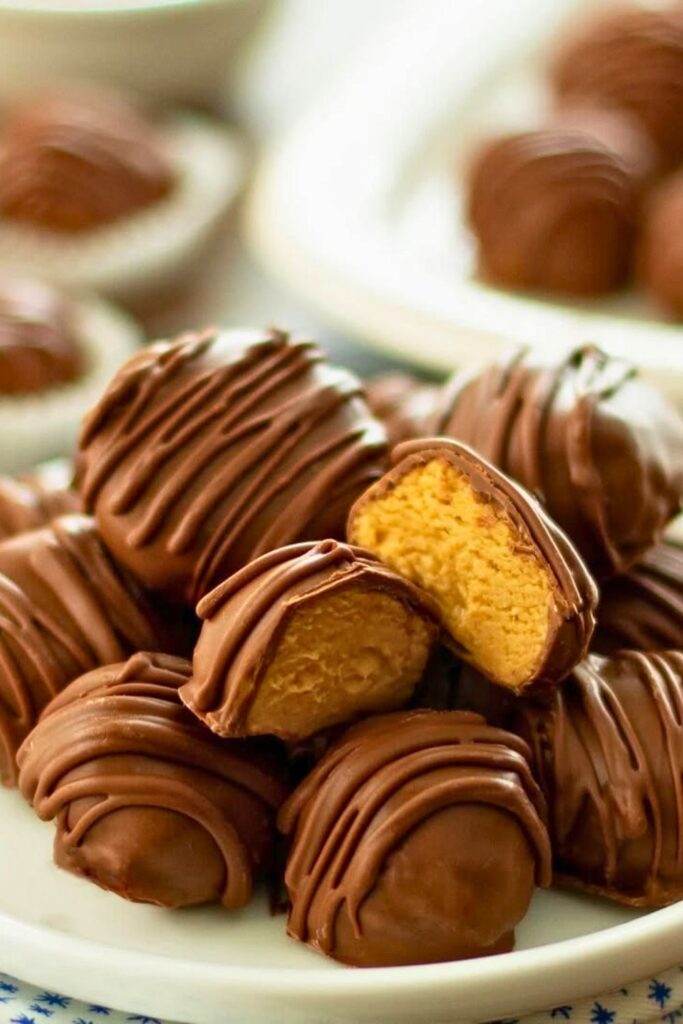
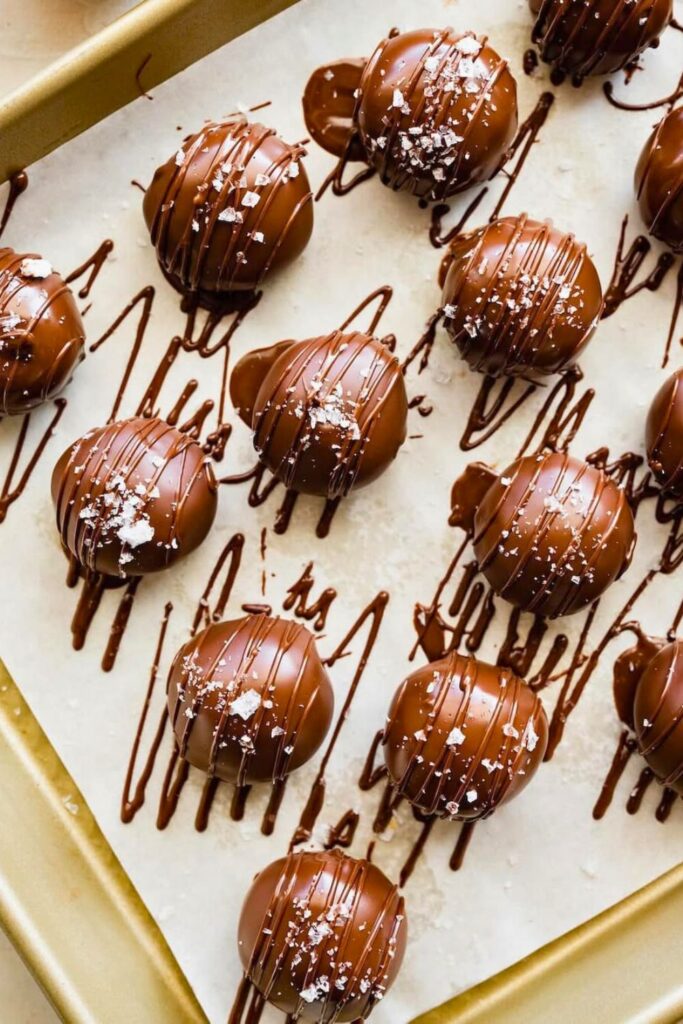
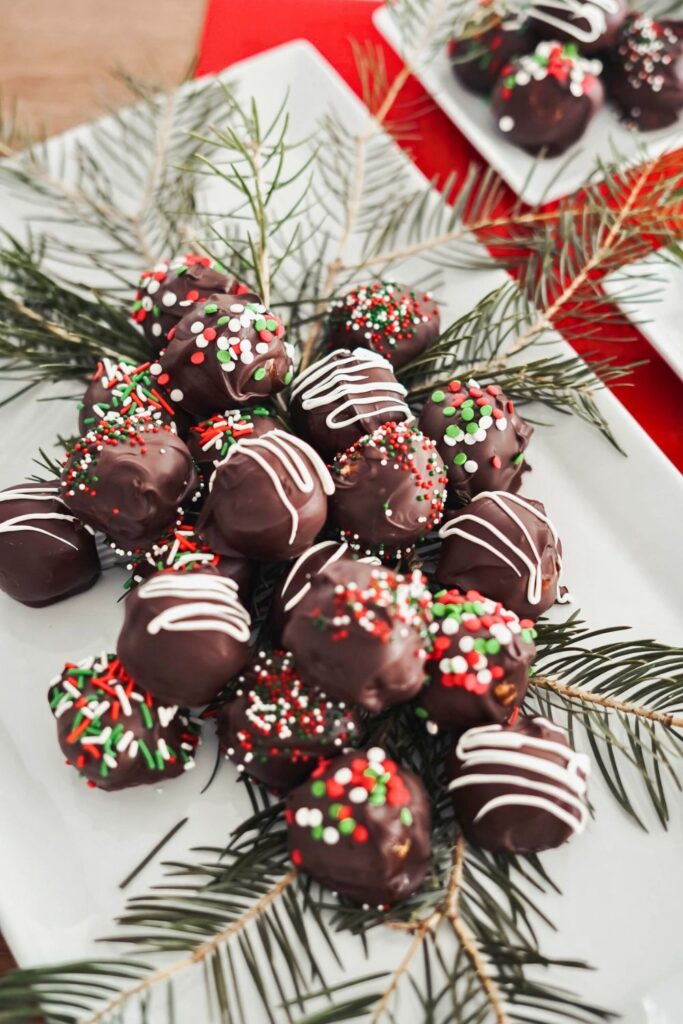
Step 8: Add the Finishing Touch
Before the chocolate sets completely, now’s your chance to dress them up.
Sprinkle each freshly dipped peanut butter ball with a pinch of flaky sea salt. Not only does it make them look stunning, but the flavor contrast is genuinely exceptional.
The salt cuts through the sweetness, adding a slightly grown-up edge to what’s otherwise a classic childhood treat. Trust me, don’t skip this step if you want people to ask, “What’s your secret?!”
Work quickly so the salt sticks before the chocolate hardens.
Step 9: Chill Again and Set
After all your peanut butter balls are dipped and topped, let them rest for a few minutes.
Place the tray back in the fridge or freezer for 20–30 minutes to allow the chocolate to set fully.
Once firm, you can gently lift them off the tray and admire your handiwork. They’ll have that beautiful, glossy coat, a hint of sea salt sparkle, and the perfect texture underneath.
Now they’re ready for gift boxes, cookie platters, or a sneaky midnight snack.
Serving Ideas for Peanut Butter Balls
Peanut butter balls are one of those versatile treats that fit into just about any festive setup. Whether you’re planning a cozy family gathering, prepping gift baskets, or just sneaking a sweet bite between wrapping gifts, they always deliver. Here’s how you can serve them to impress:
- Holiday Cookie Platters: Mix peanut butter balls with sugar cookies, gingerbread men, and chocolate bark to create a beautiful assortment.
- Edible Gifts: Package them in festive tins, glass jars, or cellophane bags tied with ribbon for charming, homemade gifts.
- Hot Chocolate Bar Companion: These pair perfectly with a steaming mug of cocoa. Offer them as a sweet bite next to your winter drinks station.
- After-Dinner Dessert Bites: Serve them chilled on a platter alongside other mini desserts for a simple but elegant end to your holiday meals.
- Office Parties or Cookie Swaps: Their bite-sized nature makes them easy to transport and share. They’re always one of the first to disappear!
- Freezer Treats: Keep a stash in the freezer for surprise guests or late-night sweet cravings.
No matter how you serve them, their homemade charm and rich flavor always win hearts.
Tips for Peanut Butter Balls Success
Making peanut butter balls is a joyful (and delicious) tradition, but a few handy tips can elevate your results from good to irresistible:
- Use creamy peanut butter for consistency. Natural peanut butter can be too runny or separate during mixing.
- Melt the butter before mixing. It softens the peanut butter and helps everything blend smoother, faster.
- Don’t skip the vanilla. It balances the richness of the peanut butter, bringing out a deeper, more nuanced flavor.
- Add powdered sugar gradually. This prevents sugar clouds and allows you to monitor the texture as it firms up.
- Expect a crumbly texture before cereal. That’s what makes them moldable, not mushy.
- Fold in the cereal gently. A few crushed flakes are fine, but you want to preserve that crunch.
- Use a chilled tray. Cold trays help the chocolate set faster and reduce sticky bottoms.
- Dust your hands with powdered sugar. It makes rolling easier and less messy.
- Freeze before dipping. Cold balls are easier to dip and keep their shape.
- Add coconut oil to the chocolate. It makes for a smoother, glossier finish.
Lastly, don’t stress about perfection. Homemade treats are supposed to look a little rustic; that’s what makes them feel special.
Peanut Butter Balls Variations to Try
| Variation | What to Change or Add | Flavor/Texture Result |
| Crunchy Peanut Butter | Use crunchy instead of creamy peanut butter | Adds extra nutty bits and a firmer bite |
| White Chocolate Coating | Swap semi-sweet chocolate for melted white chocolate | Creamier, sweeter, and a fun visual change |
| Peppermint Twist | Add ¼ tsp peppermint extract to the dough or top with crushed candy canes | Refreshing, festive touch perfect for holiday trays |
| Dark Chocolate Drizzle | Drizzle melted dark chocolate over white-coated balls | Adds elegance and a bitter-sweet contrast |
| Toffee Bits Mix-In | Stir in ¼ cup crushed toffee bits with the cereal | Adds caramel crunch and sweetness |
| Sprinkle Topping | Use colored sprinkles or edible glitter right after dipping in chocolate | Kid-friendly and visually festive |
| Nut-Free Version | Use sunflower seed butter or cookie butter instead of peanut butter | Allergy-safe with a fun twist in flavor |
| Protein-Packed Balls | Add 1 scoop of vanilla or chocolate protein powder with powdered sugar | A post-workout version with a nutritional edge |
| Buckeye Style | Skip the cereal, roll into dense balls, and dip only halfway in chocolate | More traditional, rich, and fudge-like |
| Espresso Kick | Mix in 1 tsp instant espresso powder into the melted chocolate | Deepens the chocolate flavor and adds a subtle coffee note |
With these ideas, you can adapt the base recipe to fit different preferences, occasions, and dietary needs while keeping all the holiday joy intact.
Conclusion: A Holiday Classic That Never Fails
Making these peanut butter balls isn’t just about dessert; it’s about keeping traditions alive. They’re simple, affordable, and joyfully messy, but they deliver that melt-in-your-mouth happiness every single time.
Whether you’re prepping for a cookie swap, filling a candy tin for friends, or just craving something sweet and nostalgic, this recipe is a keeper.
So grab that peanut butter jar, melt some chocolate, and roll up your sleeves. It’s time to make some magic one bite at a time.
Recommended Cookie Recipes You’ll Love
If you loved these peanut butter balls, you’ll definitely enjoy these other crowd-pleasing cookie recipes that are perfect for busy moms, holiday bakers, and everyday snack lovers alike:
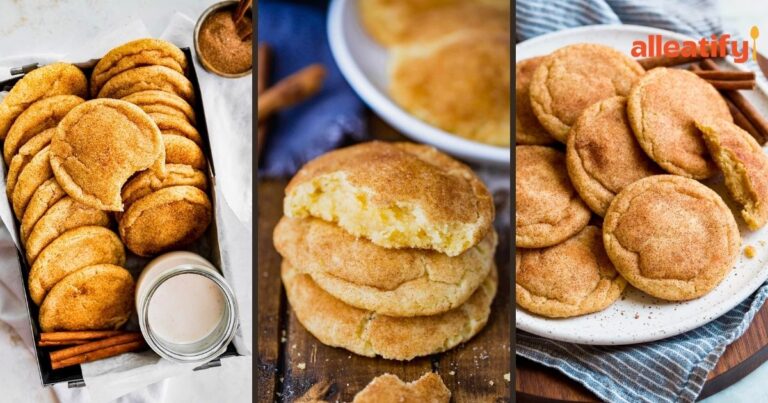
- 🍪 Soft Snickerdoodle Cookies Recipe for Busy Moms: Sweet, buttery, and rolled in cinnamon sugar. A cozy classic that melts in your mouth.
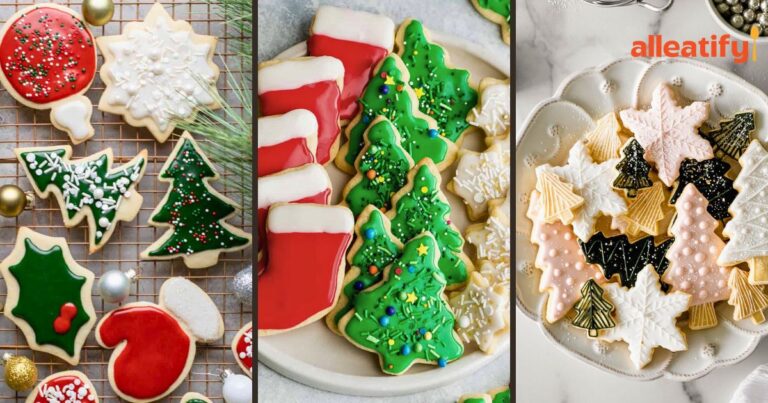
- 🍬 Easy 30-Min Sugar Cookies Recipe for Holidays: Soft, chewy, and perfect for decorating with royal icing or sprinkles.
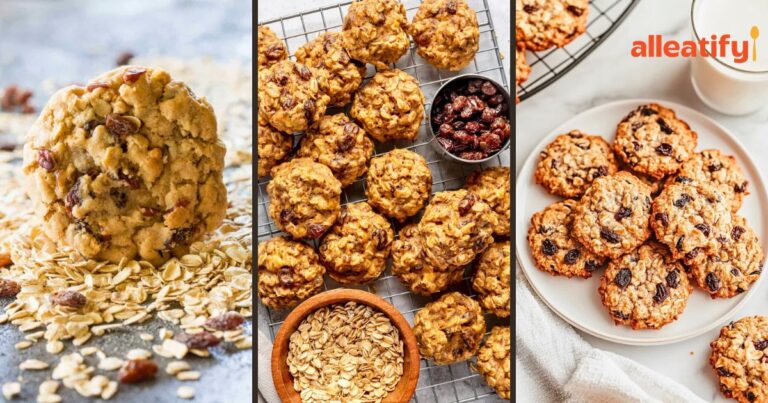
- 🌾 Healthy Oatmeal Raisin Cookies Recipe for Women: Wholesome, chewy, and packed with natural sweetness from raisins and oats.
Each recipe offers something unique, whether you crave something classic, festive, or feel-good healthy, there’s a cookie (or three!) waiting to make your day a little sweeter.