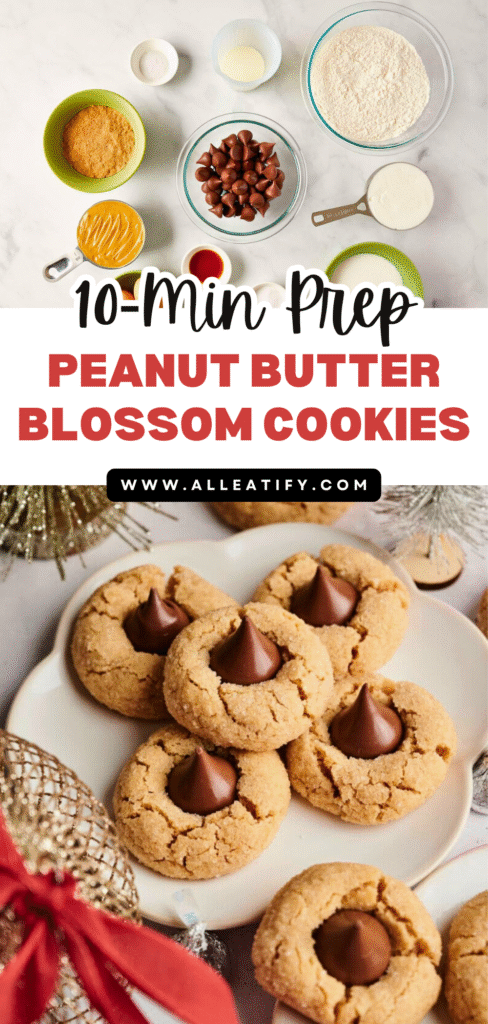
Quick 25-Min Peanut Butter Blossom Cookies Recipe in 2026

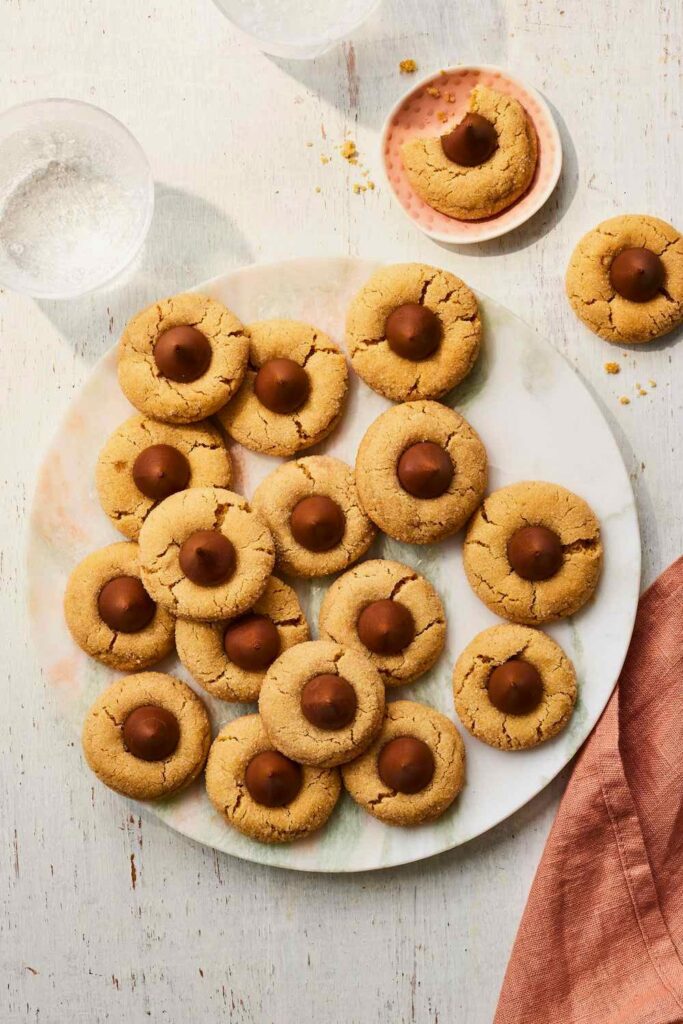
There’s something magical about the moment you press a warm Hershey’s Kiss into the center of a golden peanut butter cookie.
The chocolate softens slightly, creating a swirl of flavor that’s both nostalgic and irresistible.
Whether you grew up eating them during the holidays or just discovered them, Peanut Butter Blossoms always feel special. They remind us that good baking doesn’t need to be complicated, it just needs heart (and a little peanut butter).
This recipe stays true to that spirit: simple ingredients, zero chill time, and guaranteed success even for beginners.
Why Peanut Butter Blossom Cookies Work Every Time
What makes Peanut Butter Blossom Cookies so reliably perfect is the balance of texture, flavor, and chemistry in every step of the recipe.
Each ingredient plays a precise role in creating that signature soft, chewy cookie with a tender crumb and a chocolate center that melts just enough.
- Butter and peanut butter form the rich, creamy base. The butter gives structure, while the peanut butter adds moisture and that unmistakable nutty flavor.
- Brown sugar adds depth and chewiness due to its molasses content, while granulated sugar balances it with a light, crisp edge.
- Baking soda reacts with the natural acidity in brown sugar, giving the cookies their classic puff and slight crackle on top.
- No chill time means the dough maintains its tenderness without over-drying, perfect for quick, soft cookies that hold their shape.
- Pressing the chocolate right after baking ensures it bonds with the warm cookie, slightly melting to create that glossy, irresistible “blossom” look.
- Finally, rolling in sugar adds a subtle crunch and a sparkle that makes them visually festive.
The result? A cookie that’s buttery, balanced, and foolproof every single time.
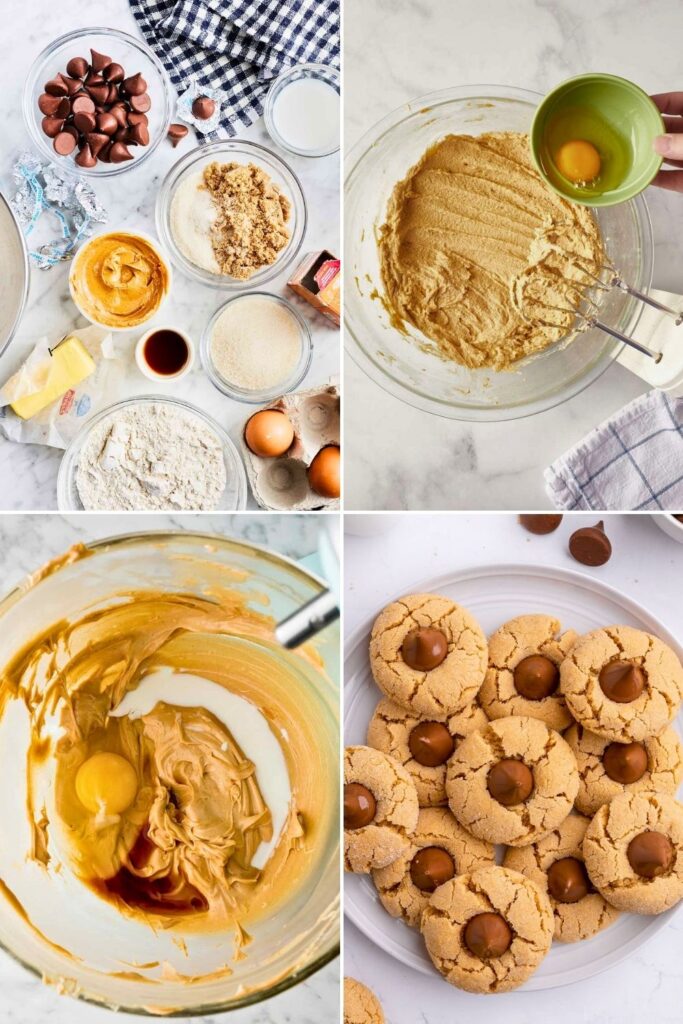
Ingredients You’ll Need

| Category | Ingredient | Amount | Notes |
| Wet | Unsalted Butter | ½ cup (113g) | Room temperature for creaming |
| Creamy Peanut Butter | ¾ cup (188g) | Processed peanut butter works best | |
| Light Brown Sugar | ½ cup (110g) | Packed for accurate measurement | |
| Granulated Sugar | ½ cup (100g) | Adds structure and crisp edges | |
| Salt | ¼ tsp | Use ½ tsp if using natural peanut butter | |
| Dry | All-Purpose Flour | 1½ cups (180g) | Spoon and level for accuracy |
| Baking Soda | ½ tsp | Helps cookies puff and crack slightly | |
| For Rolling | Granulated or Sanding Sugar | As needed | Optional for coating dough balls |
| Topping | Hershey’s Kisses | 24 pieces | Press in while cookies are hot |
How to Make Peanut Butter Blossom Cookies (Step-by-Step Guide)
Making peanut butter blossom cookies isn’t just about following a recipe. It’s about capturing the perfect balance of rich peanut butter flavor, soft cookie texture, and that iconic chocolate center.
Below, you’ll find an easy, no-chill, foolproof method that walks you through every step from mixing to baking to serving.
Whether you’re baking for Christmas or just want a quick weeknight treat, this method has got you covered.
Let’s jump into the details.
Step 1: Preheat and Prepare
Before you start mixing ingredients, get your kitchen ready:
- Preheat your oven to 375°F (190°C). This high starting temperature helps the cookies puff up quickly in the oven without needing any chill time.
- Line two baking sheets with parchment paper. This makes cleanup easier and helps prevent over-browning or sticking. Parchment is also ideal for ensuring your cookies bake evenly on the bottom without spreading too much.
No chill time means you’re minutes away from soft, chewy blossoms!
Step 2: Check Your Butter
Butter is the backbone of this recipe, so it’s essential to get the texture right. The butter should be at room temperature, neither cold nor melted.
How to test: Gently press a finger into the butter. If it leaves a soft dent without sinking all the way or feeling greasy, it’s perfect.
At room temperature, butter blends easily with peanut butter and sugar, providing the dough with a creamy, even base. Cold butter won’t combine smoothly, while melted butter leads to greasy, flat cookies. This step may seem small, but it sets the tone for your entire dough.
Step 3: Combine the Butters and Sugars
Grab a large mixing bowl (or the bowl of your stand mixer with paddle attachment) and add the following:
- ½ cup unsalted butter
- ¾ cup creamy peanut butter
- ½ cup packed light brown sugar
- ½ cup granulated sugar
- ¼ teaspoon salt
Tips from the dough base:
- Creamy processed peanut butter is best here. It’s smooth, consistent, and won’t separate like natural peanut butter. This ensures your dough won’t be oily or gritty.
- If you use natural peanut butter, stir it thoroughly and add 2 extra tablespoons of sugar and ¼ teaspoon more salt to maintain balance.
Use a hand or stand mixer to cream everything together on medium speed until well-blended and smooth. Scrape down the sides of the bowl to make sure nothing’s left behind. The mixture should look pale and fluffy. This is where your cookies start to come alive!
Step 4: Mix the Dry Ingredients
Now, let’s bring structure to the dough. With your mixer off, add:
- 1½ cups (180g) all-purpose flour
- ½ teaspoon baking soda
For extra lightness, you can sift the dry ingredients before adding them, but it’s optional. The baking soda reacts with the acidity in the brown sugar to create puffiness and that beautiful crinkled effect on top.
Stir everything just until combined. Do not overmix. You’re aiming for a dough that’s uniform but still tender. Overmixing can create tough cookies, and no one wants that!
Step 5: Feel the Dough
At this point, your kitchen should smell amazing.
Use a spatula to scrape down the bowl and check the dough’s consistency. It should be:
- Soft
- Smooth
- Slightly pliable
- Not sticky
If there are a few streaks of flour at the bottom, fold them in with your spatula. The finished dough will feel rich, buttery, dense, and fragrant. This dough doesn’t contain eggs, so the cookies will be very tender once baked.
Step 6: Shape the Cookies
Now comes the fun part!
Use a small cookie scoop or tablespoon to portion out dough balls (about 25 grams each, give or take). Roll each one gently between your palms into a smooth ball.
Optional but recommended:
Roll the cookie balls in granulated sugar before placing them on the baking sheet. This adds a beautiful sparkle and subtle crunch to the outside.
Want to make them festive? Use colored sanding sugar (in red, green, or gold) for a festive platter. It’s a simple touch that makes a big visual difference.
Space the cookie dough balls 2 inches apart on the baking sheet. They will spread slightly as they bake.
Step 7: Bake to Perfection
Slide your tray into the oven and bake at 375°F for 8–10 minutes.
What you’re looking for:
- The cookies should look puffy and slightly cracked on top.
- The bottoms will be lightly golden, not dark brown.
- They should feel soft to the touch in the center.
Do not overbake. Even if they look slightly underdone, trust the process. They’ll continue to set as they cool on the tray. Baking for too long will turn your soft, melt-in-your-mouth cookies into dry, crumbly disappointments.
Step 8: Get the Chocolate Ready
While the cookies are baking, you’ve got one essential job: unwrap your chocolate kisses.
Timing is crucial here. The chocolate must be pressed into the cookies immediately after baking, while they’re still soft and hot.
Quick tips:
- Unwrap at least 24 kisses in advance.
- Place them on a small plate or bowl near your oven.
- If you want to switch things up, you can use other small chocolate candies, such as peanut butter cups or dark chocolate buttons.
This step requires no delay. If you hesitate, the cookies will firm up, and the kiss won’t nestle in as smoothly.
Step 9: Press the Chocolate
As soon as the cookies come out of the oven:
- Transfer the tray to a heatproof surface or trivet.
- Gently press one Hershey’s Kiss into the center of each cookie.
Press just enough to slightly sink the chocolate into the cookie; the edges will crack a little, which is precisely what you want. That classic “blossom” look comes from this natural cracking around the warm center.
You’ll notice the chocolate gets glossy as it melts slightly from the cookie’s heat. This soft-set finish is what makes blossoms so irresistible.
Step 10: Cool and Serve
Now, let the cookies rest.
Leave them on the baking sheet for about 5–10 minutes, allowing them to firm up and finish baking gently from residual heat. Then, transfer them to a wire cooling rack to cool completely.
Once cooled, the chocolate kiss will set and retain its shape, while the cookie remains soft, tender, and slightly crisp on the outside.
Ready to serve? Here’s what to expect:
- A perfect bite of peanut buttery richness.
- A melt-in-your-mouth cookie base.
- That familiar sweet chocolate center that ties everything together.
These cookies are best enjoyed fresh, but they also store beautifully. Whether you’re baking for the holidays, gifting, or just treating yourself, Peanut Butter Blossoms never fail to satisfy.
5 Pro Tips for Peanut Butter Blossoms Cookies

Mastering Peanut Butter Blossom Cookies is all about precision in small details. While the recipe is simple, these pro tips ensure your cookies turn out bakery-perfect every single time, soft, chewy, and beautifully shaped.
- Use Processed Creamy Peanut Butter: For the best texture, stick with processed brands like Jif or Skippy. Natural peanut butter often separates, creating a greasy or crumbly texture. If you must use it, mix well and add two tablespoons of extra sugar and a bit more salt.
- Measure Flour Correctly: Using too much flour results in dense, dry cookies. Always use the “spoon and level” method: spoon the flour into your measuring cup and level it off with a knife, rather than scooping directly.
- Press the Chocolates Immediately: Timing is key. The cookies need to be hot and soft when you press in the chocolate kiss. If you wait too long, the cookie’s surface hardens and cracks awkwardly.
- Don’t Overbake: Remove the cookies while the centers still look slightly soft. They’ll continue baking on the tray from residual heat, keeping that melt-in-your-mouth texture.
- Keep Brown Sugar Soft: Hardened brown sugar can ruin the texture balance. Store it with a few marshmallows or an apple slice to keep it moist and ready for perfect blending every time.
These small but crucial tips transform ordinary cookies into unforgettable peanut butter blossoms.
Variations You’ll Love
| Variation | Description | Best Occasion |
| Chocolate Peanut Blossoms | Add 2 tablespoons of cocoa powder to the dough for a rich chocolate flavor base. | Valentine’s Day or for chocolate lovers |
| Holiday Sparkle Blossoms | Roll dough in red, green, or gold sanding sugar before baking for a festive touch. | Christmas and New Year |
| Mini Peanut Butter Cup Blossoms | Replace Hershey’s Kisses with mini peanut butter cups for a double dose of peanut flavor. | Kids’ parties and birthdays |
| Almond Blossoms | Use almond butter instead of peanut butter and top with dark chocolate. | Gourmet dessert trays |
| Gluten-Free Blossoms | Use a 1:1 gluten-free flour blend for a soft, chewy gluten-free option. | For gluten-free guests |
| White Chocolate Blossoms | Swap milk chocolate kisses for white chocolate or peppermint kisses. | Winter holidays |
| Crunchy Peanut Blossoms | Stir in crushed roasted peanuts for extra texture and flavor. | Casual snacking or bake sales |
Serving Ideas
Peanut Butter Blossom Cookies aren’t just for cookie trays; they’re incredibly versatile for all occasions. Here are a few creative ways to serve them:
- Holiday Cookie Platters: Combine with sugar cookies, gingerbread men, and fudge for a colorful dessert spread.
- Gift Boxes or Jars: Layer cookies in decorative tins or mason jars with tissue paper for homemade edible gifts.
- Dessert Boards: Pair with truffles, brownies, and bite-sized pies for an eye-catching dessert charcuterie board.
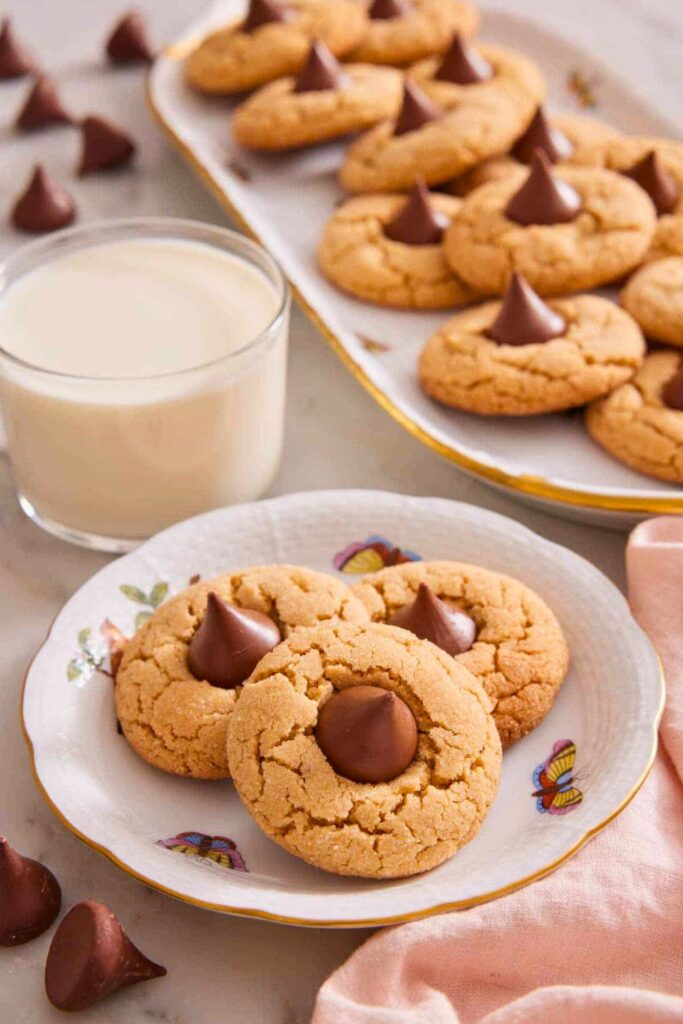
- Warm Treat with Milk: Enjoy fresh from the oven with a glass of milk or hot cocoa for ultimate comfort.
- Party Favors: Wrap two or three cookies in clear cellophane, tied with a ribbon, for a sweet takeaway for guests.
- After-Dinner Treat: Serve alongside coffee or cappuccino for a cozy, satisfying finish to any meal.
No matter the occasion, these cookies bring joy to every table, buttery, nostalgic, and always crowd-pleasing.
Conclusion: The Cookie That Brings Everyone Together
At the end of the day, Peanut Butter Blossom Cookies aren’t just about peanut butter and chocolate. They’re about the moments, the smell of cookies baking, the excitement of pressing the chocolate, and that first warm bite that melts in your mouth.
They’re proof that simple ingredients can create something unforgettable.
So preheat your oven, grab your peanut butter jar, and bake a batch today. You may create your own family tradition one blossom at a time.
You’ll Also Love Baking These
If you enjoyed making these Peanut Butter Blossoms, you’ll love these other tried-and-true cookie recipes from our kitchen:
- 🍪 Healthy Oatmeal Raisin Cookies Recipe for Women: Soft, chewy, and wholesome with the perfect blend of oats and raisins.
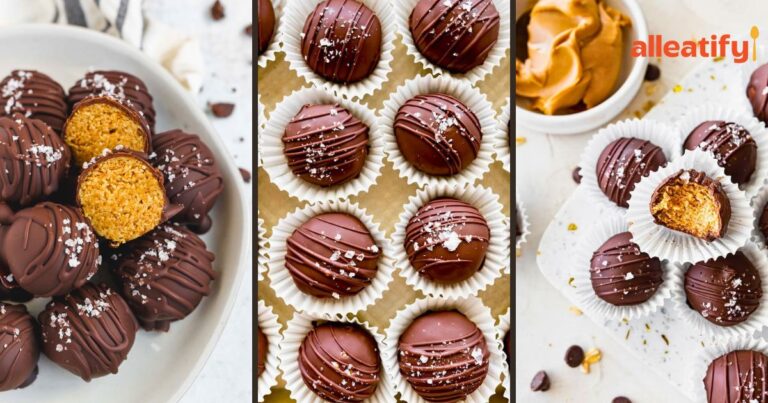
- 🍫 Homemade Peanut Butter Balls Recipe in 35 Minutes: Quick, no-bake chocolate-dipped peanut butter treats perfect for gifting.
- ❤️ 15-Min Prep Red Velvet Cookies Recipe for Holidays: Festive, soft, and chocolatey cookies that bring instant holiday cheer.
Each recipe pairs beautifully with your favorite warm drink, adding variety to your dessert table, whether for holiday gatherings or everyday indulgence.