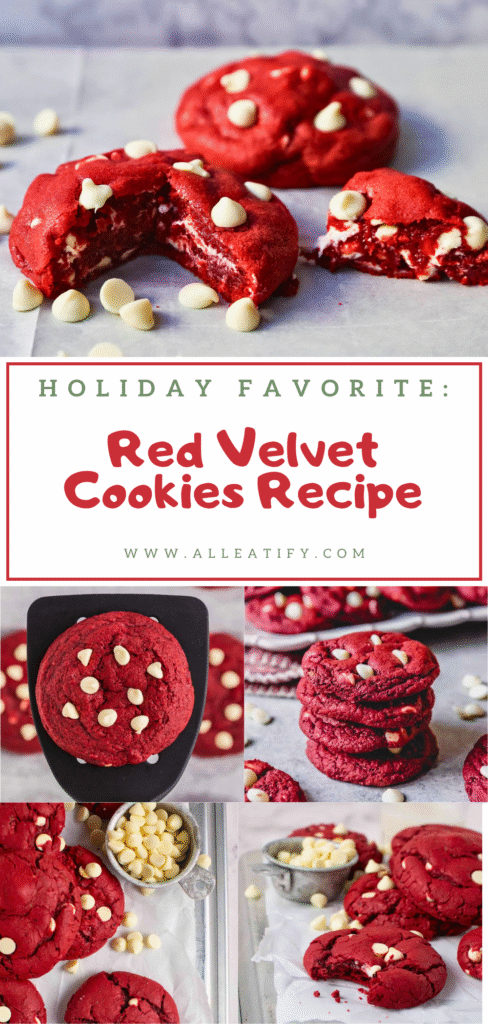
15-Min Prep Red Velvet Cookies Recipe for Holidays in 2026
The holidays are here, and that means one thing: cookies!
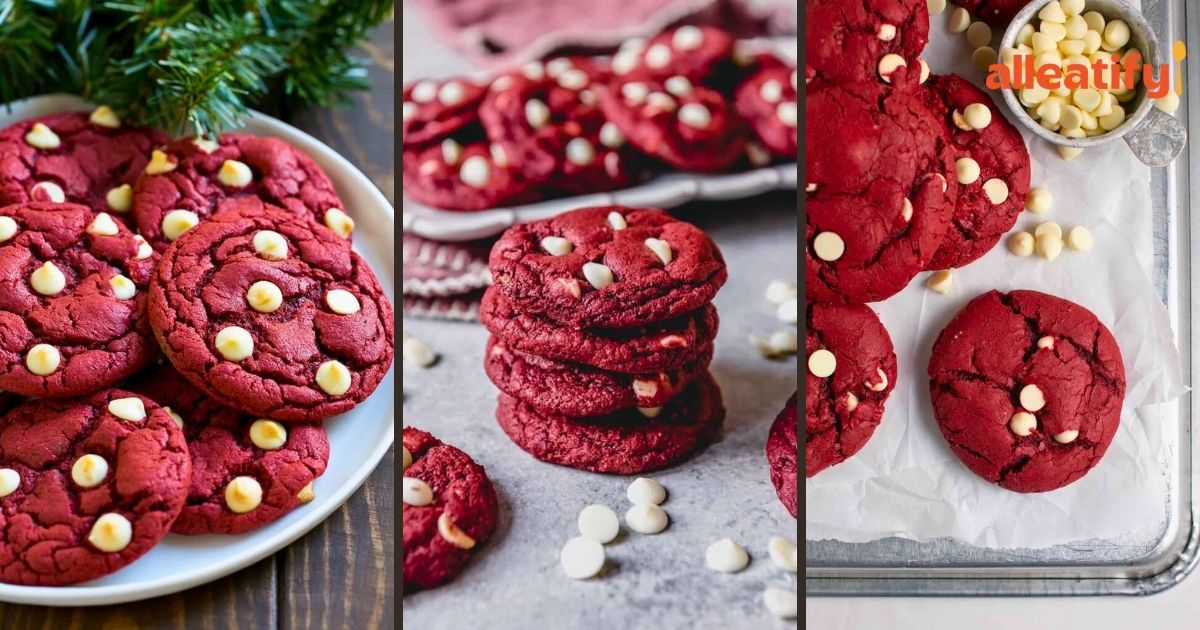
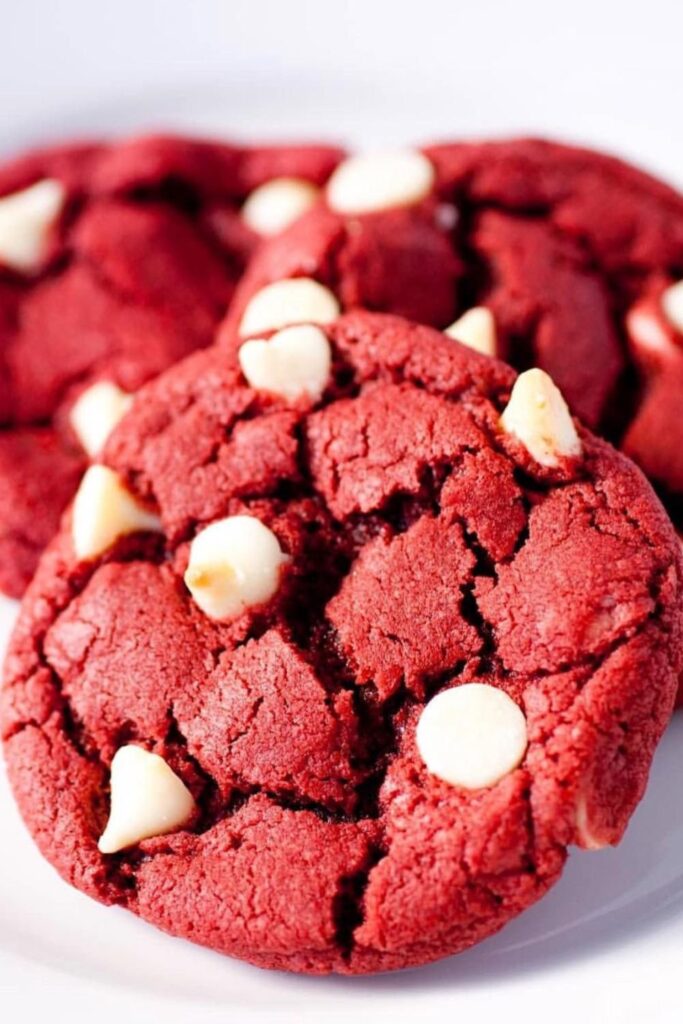
Not just any cookies, though. We’re talking about soft, chewy, red velvet cookies with creamy white chocolate chips.
They’re rich, buttery, and full of that classic cocoa flavor everyone loves. Each bite feels like Christmas in cookie form. The red color makes them festive, while the sweetness brings pure comfort.
If you love red velvet cake, you’ll adore these cookies. They taste just as indulgent but bake in half the time. Perfect for Santa, family gatherings, or a cozy night in with a glass of milk.
So grab your apron. Turn on the oven. Let’s bake something merry, bright, and unbelievably delicious together.
Why Red Velvet Cookies Are So Good
There’s a reason red velvet cookies never go out of style: they’re a perfect balance of flavor, texture, and festive charm. Every bite feels like a little celebration. Here’s why they’re so irresistible:
- A unique flavor combo. Red velvet isn’t just chocolate; it’s a subtle blend of cocoa, vanilla, and cream cheese that yields a smooth, slightly tangy flavor. It’s rich without being overpowering.
- Soft and chewy perfection. Thanks to the butter, brown sugar, and cream cheese, these cookies remain moist inside with just the right amount of chew on the edges.
- White chocolate magic. The creamy sweetness of white chocolate chips melts beautifully into the dough, balancing the mild cocoa flavor and adding bursts of smooth richness.
- Festive color and texture. That bright red hue isn’t just for looks. It makes these cookies the centerpiece of any dessert tray, perfect for holidays, gifts, or cozy nights in.
- Simple yet elegant. No complicated steps, no chilling for hours, just straightforward baking that feels fancy without the effort.
When you pull them from the oven, the contrast between the red dough and melting white chips creates pure holiday magic: warm, soft, and impossible to resist.
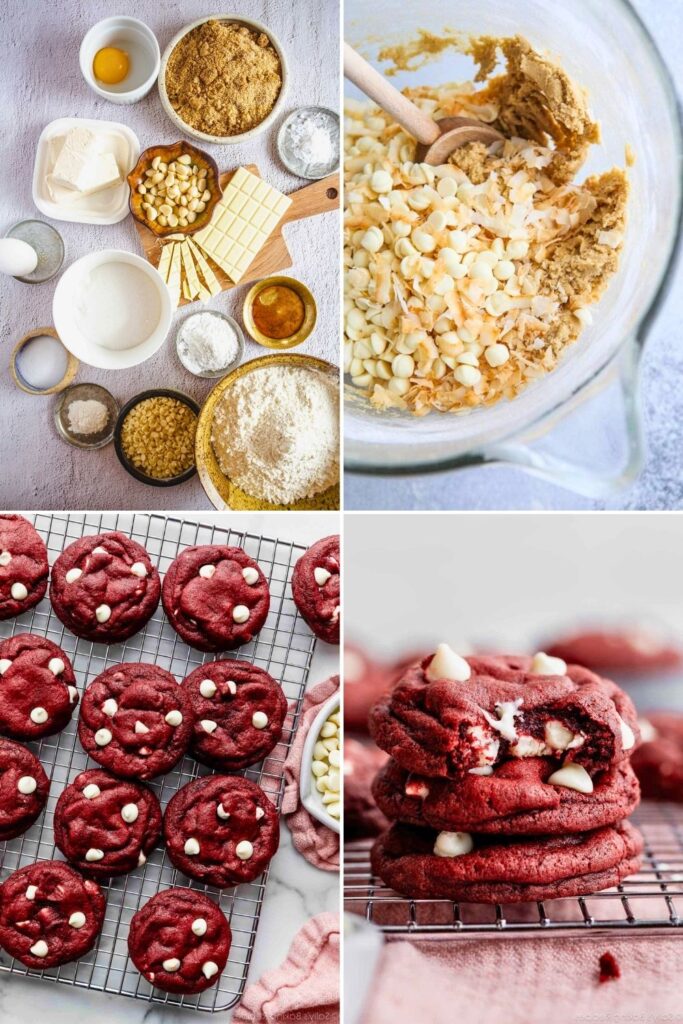
Red Velvet Cookies Ingredients
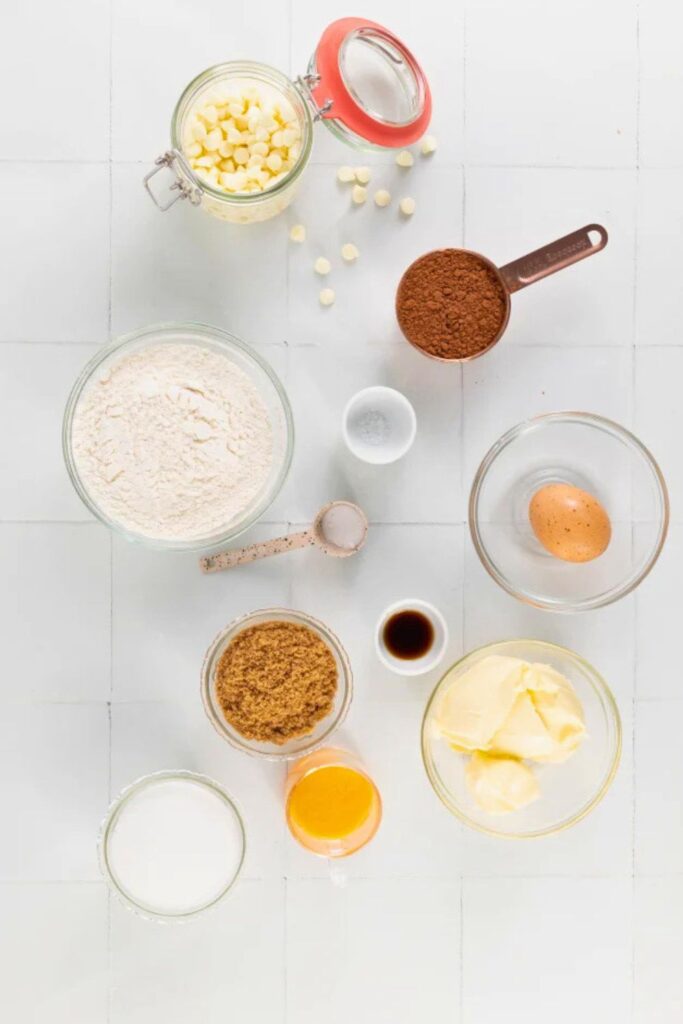
| Category | Ingredient | Amount / Notes |
| Dry Ingredients | All-Purpose Flour | 2 ⅔ cups (spoon and level for accuracy) |
| Unsweetened Cocoa Powder | ¼ cup (adds rich red velvet flavor) | |
| Baking Soda | 1 teaspoon | |
| Salt | ¼ teaspoon (balances sweetness) | |
| Wet Ingredients | Melted Butter | ¾ cup (adds softness and flavor) |
| Cream Cheese (room temperature) | 4 oz (creates signature texture) | |
| Light Brown Sugar (packed) | 1 cup (adds moisture and depth) | |
| Pure Vanilla Extract | 2 teaspoons | |
| Egg | 1 whole egg | |
| Egg Yolk | 1 yolk (adds richness and chew) | |
| Red Food Coloring | 1 ½ tablespoons (for vibrant color) | |
| Add-Ins | White Chocolate Chips | 2 cups (fold in gently; reserve a few for topping) |
Step-by-Step Guide: How to Make Red Velvet Cookies from Scratch
Making red velvet cookies isn’t just baking; it’s creating little pieces of joy. The dough is rich and velvety, the aroma fills the kitchen, and the white chocolate chips melt into warm pools of sweetness. If that’s not holiday magic, what is?
Below is your complete, beginner-friendly guide. Whether you’re baking for Santa or just want a cozy night treat, this guide has you covered.
Step 1: Mixing the Dry Ingredients
Let’s start with the foundation: the dry mix. This might seem basic, but it’s a crucial part of building a perfectly balanced cookie.
In a large mixing bowl, add the following:
- 2 and 2/3 cups of all-purpose flour
- ¼ cup of unsweetened cocoa powder
- 1 teaspoon of baking soda
- A small pinch of salt
Why it matters: The flour gives your cookies structure. The cocoa powder adds that signature red velvet taste, just a touch of chocolate without overpowering sweetness.
Baking soda helps them puff up slightly and creates those soft, crinkly edges. And salt? Just enough to wake everything up.
Technique tip: Use the “spoon and level” method to measure flour. That means spooning it into the measuring cup instead of scooping directly from the bag.
Then level it off with the back of a butter knife. This prevents you from packing too much flour, which can cause the cookies to dry out.
Once everything is in the bowl, grab a whisk. Mix until the color is consistent and everything looks evenly blended. It’ll be pale, cocoa-colored, dry but aromatic.
Step 2: Blending the Wet Ingredients
Time to bring out the mixer!
In a separate large bowl (or a stand mixer if you have one), combine:
- ¾ cup of melted butter
- 4 ounces of room temperature cream cheese
- 1 cup of light brown sugar, packed tightly
- 2 teaspoons of pure vanilla extract
Turn the mixer to medium speed and let it run for a couple of minutes. You’re looking for a creamy, slightly thick, glossy texture.
Why this works: The butter and cream cheese melt together into a rich base. The cream cheese adds a subtle tang, making the cookies soft and moist. Brown sugar contributes to that chewy texture and deep, caramel-like sweetness.
Quick note: If your cream cheese is cold, it won’t mix well. You want it soft, so take it out about 30 minutes before baking.
Step 3: Adding the Eggs and Food Coloring
Now we’re building structure and color.
Crack in:
- 1 whole egg
- 1 egg yolk (save the white for another recipe)
Mix on medium-low until fully incorporated. You don’t need to overdo it — just until it’s smooth.
Why the extra yolk? It adds richness and chew. Trust us, it makes a big difference in how the final cookie feels when you bite in.
Next, pour in:
- 1 ½ tablespoons of red food coloring
This is where the dough comes to life. That vibrant, festive red? It sets the tone for the whole recipe.
Let the mixer run again until the dough turns a deep, bold red color. You should now feel a little excitement. This is the moment it starts looking like red velvet magic.
Step 4: Combining the Wet and Dry Ingredients
Okay, now it’s time to bring everything together.
Turn your mixer to medium-low. Slowly add your dry ingredient mixture (flour, cocoa, baking soda, and salt) to the wet mixture. Do it in batches, maybe 3-4 scoops, so the flour doesn’t puff up and fly everywhere.
As you mix, stop occasionally to scrape the sides and bottom of the bowl to ensure even mixing. It’s easy to miss pockets of flour that hang out on the bottom, and you don’t want any dry streaks in your cookies.
The dough will get thick, but that’s precisely what you want. Once everything is thoroughly combined, it should feel rich, slightly sticky, and hold its shape.
Baking tip: If the dough appears too soft or wet, you can refrigerate it for 10–15 minutes before shaping. But if it’s holding shape nicely, no chilling is needed.
Step 5: Folding in the White Chocolate Chips
Time for the final flavor touch.
Grab:
- 2 cups of white chocolate chips
Hold back a small handful; you’ll use them to press on top of the cookies before baking (they’ll look prettier that way).
Use a rubber spatula to fold the chips into the dough. Avoid using the mixer here; folding by hand keeps the dough soft and prevents overmixing.
The white chips contrast beautifully with the red dough. It’s like holiday confetti, you’ll start feeling the Christmas spirit already!
Step 6: Preheating and Prepping the Baking Sheet
Your oven needs to be hot and ready when you put the cookies in. So now’s the time to:
- Preheat your oven to 350°F (175°C)
- Line a baking sheet with parchment paper
Why parchment paper? It prevents sticking, ensures even baking, and makes cleanup a breeze. Additionally, you don’t need to grease anything; simply drop the dough directly onto the sheet.
Step 7: Shaping the Cookie Dough
Use a medium cookie scoop or a spoon to portion out the dough. Each cookie should be about 1½ tablespoons in size.
Now decide how you like your cookies:
- For denser cookies, roll the dough into tight balls.
- For soft, tender cookies, leave the dough a little loose and gently shaped.
Place the dough balls on the baking sheet, about 2 inches apart. They’ll spread, so don’t crowd them.
Take those reserved white chocolate chips and gently press 3–4 into the top of each cookie. This makes them look like they just came from a bakery window.
Step 8: Baking the Cookies
Slide the tray into the oven and bake for 9-11 minutes.
What to look for:
- The edges will look set and slightly crisp.
- The centers will still appear soft and somewhat underbaked, which is a good thing.
Cookies continue to bake from residual heat after being removed from the oven. So resist the urge to keep them in longer. Overbaking makes them dry and takes away that perfect chew.
Once out, leave the cookies on the sheet for 5 minutes. Then transfer them to a wire rack to cool completely.
Bonus tip: Baking more than one tray? Rotate the trays halfway through to ensure they bake evenly.
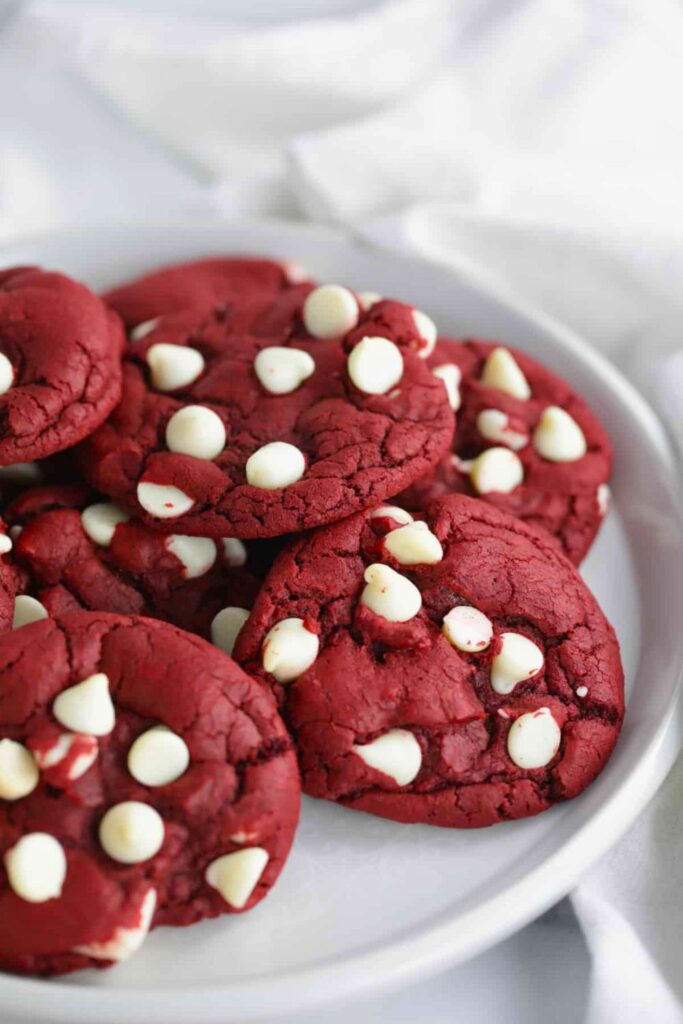
Step 9: Cooling and Enjoying
Now for the best part, the reward!
Once the cookies have cooled (or at least mostly cooled, no judgment if you sneak one early), take a bite. You’ll taste:
- The slight cocoa note from the red velvet
- The creamy sweetness of melting white chocolate
- The soft, brownie-like center that makes these so addictive
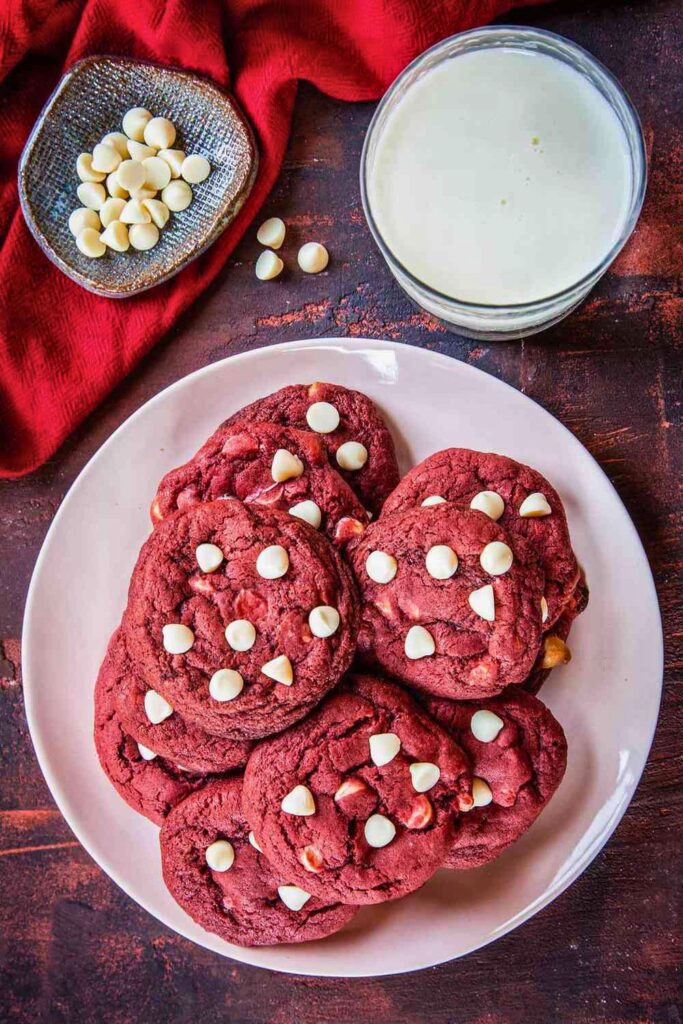
Pair with:
- A glass of cold milk
- A mug of hot cocoa
- Or go big eggnog with a splash of bourbon for a grown-up treat
Holiday serving idea: Stack them high on a plate with a few candy canes or cinnamon sticks for a festive table centerpiece.
They’re great for:
- Christmas Eve snacks for Santa
- Wrapping gifts in clear bags
- Cookie swaps
- Or just eating 3 in a row while watching holiday movies
5 Tips for the Best Red Velvet Cookies
Even though this recipe is simple, a few thoughtful steps can make the difference between “good” cookies and “wow, I need another one.” Here are five pro tips to make your red velvet cookies soft, chewy, and absolutely irresistible:
1. Measure ingredients accurately.
Baking is pure science. Scoop too much flour, and your cookies will turn dry; add too little, and they’ll spread too much. Spoon flour into the cup, level with a knife, and measure your cocoa powder precisely.
2. Use room temperature ingredients.
Cold cream cheese or butter won’t blend properly. Let them sit out for about 30 minutes before mixing this ensures a smooth, even dough.
3. Don’t skip the scraping.
Always scrape down the sides and bottom of your mixing bowl as you go. It helps distribute ingredients evenly and maintains a consistent dough texture.
4. Watch your baking time closely.
Red velvet cookies bake fast, about 9 to 11 minutes. Pull them out when the edges appear set, but the centers still seem soft. They’ll finish cooking on the sheet.
5. Add chocolate chips on top.
Before baking, press a few white chocolate chips into each cookie. It gives that bakery-style look and adds extra creamy sweetness in every bite.
Red Velvet Cookies Variations
Want to experiment with flavors or presentation? Try one of these fun red velvet cookie variations. Each twist brings a new dimension to the classic holiday favorite.
| Variation | Description | Why You’ll Love It |
| Cream Cheese-Stuffed Red Velvet Cookies | Fill each dough ball with a spoonful of sweetened cream cheese before baking. | Tastes like a blend of red velvet cake and cheesecake, rich, creamy, and decadent. |
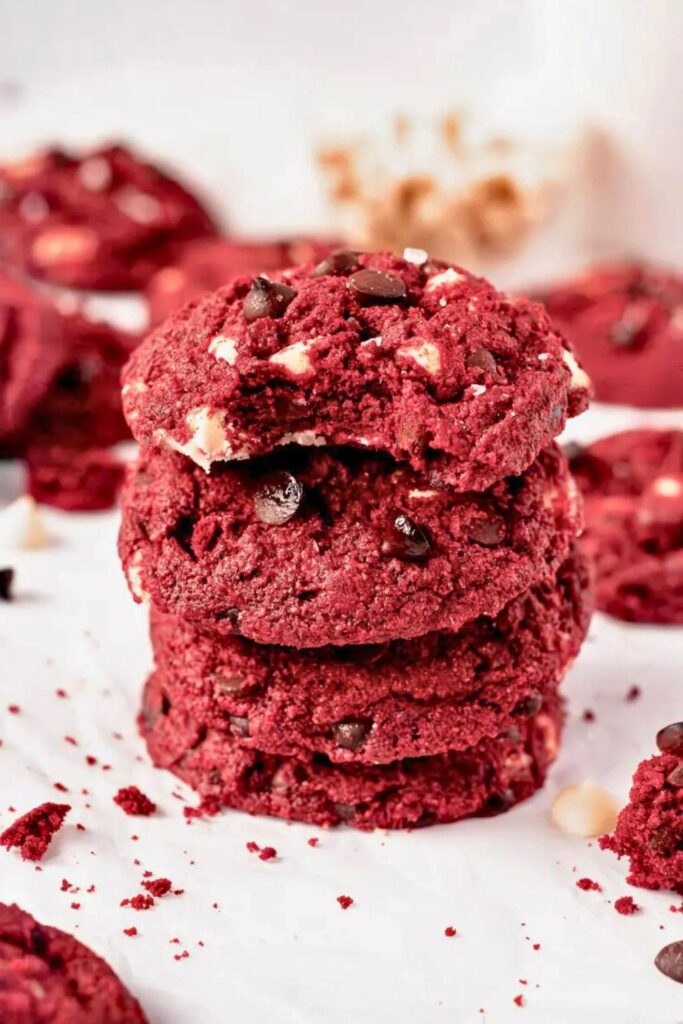
| Double Chocolate Red Velvet Cookies | Mix in both white and semi-sweet chocolate chips. | Adds a deeper cocoa flavor and extra gooey texture. |
| Red Velvet Crinkle Cookies | Roll cookie dough balls in powdered sugar before baking. | Creates a festive, snow-dusted look perfect for the Christmas season. |
| Red Velvet Sprinkle Cookies | Mix red and green sprinkles into the dough. | Adds color, fun, and holiday cheer for parties or kids. |
| Red Velvet Cookie Sandwiches | Spread cream cheese frosting between two cookies. | A classic bakery-style dessert with layers of soft cookie and creamy filling. |
Serving Ideas
Red velvet cookies are versatile, beautiful, and easy to serve for almost any occasion. Here’s how to make the most of them:
- Classic Christmas Treat: Plate them with a glass of milk or hot cocoa for Santa (or yourself).
- Gift Box Favorite: Stack 3–4 cookies in a clear bag, tie with a red ribbon, and gift them to neighbors or coworkers.
- Holiday Dessert Board: Pair with brownies, sugar cookies, and peppermint bark for a stunning cookie platter.
- After-Dinner Dessert: Serve warm with a scoop of vanilla ice cream; it’s a simple yet unforgettable treat.
- Festive Party Snack: Add them to your dessert buffet or serve as a grab-and-go sweet treat during gatherings.
- Midnight Craving Fix: Keep a few in an airtight jar; they stay soft for days and taste even better the next morning with coffee.
Final Thoughts: The Ultimate Red Velvet Cookie Experience
There’s something magical about baking during the holidays. The sound of the mixer, the scent of vanilla, the warm kitchen, it’s all part of the joy.
These Red Velvet Cookies capture that spirit perfectly. Soft, chewy, filled with creamy white chocolate chips, and glowing in that festive red hue, they’re everything a Christmas cookie should be.
So this year, skip the store-bought treats and bake these beauties from scratch. Share them with friends, gift them to family, or leave a few out for Santa (with a bit of eggnog, of course).
One bite, and you’ll know this is what Christmas tastes like.
More Sweet Recipes You’ll Love
If you loved these red velvet cookies, you’ll definitely want to try a few of my other favorite homemade cookie recipes:
- 🍪 Easy 30-Min Sugar Cookies Recipe for Holidays: Soft, buttery, and perfect for decorating with the kids.
- 🌾 Healthy Oatmeal Raisin Cookies Recipe for Women: A wholesome, chewy treat packed with oats and raisins.
- 🥜 Homemade Peanut Butter Balls Recipe in 35-Min: No-bake, creamy, and coated in rich chocolate for the ultimate quick dessert.
Each one is easy, delicious, and made for those cozy moments when you just want something sweet without the fuss.